Have you ever stayed at a hotel that required you to pay a fee for each Wi-Fi device you used? I recently did. How about wanting to share the iPhone’s tethered connection with your iPad and your other devices? With Virtual Router Manager you will be able to do both. Virtual Router Manager is a free application that uses one of Windows 7’s new features that allows for the virtualization of a network connection. In this case we are sharing a wireless connection on your Windows 7 notebook with other Wi-Fi enabled devices.
Scenario Where Virtual Router Manager Saved Me $60/day at Caesars Palace
I just got back from a trip to Vegas where I stayed at Caesars Palace. At Caesars they require that you pay $14.95 for each Wi-Fi device that connects to their network! My dilemma; I have two iPhones, two laptops, and an iPad. I was not about to pay a month’s worth of internet service per day for three days. So I started searching the web and found this awesome application on Microsoft’s CodePlex website. If you think you will be travelling in the near future and expect a similar scenario make sure you download this great application.
How to Use Virtual Router Manager to Share Wi-Fi Connections
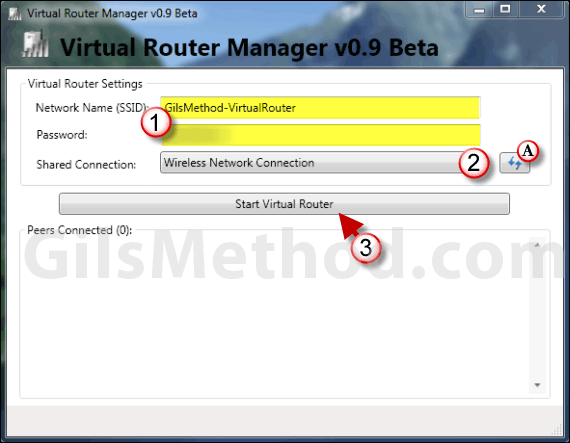
1. When you launch Virtual Router Manager you will be asked to enter a Network Name (SSID) and Password. Make sure you use a tough password, you don’t want everybody accessing your virtual router.
2. Choose the wireless connection you wish to share from the Shared Connection drop-down list. Unless you have more than one wireless card, the default selection should do the trick.
A. If your wireless connection does not appear on the list, click on the Refresh button. If it’s still not appearing restart your computer and try again.
3. When you are ready click on the Start Virtual Router button.
This is the step where you head over to your iPad, laptop, and other Wi-Fi devices and connect to the virtual router you just created. Just make sure you enter the password you used when you started the virtual router.
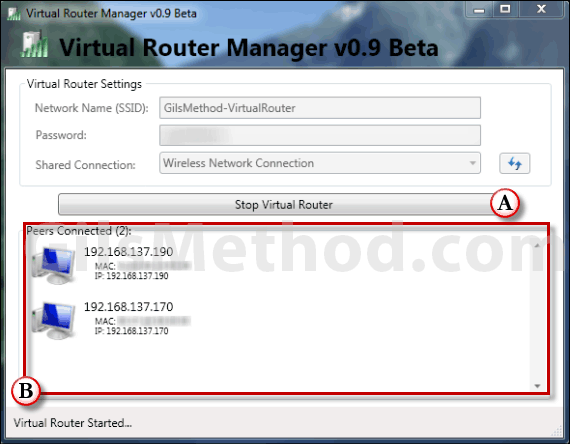
A. If you wish to stop the virtual router click on the Stop Virtual Router button.
B. You will notice that as peers connect to the virtual router they will be listed in the Peers Connected section. This will also help you determine if someone who isn’t authorized to be on is accessing your virtual router.
Note: In the screenshot above I was sharing my laptop’s paid Wi-Fi connection with my iPad and iPhone simultaneously.
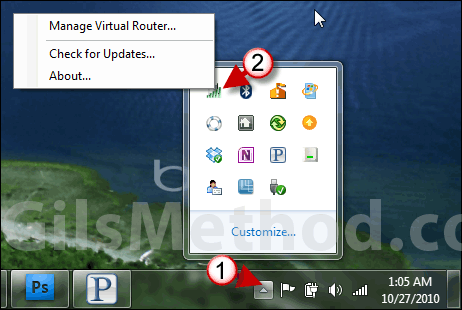
When the Virtual Router is running you can close the window at any time. The Virtual Router will continue to run in the Notification Area.
To access the Virtual Router application after it has been minimized follow the steps below.
1. Click on the small arrow in the Notification Area to open the list of hidden applications.
2. Right-click on Virtual Router icon to open the menu.
You can click on Manage Virtual Router to open the window or Check for Updates to the application.
Note: There are some compatibility issues with some Wi-Fi adapters that you should be familiar with in case you have problems running the application. Device support is dependent on you having a driver installed that is Certified for Windows 7. Part of the requirement for a wireless driver to be Windows 7 Certified is that it must support Virtual Wi-Fi and Wireless Hosted Network features of Windows 7. Here’s a list of supported devices.
Download Virtual Router Manager.
Do you know of other applications with a similar function? Please share your thoughts in the comments section below.
