Are you looking for a way to quickly insert screenshots from your computer into a Word document? In Word 2010 the Screenshot tool has been improved so that is more intuitive and easier to use. The guide below will show you how to use the Screenshot tool in Office 2010 to quickly insert screenshots into your Word documents, spreadsheets, presentations, and emails.
If you have any comments or questions, please post them below.
Note: I used Word 2010 for this tutorial, but this tool is available in Excel 2010, PowerPoint 2010, and Outlook 2010.
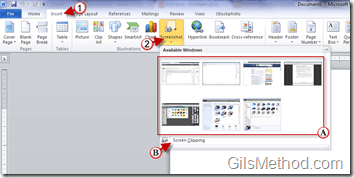
1. Click on the Insert tab in the Office Ribbon.
2. Click on the Screenshot button in the Images group.
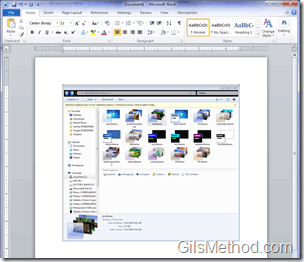
A. A group of thumbnails displaying Available Windows will appear. This should list all of the windows you currently have open. When you click on a window it will automatically insert the image into the document you are working on.
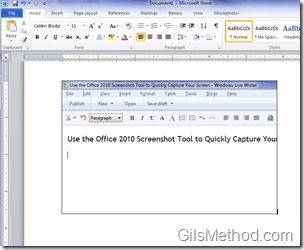
B. The Screen Clipping option will allow you to select an area on your screen to use as a screenshot.
Window inserted into Word document.
Screen clipping inserted into Word document.
Once the image is inserted you can use the Picture Tools to format the images.


