To avoid data loss on your memory card you should always go through the Safely Remove hardware process before unplugging the device form your computer. This can sometimes be a waste of time especially if you are trying to rush out of the office before 5PM. To speed up the process you can enable Quick Removal via a policy setting for the device you wish to modify. The default setting in Windows 7 is Quick removal, however the how to below is specifically written for those of you that have enabled caching for memory devices and don’t know how to turn it off.
If you have any comments or questions, please post them in comments section below.
Note: I used Windows 7 Ultimate for this guide.
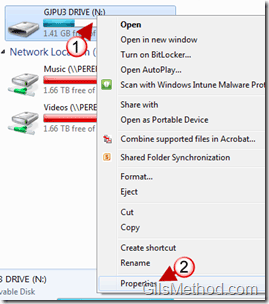
1. Right-click on the memory stick or memory card you wish to optimize.
2. Click on Properties from the list.
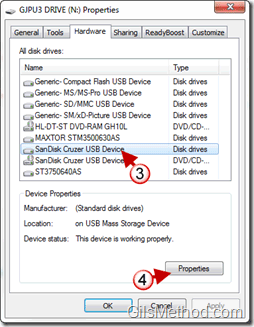
3. Make sure the Hardware tab is active and click on the memory drive from the list.
4. Click on the Properties button.
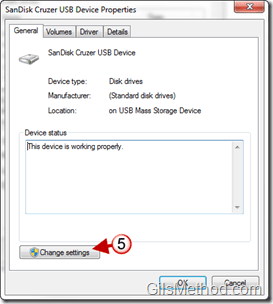
5. When the Properties window for the selected drive opens, click on the Change settings button.
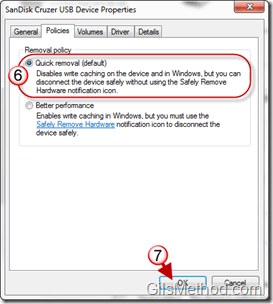
6. Make sure the Policies tab is active and select Quick removal.
Difference between Quick removal and Better performance
Quick removal disables write caching to the device which allows for the removal of the device without the wait. The Better performance setting, improves performance by using the drive to write caches to speed up Windows and other applications. This setting requires that you go through the process of Safely removing the device.
7. Click OK to save the changes.


