Wouldn’t it be nice if you could test new plug-ins or a new design without ever touching your Live WordPress installation? Sure, you can create a mirror of your site on a test.yourdomain address, but why run the risk of crashing the server hosting your website if one of the plugins you are testing goes haywire. This is where Microsoft’s Web Platform comes in. The Web Platform Installer is basically an installation tool for different web applications that allows you to run any of the included applications on your Windows PC. This essentially eliminates the hassle of setting up MySQL servers, PHP, and other scripts required to run today’s popular web applications. With this tool you can install WordPress, Drupal, PHPBB, and other web applications.
In this tutorial we will focus on the deployment of WordPress on your Windows-based PC. The Web Platform Installer is free so make sure to check out the screenshots below to see how I setup a test WordPress installation on my computer. If you have any comments or questions please use the comments form at the end of the article.
In this article we will cover the following topics:
- Download and Install the Web Platform and WordPress
- Setup WordPress
Download and Install the Web Platform and WordPress
1. Go to the Microsoft Web App Gallery to download and install the Web Platform Installer.
Note: The link above will take you directly to the installer website.
Depending on your browser you will see a prompt asking you if you are sure you want to run Web Platform Installer from Microsoft Corporation.
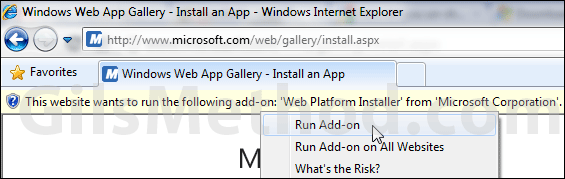
If you see the message make sure to choose the option that allows the installer to run. In Internet Explorer 8, click on the yellow information bar and click on Run Add-on.
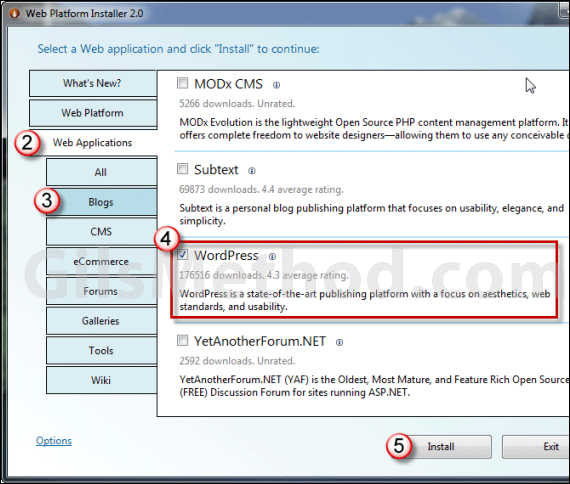
2. When the Web Platform Installer loads click on the Web Applications tab.
3. Then click on the Blogs tab.
4. Scroll down the list and check WordPress.
5. Click on the Install button.
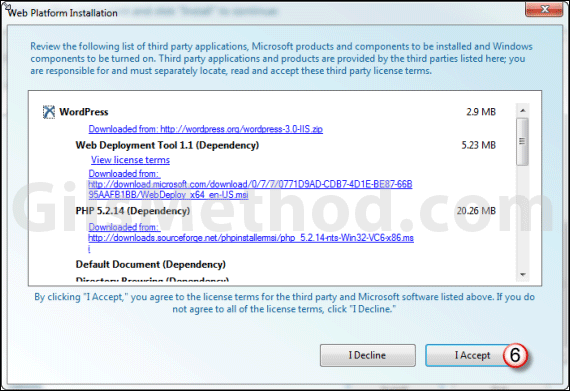
6. Click I Accept. This is a list of the dependencies that will be installed in order for WordPress to run on your computer.
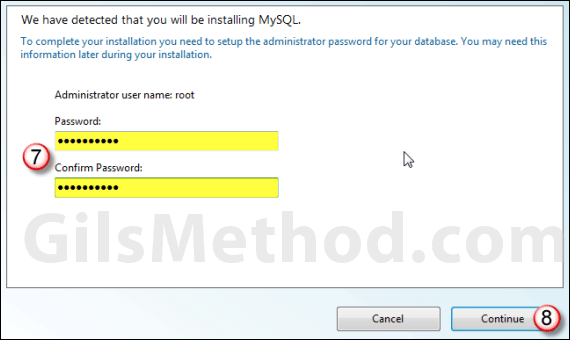
7. MySQL requires that you set an administrator password for your database. Enter the password and write it down as you will need it in upcoming steps.
8. Click Continue to proceed.
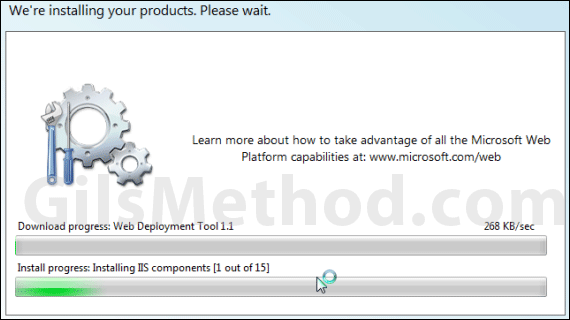
The installer will download the required applications and components and install them. This can take anywhere from 10 minutes to a couple of hours depending on your PC and the internet connection you are using.
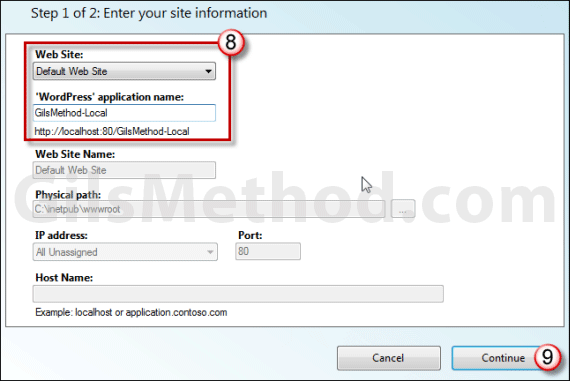
8. To keep things simple, choose Default Website from the Website drop-down and name the application.
Note: The name you enter will be used when accessing the site – http://localhost/application-name. If you want to have control over the path of the application, port number, and IP addresses make sure to use New Website from the Website drop-down.
9. Click Continue to proceed.
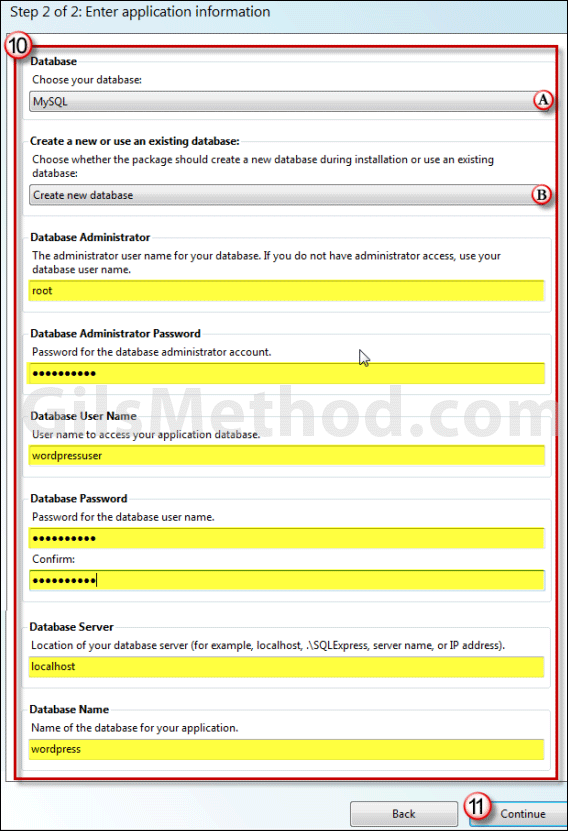
10. Enter the information for the application in the highlighted fields.
A. Choose MySQL for Database.
B. Unless you have an existing database you want to use choose New Database from the list. Use the administrator password from step 7 in the Database Administrator Password field.
Note: Do not modify the fields after Database Name.
11.Click Continue to proceed.
You will see a download and installation progress bar. Depending on your computer and the internet connection this process may take anywhere from a couple of minutes to a couple of hours.
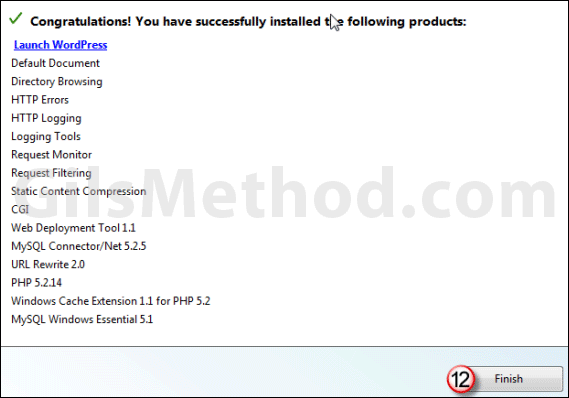
12. Click Finish to complete setting up all of the components necessary to run WordPress on your PC.
Setup WordPress
1. Go to localhost/your-application-name/ in your browser and you should see the following screen:
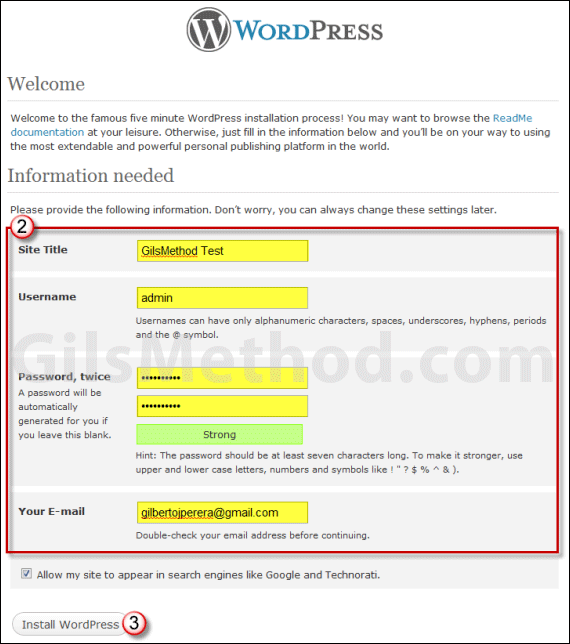
2. In the WordPress installation page enter the information about the site you are creating:
Site Title – Enter the site’s name, this can changed at a later time.
Username – Choose this wisely because you cannot change it (easily) once it is set.
Password – Because you are running this locally you can use an easy password, although I always recommend to get in the habit of using difficult passwords.
Your E-mail – This is the email address associated with this installation.
3. When you are done, click on the Install WordPress button. Installation should be quick.
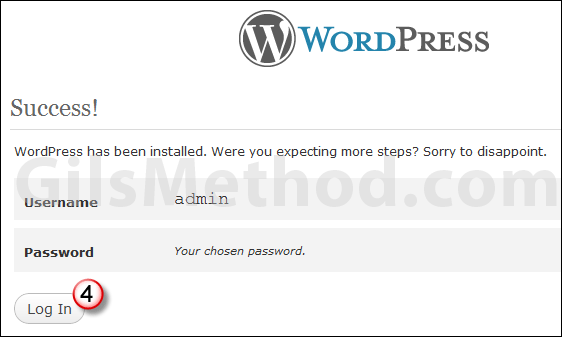
4. Once you are done, click on the Log In button to access your site’s Dashboard and you are set. You have successfully installed WordPress on your PC.
If you encounter any errors during the setup make sure you verify the steps above and that you used the correct passwords during the setup process. You can also leave your comments and questions in the comments field below.
