Aside from being an amazing application to manage thousands of pictures, Picasa also does a pretty darn good job of capturing images and videos from a webcam attached to your computer. In this guide I will show you how to configure Picasa to capture images and video and how to save those captures to your computer. This is a great way to create and share videos for family, friends, and even YouTube.
Note: I used a Microsoft LifeCam Cinema with Picasa 3.6
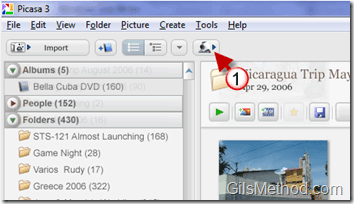
1. Open Picasa and click on the Webcam button.
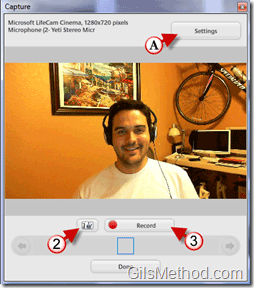
A. The Capture window will open. If you’re not seeing video, chances are that the capture device is not configured properly. Click on the Settings button to update the capture settings.
If you have video then proceed to Step 2 below.
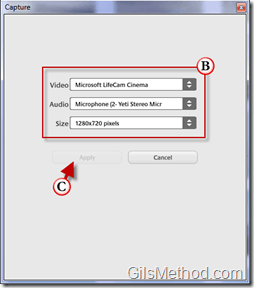
B. Select the devices for Video and Audio then specify the video resolution (Size) to use for the video.
C. Click Apply to save the settings.
Continued from previous screenshot…
2. Click on the Picture button to take a quick picture.
3. Click on the Record button to begin recording a video.
I happen to have a tuner installed on my computer and noticed that it w
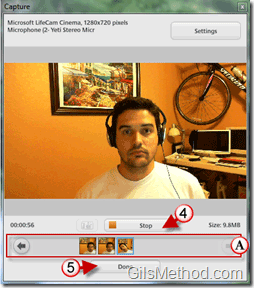
A. As you capture video and images, Picasa will list these items in small tray. When you’re not recording you can click on the image or video for a preview.
4. When you are done recording, click on the Stop button.
5. Click Done to close the Capture window and return to the Picasa window.
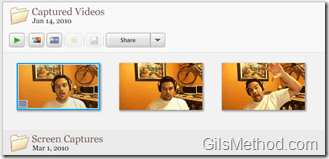
When you return to Picasa you will notice that a new folder named Captured Videos will appear. This folder will also contain the snapshots you took.
To edit and format the images and videos you just captured, check out the other Picasa tips and how-to’s on GilsMethod.

