When was the last time you played that one video game you bought two years ago? Or how about that program to edit photos you never used? If you find that there are a couple of applications that are either outdated or you simply don’t use, then you can do yourself and the computer a favor and uninstall the culprit using up that precious space on your hard drive.
You may also want to take a look at applications that run in the notification area (background) that you are not using, this is usually a good place to start. The guide below will show you how to uninstall applications from Windows 7 so that you can recover some of those precious computer resources.
Software/Hardware used: Windows 7 Ultimate.

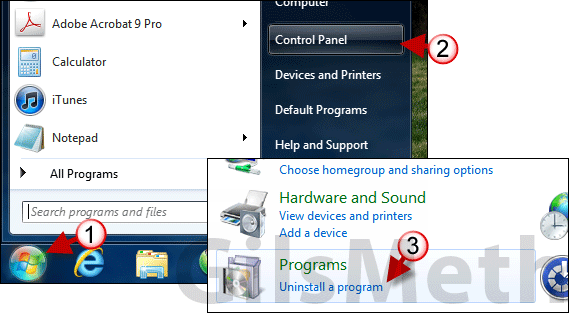
1. Click the Windows Orb to open the Start menu.
2. Click Control Panel from the Start Menu.
3. When the Control Panel window opens click the Uninstall a program link under Programs.

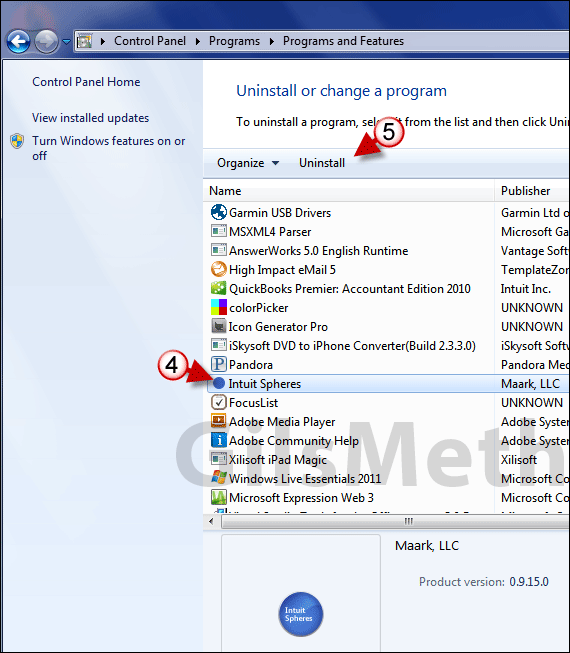
In the Programs and Features window you will be presented with a list of all the applications installed on your computer. The list can be sorted alphabetically, by Publisher, by last time used, and by the size used by the application.
4. Locate and select the application you wish to uninstall from your system.
5. Click the Uninstall button to launch the application’s uninstall program.
Follow the instructions in the Uninstaller until the removal of the application is complete. Repeat for all of the applications you are no longer using and wish to remove from your computer. If you have any comments or questions please use the comments form below.


