Did you know that the latest version of iPhoto on your Mac makes it easier than ever to share your photos with family and friends on Facebook? iPhoto allows you to post images to your Facebook profile, existing albums, new albums, and even your wall. So if you’re looking for a quick an easy way to share those pictures from last week’s party, follow the instructions below.
Software/Hardware used: iPhoto 2011 running on Mac OS X.

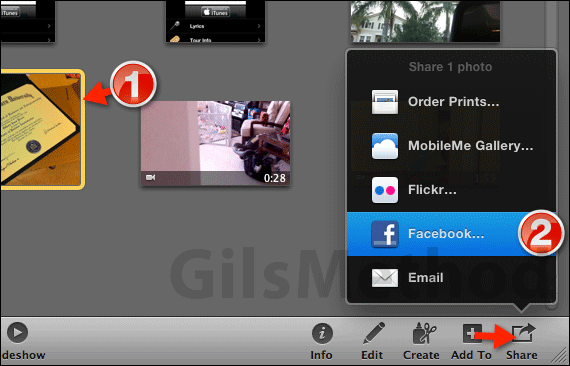
1. Select the photo(s) you wish to post to Facebook.
2. Click the Share icon and click Facebook from the list.

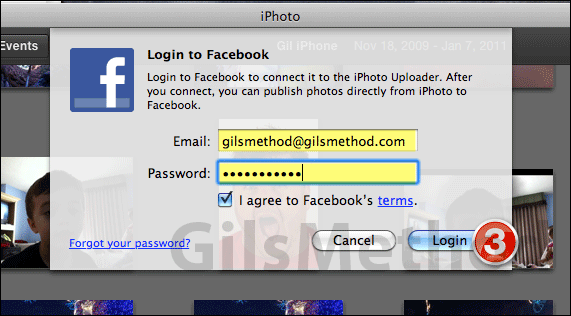
3. If this is your first time uploading pictures from iPhoto to Facebook you will need to enter your Facebook account email and password. Click Login when you are done.
If you’ve done this before, skip to the next step.

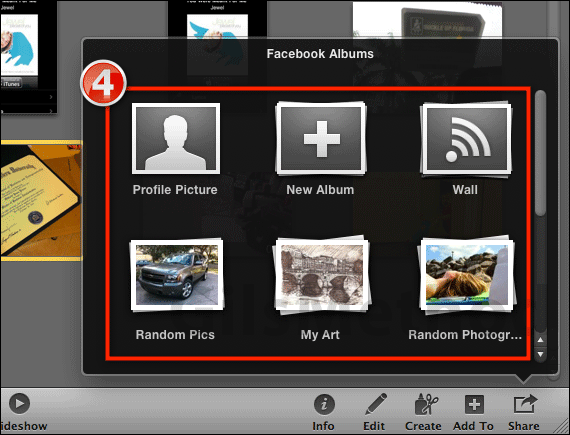
4. You will have the option of posting the picture to an existing album, a New Album, your Profile Picture, and your Wall. Click on the option you wish to use.

5. Enter a Comment (optional) for the picture you are uploading and click Publish. That’s it. In a moment (depending on your connection speed and the size of the picture) the photo will post to the designated located in Facebook.
If you have any comments or questions please use the comments form below.


