If you carry around a lot of sensitive information on your iPad it may be a good idea not only to add a passcode lock, but also to enable automatic data wipe.
The automatic data wipe feature will erase all data on your iPad after 10 failed passcode attempts. This means that if someone is trying to figure out your password they will only have 10 attempts before the iPad is completely erased.
Again, this feature is not for everyone, especially those who tend to forget passwords, but it is essential for people who carry extremely sensitive information on their iPads.
The guide below will show you how to enable this feature on the iPad.
Enable Erase Data on the iPad
Software/Hardware used: iPad 2 running iOS 4.3.2.
1. Tap Settings on the Home Screen.

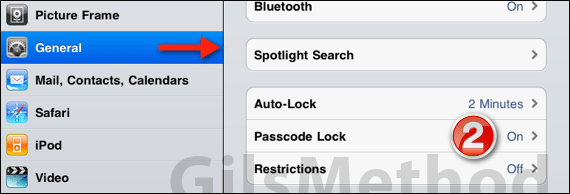
2. When Settings opens, tap Passcode Lock.

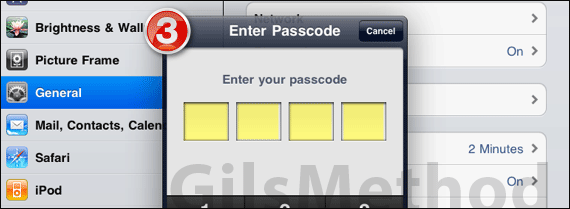
3. If you already have a Passcode set on your iPad, enter the code when prompted and proceed to the next step.
Don’t have a passcode, you need to follow the How to Set a Password on the iPad guide to enable the data wipe feature. Once the passcode is enabled you will be able to complete this guide.

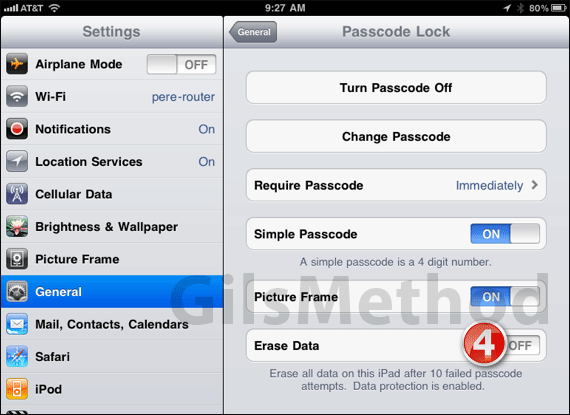
4. In the Passcode Lock page, toggle ON Erase Data.

5. You will be prompted to confirm turning on this feature. Tap Enable to continue.
Next time you lock your iPad you will only have 10 failed attempts before it automatically erases all of the information on the iPad and sets it back to factory conditions.
If for whatever reason you cannot remember the iPad’s passcode make sure to sync before running out of failed attempts to ensure your data is backed up.
Have any questions? Please use the comments form below.


