
I’ve always enjoyed receiving Christmas cards, birth announcements, and other greeting cards with photographs. Pictures say so much and are much more personal, they tend to stick out against other greeting cards clinging to the refrigerator door. I know I could probably go the local Wal-Mart or Costco to get these photo greeting cards done, however I take pride in the do-it-myself so before I ran off to the local photo place I did some digging, luckily I found that Adobe Photoshop Elements (which I’ve been using for basic photo fixes) has a feature which allows you to create photo greetings cards from your own pictures. The software provides a good number of themes and layouts to customize your greeting card.
Below you will find the steps necessary to create your own greeting card, I will use a birth announcement as my example throughout this how-to. I hope you find this feature as useful as I have. If you have any comments or questions, please post them below.
Note: I used Photoshop Elements 6 to create this tutorial, however these steps should be similar in other versions of Elements. I’m not familiar with previous versions of Elements, however I can’t imagine them removing this feature in version 7.
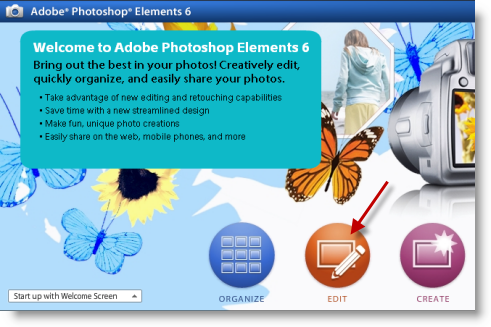
1. Open Photoshop Elements from the icon located on your desktop or Start menu, when the Welcome screen appears, click on the Edit button
Note: If the Welcome Screen is disabled, skip to the next step.
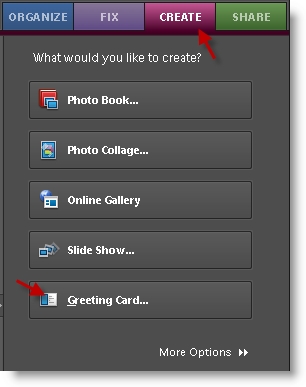
2. On the right pane in the Elements window, click on the CREATE tab, then click on Greeting Card, this will load the Editing Workspace.
3. The Editing Workspace is loading so give it a couple of seconds, this will open in a separate window.
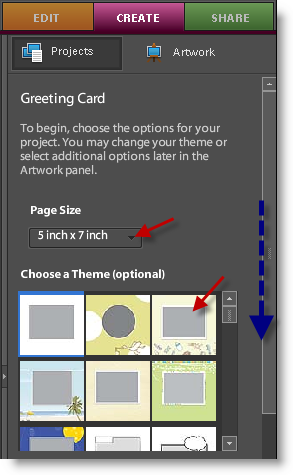
4. The column below the CREATE tab will make available a set of options to customize your greeting card, see the options below;
Page Size: This option specifies the size of the paper/print that you will working on. Make sure to select a size that matches the paper you will be using to print.
Note: You may be able to print more than one 4X6 on a 8 1/2 X 11 sheet, if you need help with this, let me know and I’ll write up the tutorial for you.
Choose a Theme (optional): I highly recommend choosing a theme, otherwise the picture will be set in a blank background. You can scroll down to see more themes.
When you are done setting the page size and selecting your theme, scroll down (see blue arrow)
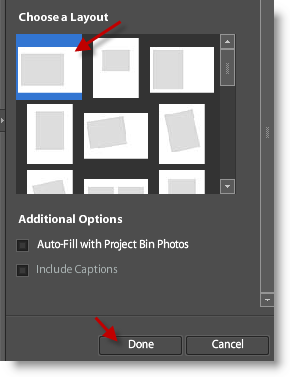
5. The Choose Layout option allows you to customize the layout of the picture, you can change it so that the picture is slightly slanted, to the top, etc. Choose your desired Layout and click Done.

6. The page generation will take a few moments…
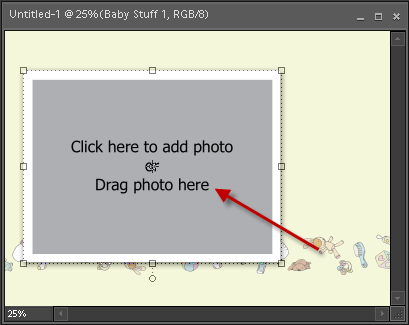
7. Your theme and layout are ready to go all you need is a picture, to add you picture click on the Click here to add photo… text
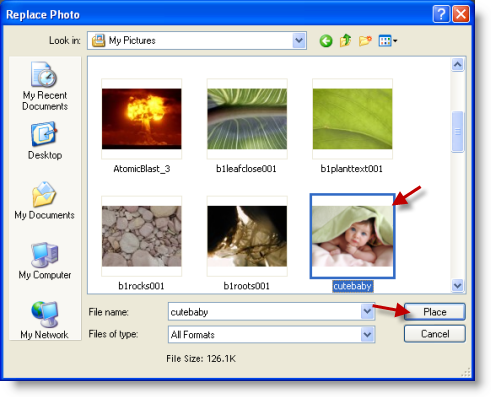
8. The Replace Photo dialog box will open, browse to the location where your pictures are stored, select the picture you wish to use, click Place.
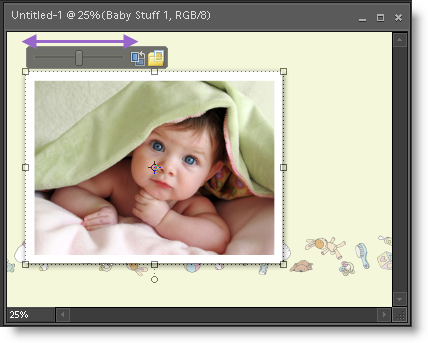
9. Once your photo is inserted in the picture placeholder, you can zoom in and out using the slider to make sure you get the right fit.
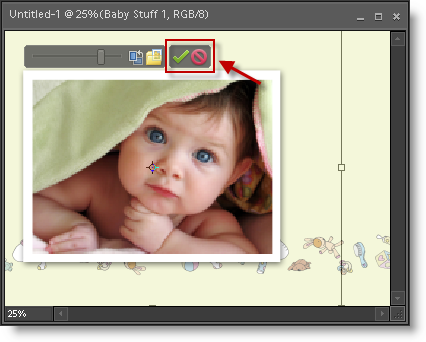
10. After you find the right fit for your picture, click on the green checkmark, this will make the change effective.
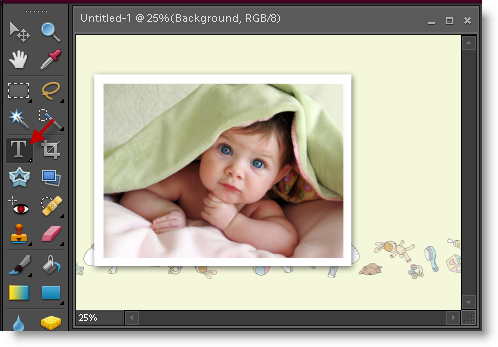
11. To add text to your greeting card, select the Text Tool from the Tool menu to the left.
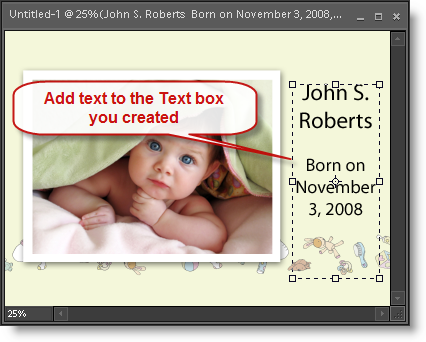
12. Click on an empty area where you would like to add text and start typing.
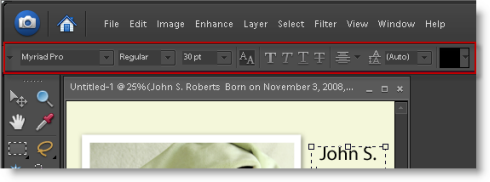
13. The text formatting options are all located below the standard menus and above your work area.
Note: The Text formatting menu is available only when editing text or when the Text Tool is active.
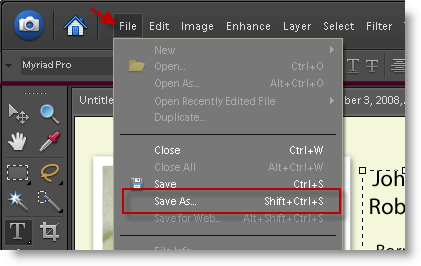
13. Once your text is formatted the way you wanted it, we need to save your greeting card, click on File > Save As…
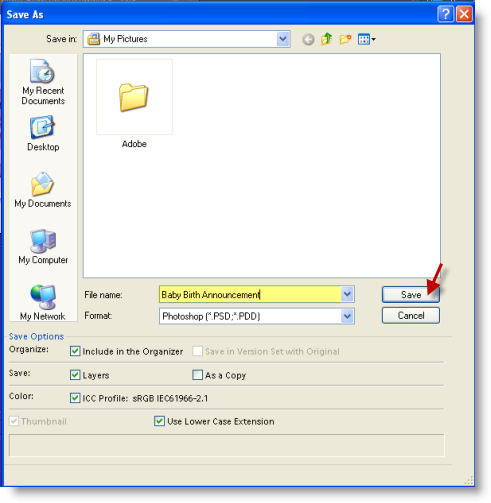
14. Name the file and click Save
Printing Your Greeting Card
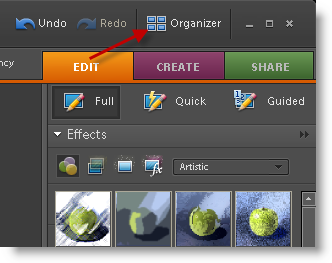
1. Return to the Organizer by clicking on the Organizer button located above the right pane.
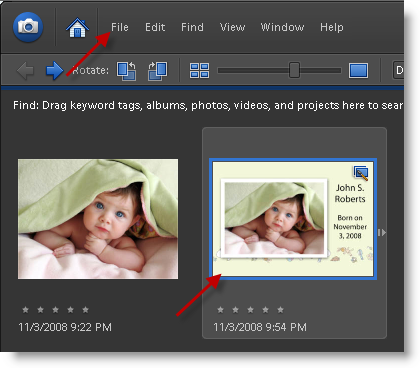
2. Select the greeting card you just saved, click on File
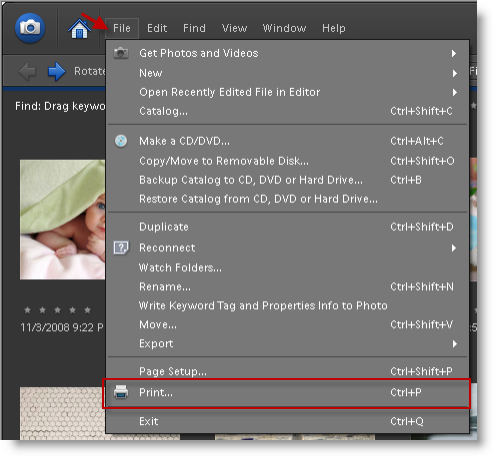
3. Click on File> Print
Note: Print settings vary by printer, however make sure that you choose a setting that will comply with the paper you’re using (photo paper) and that you select the best print settings.
Picture of baby found via Google search from Glam.com


