Sure, you know how to upload pictures to Facebook by placing them on your Wall, but wouldn’t it be nice if you could upload those same pictures to a specific album to keep all of your photo’s organized? If you’ve ever wanted to do this then you’ve come to the right place. In this guide I will show you how to create albums on Facebook and upload pictures to your albums, all from the comfort of your iPhone.
If you have any comments or questions use the comments form at the end of the guide.
Software/Hardware used: iPhone 4 running iOS 4 and the Facebook app.

1. Open the Facebook app and tap Photos.

2. A listing of your existing photo albums will appear. Tap the [+] icon to create a new album or tap an existing album to upload the pictures to.
Note: The following steps assume you are creating a new album. If you are using an existing album then proceed to step 4.

3. Enter the Album’s information and tap Create.

4. Once the album is created it will appear on the list of albums on your Facebook profile. Tap to select the newly created album to begin uploading photos to it.

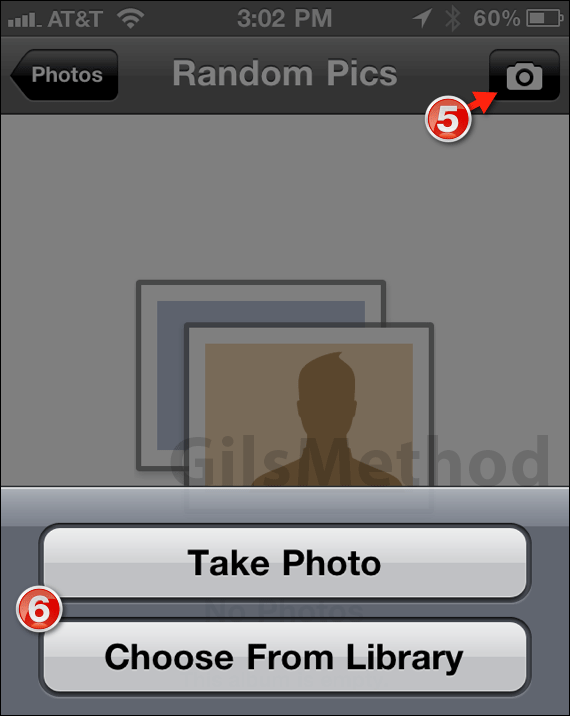
5. Tap the Camera icon to add photos to the album you selected.
6. You will be provided with the option of adding photos from the Library or from your camera. Choose the option you wish to use.

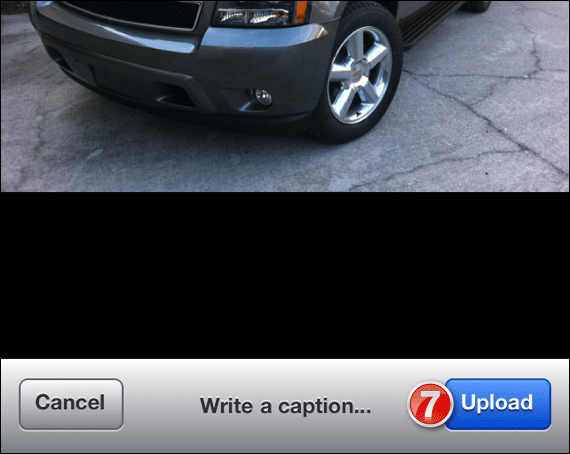
7. When the photo is ready (from Library or a new snapshot), enter a caption (optional) and tap Upload.

Repeat for other photos. Unfortunately you can only upload photos one-by-one, if you wish to upload multiple photos you may want to do so on your computer. If you have any comments or questions please use the comments form below.


