Are you looking for a way to access network files when you’re offline at home or travelling? Windows 7 ships with Offline Files which allows users to designate files or folders in a network as Offline Files. This designation tells Windows 7 to create a copy of the files on your computer so that they can be accessed when you are not on the network. Once you return to the office and log in to the network the files will automatically synchronize so that the server and your laptop has the latest version of the files. The guide below will show you how to enable offline files in Windows 7, the first step to working with online files. If you have any comments or questions please use the comments form at the end of this post.
Software/Hardware used: Windows 7 Ultimate.
How to Enable Offline Files in Windows 7
Note: Offline files is only available in Windows 7 Professional, Ultimate, and Enterprise.

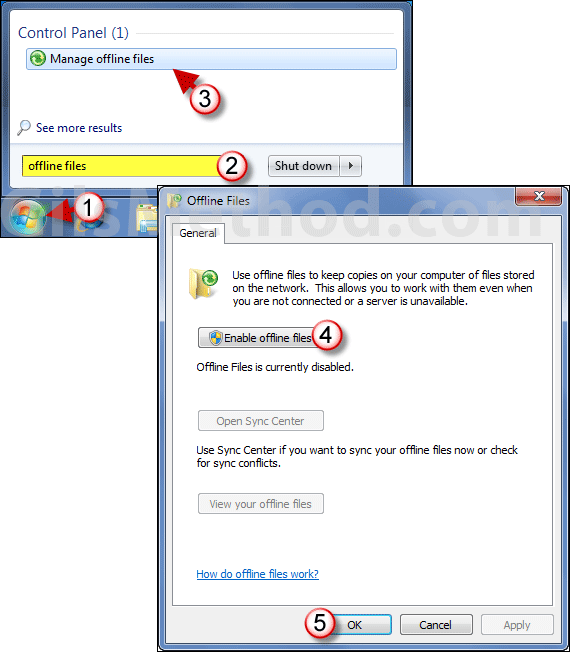
1. Click the Orb to open the Start Menu.
2. Enter offline files in the search box.
3. Click Manage offline files under Control Panel in the search results list.
4. When the Offline Files window opens, click Enable offline files.
Note: You may see a User Account Control message, click OK to continue.
5. Click OK to save the changes.
You’re set, we’ll cover using offline files in the next couple of articles.


