One of the newest features introduced in the latest version of Picasa is the ability to create a movie from a face that has been tagged in an album. With this feature you can click on a face that has been tagged and create a slideshow of all the images that have been tagged with the selected face. The slideshow can be customized with different transitions, title slides, speed, captions, and other options. Once the settings have been made users can then render a video which can be saved locally or uploaded to YouTube.
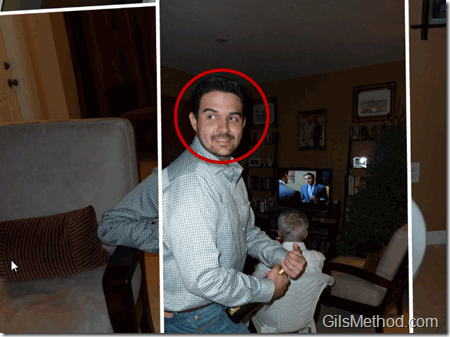
In the guide below I will show you how I created a picture slideshow video of images of me. You will notice that as the video is played back, Picasa makes sure that the face is always on the same spot.
Note: I used Picasa 3.8 for this guide.
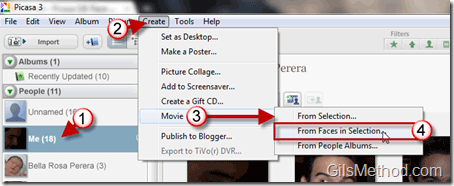
1. Click on the tagged person in Picasa (in this case it’s me).
2. Click on Create in the toolbar.
3. Click on Movie from the list to expand the options.
4. Click on From Faces in Selection from the list.
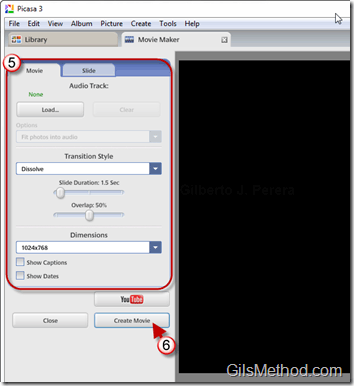
5. Set the slideshow options by using the Movie and Slide tabs.
6. When you are done setting up the slideshow, click on the Create Movie button.
You will notice that as the slideshow plays the selected face will always be centered.


