How many times have you sat in front of your computer searching for a document and don’t have anything but a date range to locate it? I know I have, it’s the, “I know I wrote that 2 months ago, but have no idea what I named it or where it is…” scenario, I’m referring to. This is where Nemo Documents comes to the rescue.
Nemo Documents is a small Windows (XP through 7 & Linux) application that works alongside the built-in Windows search engine to give you a visual representation of the files stored on your computer. This visual representation is more like a calendar view that allows you to see when documents were created and edited. The application also does a good job of filtering the files displayed on the calendar by file type and location to make it easier to locate.
Once installed the application will pull data from Windows Desktop Search to put together the index it uses for its calendar views. When that’s ready all you have to do is launch the Nemo Documents window and navigate the calendar to find your files.
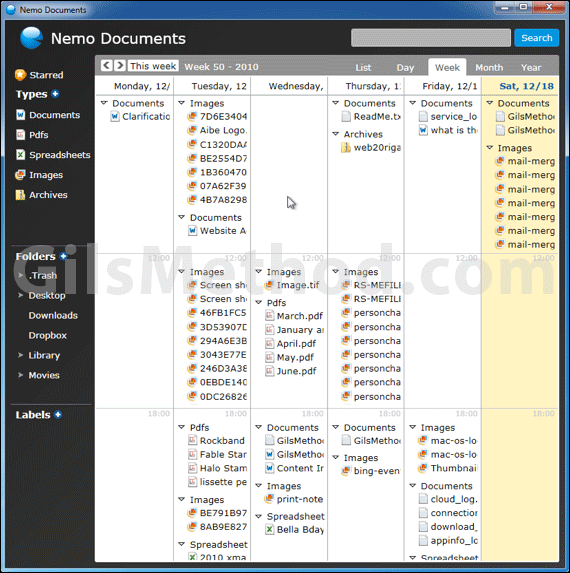
You can change the calendar’s view to display dates by List, Day, Week, Month, and Year. I’ve found that the Week view is best when trying to locate files.
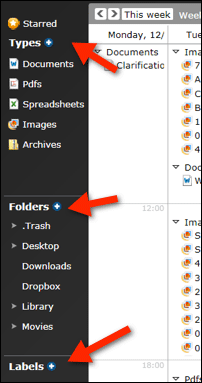
You will notice that the pane on the right has three sections, Types, Folders, and Labels.
In the Types section you will be able to filter the items on the calendar by file type, so if you wish to only locate documents, click on the Documents file type and the calendar will only display Documents and file types associated with the Documents filter. You can change what file types are included in each of the file type filters by modifying the settings.
In the Folders section you can filter by specific locations on your computer, for example if you know that the file you are looking for is on a server you can narrow your view to only files stored on the server. Did I mention you can search documents from your Google Docs account with Nemo Documents? More on that later.
Lastly, the Labels filter allows to set labels for specific files that allows those files to be found in at a later time using these filters.
To modify the filters above you will need to visit setting in Nemo Documents, here’s how.
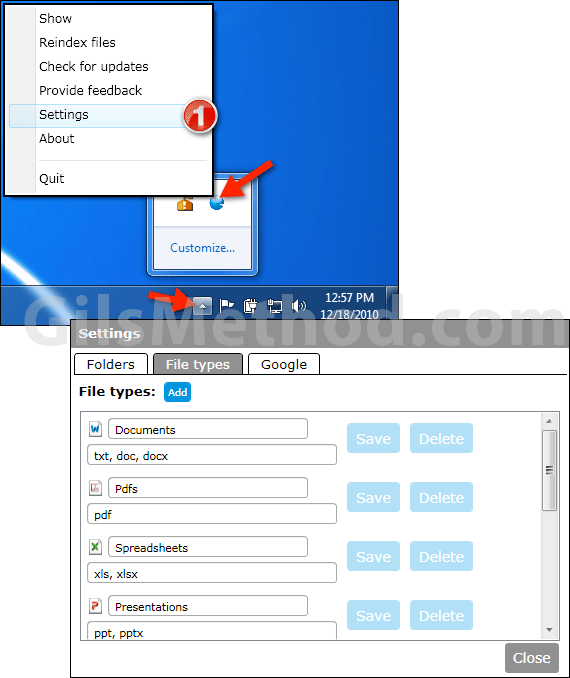
1. Open the Notification Area, right-click on the Nemo Documents icon and select Settings from the list.
When the Settings window opens you will see three tabs, Folders, File Types, and Google. In the Folders Tab you will be able to add directories that Nemo Documents will index. In the File Types directory you can change which file types are associated with Documents, PDF’s, etc. The Google tab allows you enter your Google account information so that Nemo Documents can include your Google Docs in its index.
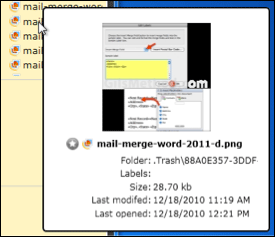
One of the things that I like best about Nemo Documents and one of the features that has the most potential is the file previews.
The latest version of Nemo Documents provides thumbnail views of image files which makes it real easy to locate a file without having to actually open it. However the preview feature is not available for Office documents and other files types, which in my opinion would make this a killer app.
Despite Nemo Documents Beta label, it appears to be very stable and feature rich, this is definitely one of those applications to keep your eyes on. It makes it easy to find and organize files on your computer and it does so without taxing performance on your computer. There are several things which I think the developer needs to include prior to launch and those items include the ability to index Office Live and Zoho Docs much like it does for Google Docs and the extension of previews to other file types.
Other than that, Nemo Documents is a great way to augment Windows built-in search engine to make it easier to find the files you are searching for.
Check out Nemo Documents yourself by downloading a free copy from the Nemo Docs website.
Have you used this application before? Let us know what you think in the comments section below.


