
If you use Picasa to organize your pictures you may or may not be aware of the various options available to you to add your pictures to Picasa. Below I will walk you through four scenarios to teach you how you can add pictures to Picasa from your computer, your camera, and the web. If you have any comments or questions please post them below.
Import Pictures from Your Camera, Memory Stick, and Other Removable Devices
To import photographs from your digital camera, scanner, or removable media, follow the instructions below.
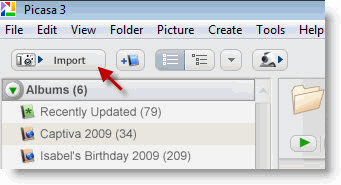
1. Click the Import button located on the top left of the screen.
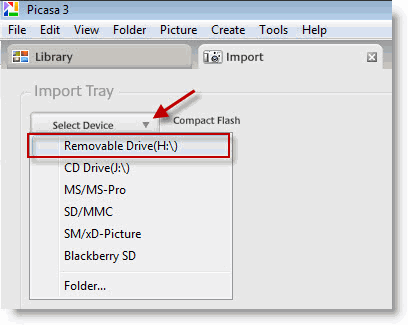
2. The Import tab will open. Click on the Select Device drop-down to choose the device to import from. In this example I will be importing photographs from a Secure Digital (SD) card.
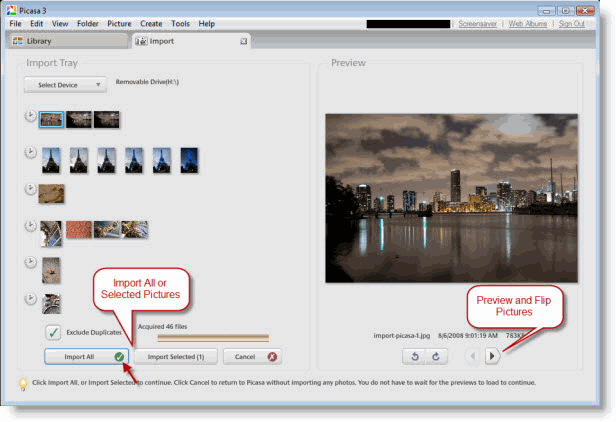
Soon after the device is selected Picasa will look at the contents of the device and list all of the pictures contained within. Picasa provides users several options when importing photographs. Users have the option of importing only selected pictures or all pictures listed. Picasa allows you to preview the photographs to be imported with the Preview pane on the right of the screen. Use the arrows to move through the pictures and the Rotate arrows to correct picture orientation prior to importing.
Another neat feature is the ability to select the photographs based on the date. Notice that Picasa segments the photographs based on the time period they were taken in. Each grouping is denoted by the clock icon. When importing pictures you can instruct Picasa to exclude duplicates by adding a check mark to the Exclude Duplicates check box.
3. When you are ready to import your pictures, click on Import All or Import Selected (#) to bring your pictures to Picasa.
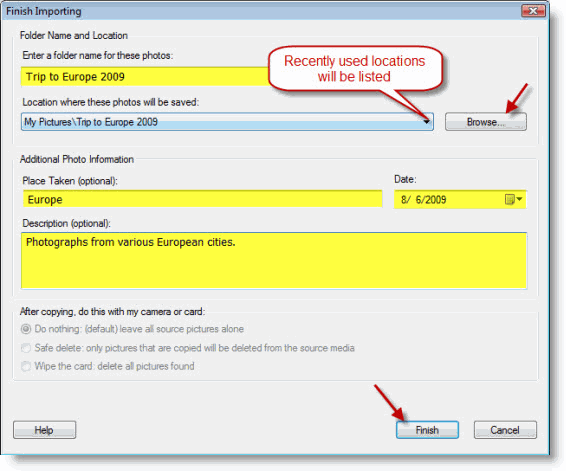
4. When you import photos to Picasa you are provided with a series of options to customize the folder the pictures you are importing will be stored in. Name the folder, select a location to copy the files to, add the location where the pictures were taken, add a date, a description and click Finish when you are done.
Note: The more details you provide for your pictures and the folder you are creating, the easier it will be to locate the pictures in the future.
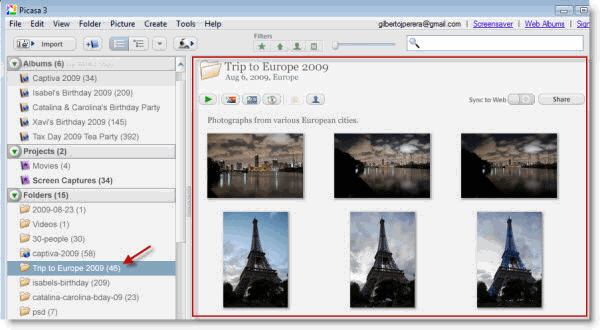
Recently imported photographs displayed in new folder.
Add Picture Folders to Picasa
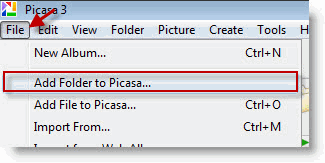
1. Click on File > Add Folder to Picasa
To add an existing folder containing pictures to Picasa follow the instructions below.
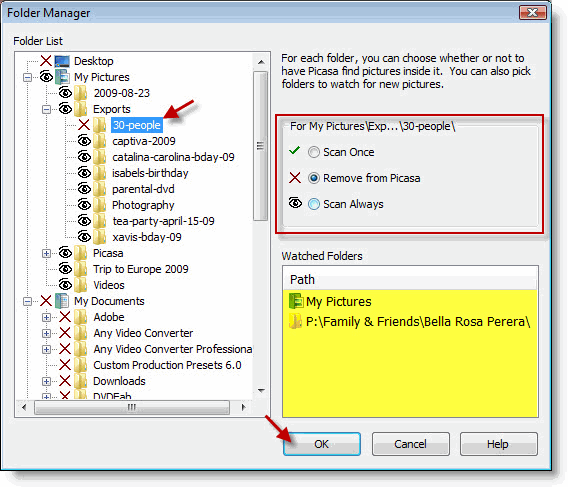
2. The Picasa Folder Manager window will open. Choose the folder you would like to add and click on Scan Once or Scan Always to add the folder to Picasa. Click OK to proceed.
Note: To get a better understanding of the Folder Manager, read the following article – How to Control Which Folders Picasa Scans Automatically
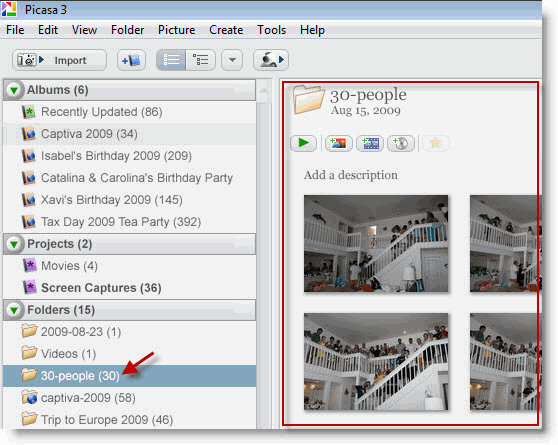
The folder that was added should appear in Picasa.
Add Individual Pictures to Picasa
To add an individual picture to Picasa follow the instructions below.
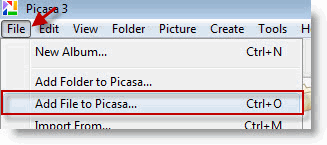
1. Click on File > Add File to Picasa
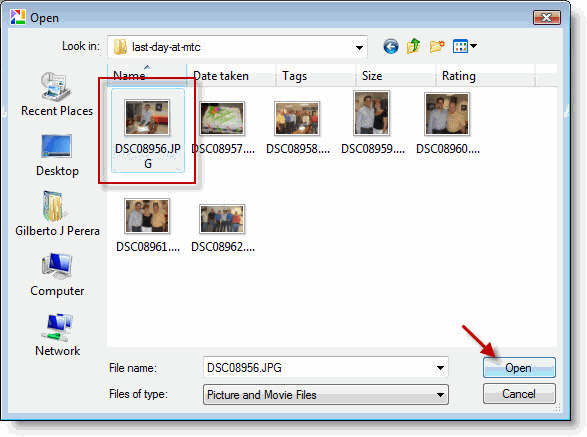
2. Locate and select the picture you wish to add to Picasa and click Open.
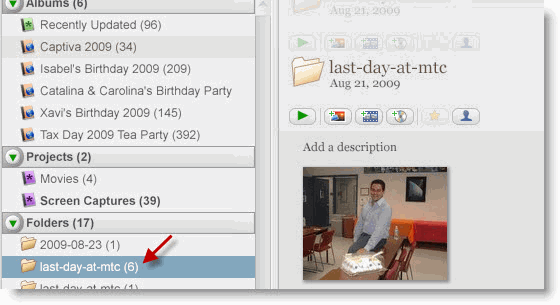
Individual picture added to Picasa will appear within the folder it is physically stored.
Import Pictures from Web Albums to Your Computer
If you’ve uploaded pictures to Picasa Web Albums from other computers and would like to save those pictures to your computer, follow the instructions below.
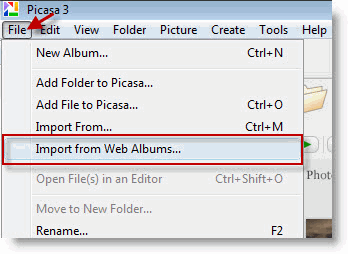
1. Click on File > Import from Web Albums
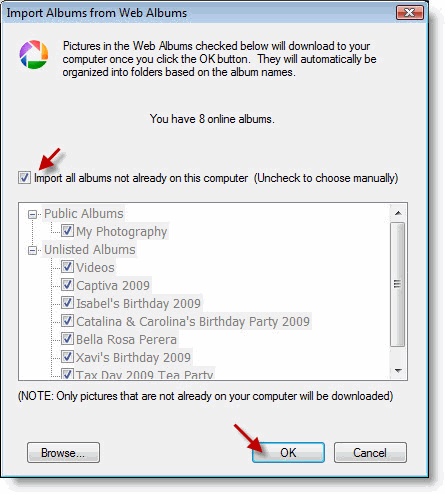
2. If you would like to import all photographs from the Web Albums website add a check mark to the Import all albums… check box. If you would like to specify which folders to import, remove the check mark. Click OK when you are done.
All or selected folders will be downloaded from Picasa Web Albums to your computer.


