If you’re tired of not being able to automatically include images, links, and other items in your web mail signatures, fear not WiseStamp is here. WiseStamp is an extension for Firefox, Chrome, Thunderbird and Flock that allows you to automatically insert signatures with all of the bells and whistles when you compose an email message. The add-in is free and requires one of the browsers listed above. WiseStamp works with the following web mail providers: Yahoo!, Gmail, Hotmail, and AOL Mail.
Below I will show you how WiseStamp works and how to install and use it. If you have any comments or questions, please post them below.
Note: The WiseStamp website will automatically detect your browser and suggest the appropriate version you’ll need. I used Google Chrome browser for this tutorial.
Before proceeding with the how-to below, download and install the WiseStamp extension from WiseStamp.com.
Customize your Email Signatures
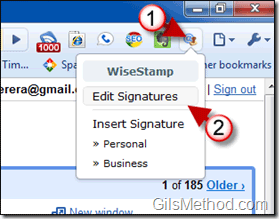
1. Once installed the WiseStamp icon should appear in the Chrome toolbar. Click on WiseStamp to open the menu.
2. Click on Edit Signatures.
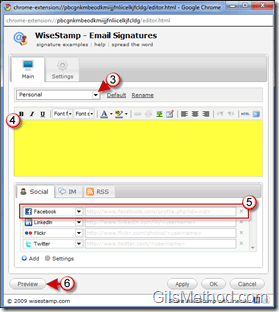
3. The Email Signatures window will open. Click on the drop-down to specify the signature you will be editing. I chose Business for this guide.
Note: You can rename the signature by clicking on the Rename link.
4. Enter your email signature in the text box. Feel free to use the formatting bar to specify font, size, color, add hyperlinks, and even images.
Note: If you will be adding links to your social profiles, follow the steps below to get a very professional look.
5. Once you are done with the signature text box, now we can add the various social links available to your signature. Click on the drop-down to select a social network from the list. Once selected enter the URL (web address) for your profile on the selected service.
You can include additional services by clicking on the Add button. If you wish to delete a social link, click on the [X] to the left of the URL text box.
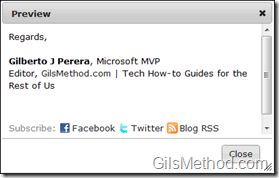
6. When you are ready, click on the Preview button to review your signature.
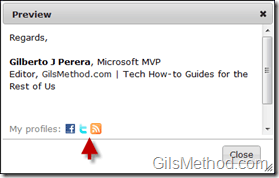
A small window will appear with the preview of your signature. If you wish to customize the social services icons, follow the steps below.
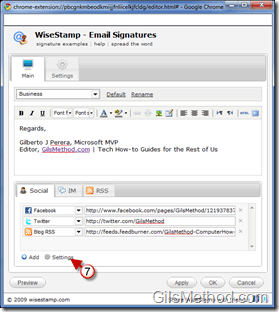
7. After you Close the Preview window and return to the Email Signatures window, click on the Settings button.
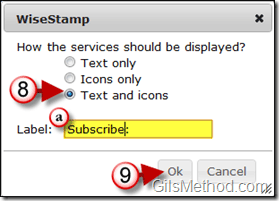
8. A small window will appear. Select how you would like the services to be displayed.
a. Customize the label, the default is My Profiles, but you can change it to something catchier.
9. Click OK to save the settings.
Click on Preview again to review the changes.
There are a ton of other features that can be added to your signatures, visit the WiseStamp Goodies for more details.
Insert Signatures into Your Messages
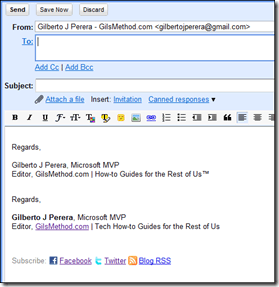
All you have to do is Compose/Create a new message and your WiseStamp signature should appear. If you’re like me and you’ve been using Gmail for a while, chances are that you already have a signature automatically inserted by Gmail, so you’ll end up with two signatures…
If you don’t remember how to remove your default signature in Gmail, follow the instructions below.
Remove Your Old Signatures
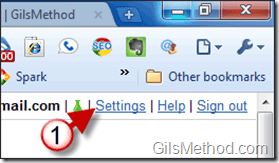
1. Open Gmail and click on the Settings link on the top right corner of the screen.
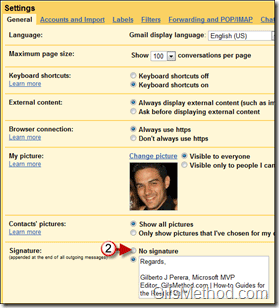
2. When the Settings page appears, make sure that you are in the General tab, click on No Signature from the Signature section.
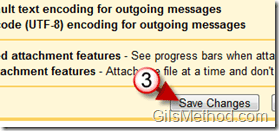
3. Scroll to the bottom of the page and click on Save Changes.
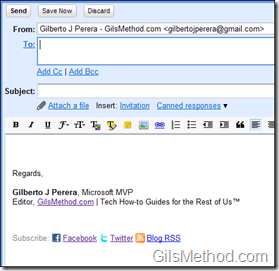
When you compose a new message only the WiseStamp signature should appear.

