This is the fourth part of a larger series that I will be publishing in the coming weeks covering my switch from Outlook to Google’s online services. The intent of this series is to help others who have found themselves wanting more out of their email and calendar applications. This guide specifically covers how to transfer all of your Outlook messages to Gmail. A lot of us find ourselves switching to Google and wishing we could access all our saved messages from Outlook or other email applications online.
Unless you are an individual with access to Google Apps via your company or school, you will need to follow the steps below to transfer your messages from Outlook to Gmail. This method is kind of a work around which I have confirmed to work (I trasferred over 600MB of messages with attachments). It is a great alternative that keeps me from having Outlook around just for old messages. If you have any tips to share, please post them below.
Note: I used Outlook 2007 and a standard Gmail account to write this article. If you use Google Apps you can use this free tool to transfer your emails.
To view the how-to describing the process for transferring appointments from Outlook to Google Calendar, follow this link.
PLEASE NOTE before proceeding make sure you enable IMAP in Gmail by following these instructions.
Configuring Outlook
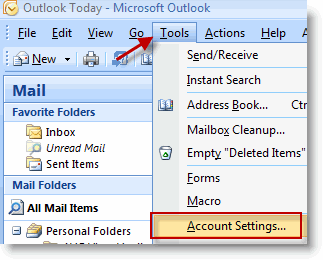
1. With Outlook open, click on Tools > Account Settings…
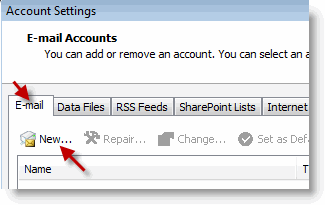
2. Click on the E-mail tab and click on the New… button.
Editing Task Details
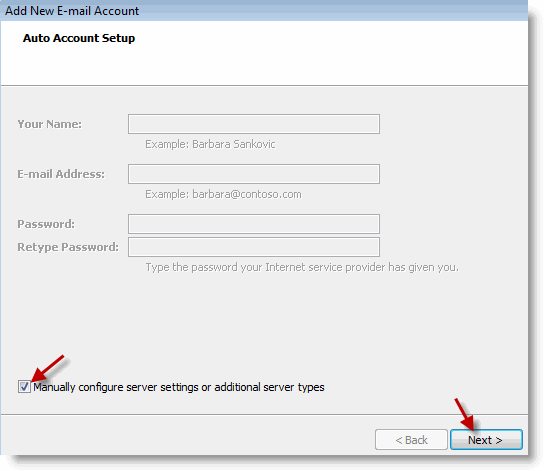
3. When the Add New E-mail Account wizard opens, add a check mark to Manually configure server settings… Click Next to proceed.
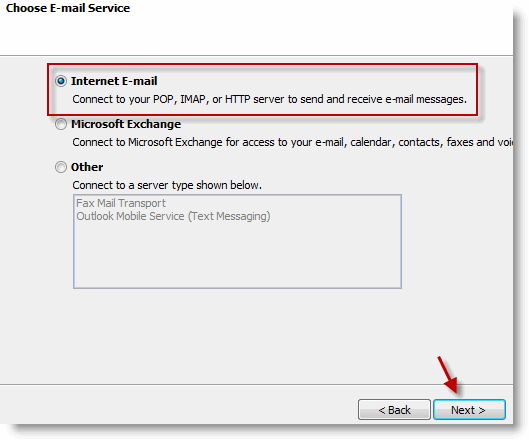
4. Select the first option, Internet E-mail, click Next.
Enable Your Tasks List in Gmail
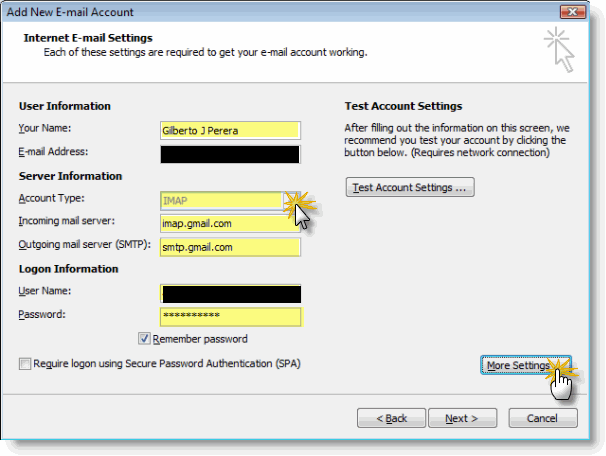
5. Fill out the form and make sure to select IMAP from the Account Type drop-down. Click on More Settings when form is complete.
Note: When filling out the form make sure that you use the following information;
- Incoming mail server: imap.gmail.com
- Outgoing mail server (SMTP): smtp.gmail.com
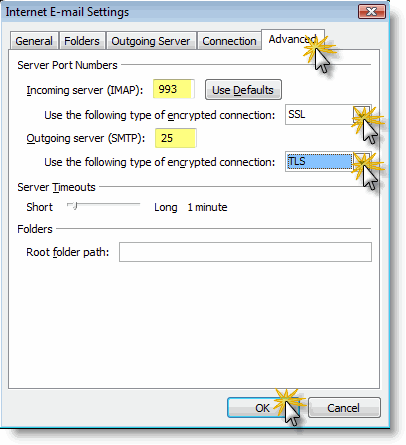
6. When the Internet E-mail Settings window opens, click on the Advanced tab. Set the following port numbers and settings, then proceed to the next step.
- Incoming server (IMAP): 993 – use SSL for the encrypted connection type
- Outgoing server (SMTP): 25 – use TLS for the encrypted connection type
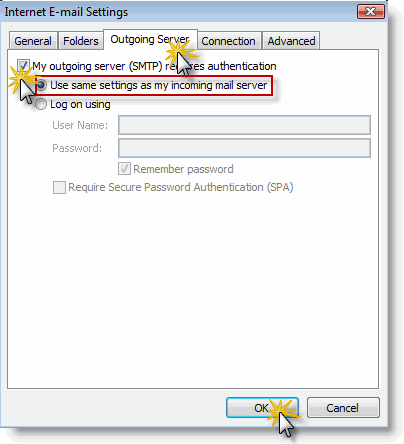
7. Click on the Outgoing Server tab and add a check mark to My outgoing server (SMTP) requires authentication. Make sure that Use same settings… is selected. Click OK to close the Window. Click Next on the Wizard screen.
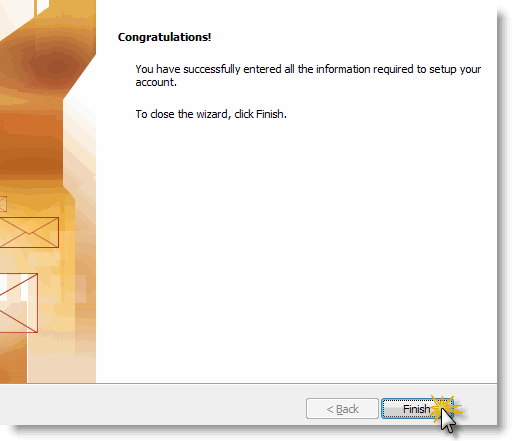
8. Congratulations you have set up the Gmail account in Outlook. Click Finish to exit the wizard.
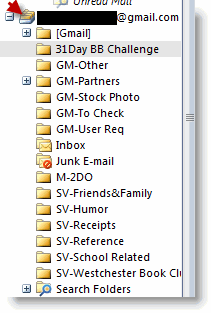
9. Wait a couple of seconds as Outlook fetches the Gmail folder list and starts making emails available within Outlook. The screen shot above shows how the Gmail account is listed.
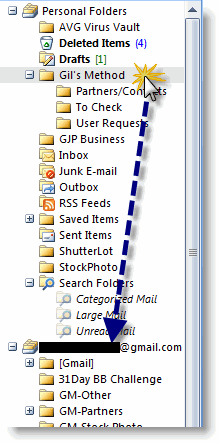
10. Once the folders in Outlook match those in Gmail we can start moving emails over to the Gmail folders. Click on the folder containing emails from your Outlook file, select the emails within the folder (or the entire folder) and drag it over to the [email protected] folder list. This will start the transfer of e-mails from your Outlook files to Gmail’s servers.
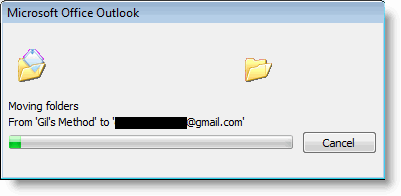
11. In some instances you may see the dialog box above. Depending on the size of your Outlook folders transfers could take seconds to hours.
Once the file transfers are completed you will have access to all of your e-mail from Outlook on Gmail.
Tips
- Make sure your folder names do not use slashes (/) you will receive an error, there are other characters that I have not confirmed.
- Unless you specify that your are copying the items over, the operation will move the files from your computer (the original.pst file) to Google’s servers and they will no longer be accessible from the ‘original’ .pst file. They will be accessible via Outlook but through the Gmail folder list.
- It may seem that Outlook has locked up at times during the transfer, this is normal, it will happen if you have a lot of emails and/or large attachments, or your connection is slow.


