
In my previous article I detailed the steps necessary to transfer Outlook 2007 emails from your computer to your Gmail account. This how-to is a follow up to a comment left by one of my readers that pointed out that there were significant differences between Outlook 2007 and 2003. I decided to publish this article for him and for any of you who are using Outlook 2003 and would like to transfer your emails to Gmail. If you have any comments or questions, please post them below.
Note: I used Outlook 2003 and a standard Gmail account to write this article. If you use Google Apps you can use this free tool to transfer your emails.
To view the how-to describing the process for transferring appointments from Outlook to Google Calendar, follow this link.
Outlook 2007 users please follow the instructions on the article found on this link.
PLEASE NOTE Before proceeding make sure you enable IMAP in Gmail by following these instructions.
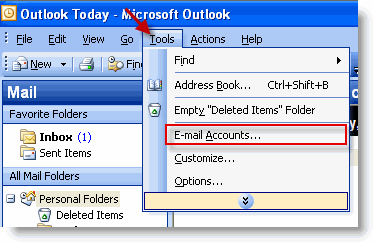
1. With Outlook open, click on Tools > E-mail Accounts
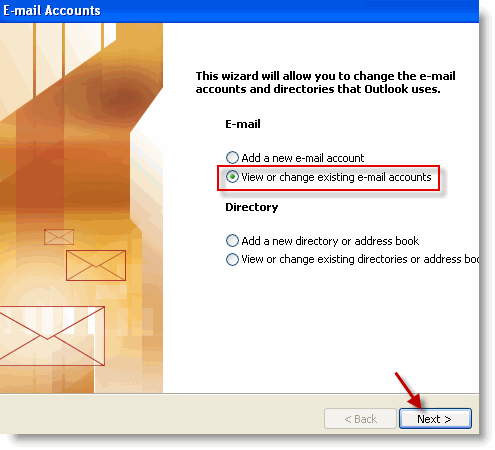
2. Select View or change existing e-mail accounts and click on Next to proceed.
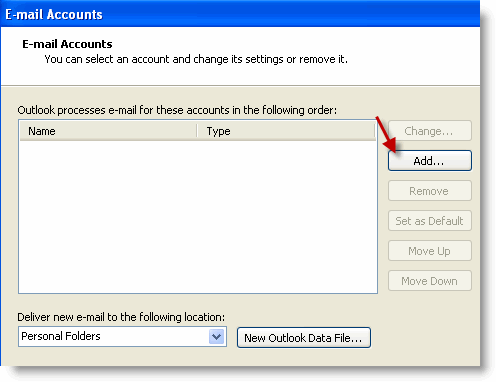
3. When the E-mail Account window opens, Click on the Add button to add your Gmail account to Outlook.
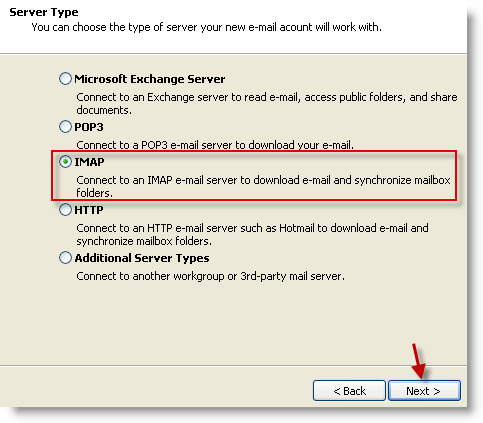
4. Select the third option, IMAP, click Next to proceed.
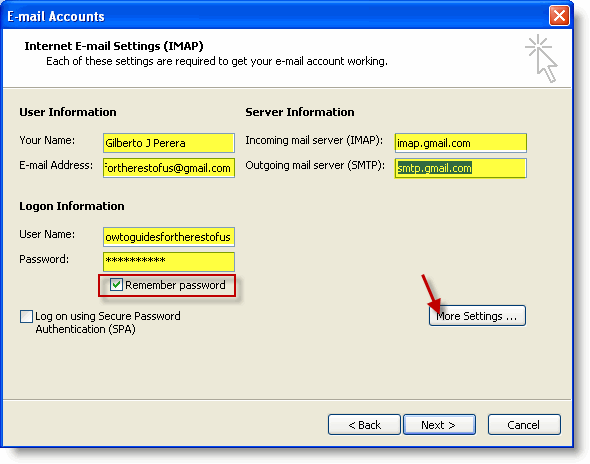
5. Fill out the form and make sure to select Remember password. Click on More Settings when form is complete.
Note: When filling out the form make sure that you use the following information;
- Incoming mail server: imap.gmail.com
- Outgoing mail server (SMTP): smtp.gmail.com
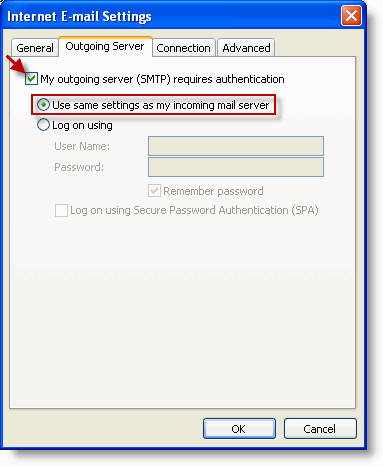
6. When the Internet E-mail Settings window opens, click on the Outgoing Server tab and add a check mark to My outgoing server (SMTP) requires authentication. Make sure that Use same settings… is selected.
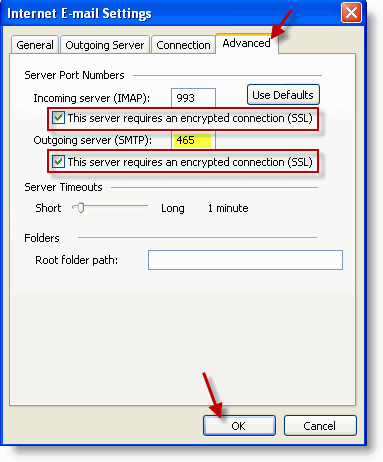
7. Click on the Advanced tab. Set the following port numbers and settings (below), click OK.
- Incoming server (IMAP): 993 and add a check mark to This server requires an encrypted connection (SSL)
- Outgoing server (SMTP): 465 and add a check mark to This server requires an encrypted connection (SSL)
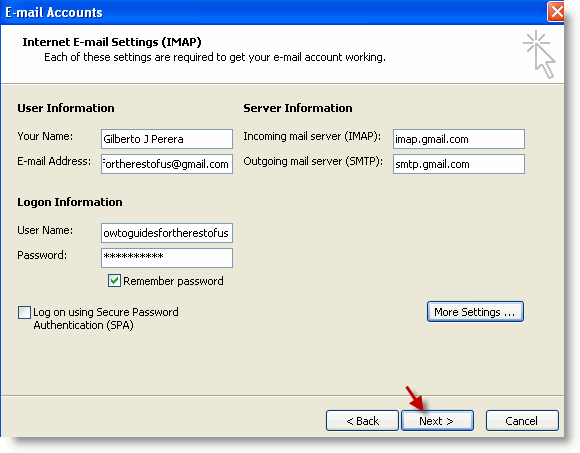
8. Make sure all of the fields are filled and click Next to exit the wizard.
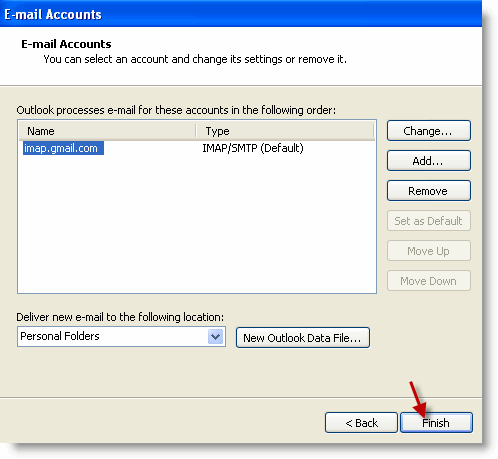
9. Click Finish to exit the E-mail Accounts window.
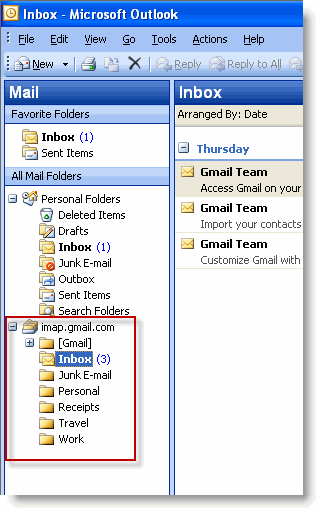
10. You should now be able to access your Gmail folders from within Outlook. Now you can start moving the emails from Outlook over to Gmail. Click on the folder containing emails from your Outlook file, select the emails within the folder (or the entire folder) and drag it over to the imap.gmail.com folder list. This will start the transfer of e-mails from your Outlook files to Gmail’s servers.
NOTE: I would urge you to copy and not just transfer your emails, this will ensure that you have a copy of your emails in your original .PST file.
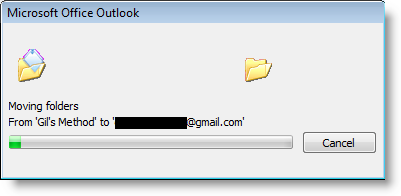
11. In some instances you may see the dialog box above. Depending on the size of your Outlook folders transfers could take seconds to hours.
Once the file transfers are completed you will have access to all of your e-mail from Outlook on Gmail.
Tips
- Make sure your folder names do not use slashes (/) you will receive an error, there are other characters that I have not confirmed.
- Unless you specify that your are copying the items over, the operation will move the files from your computer (the original.pst file) to Google’s servers and they will no longer be accessible from the ‘original’ .pst file. They will be accessible via Outlook but through the Gmail folder list.
- It may seem that Outlook has locked up at times during the transfer, this is normal, it will happen if you have a lot of emails and/or large attachments, or your connection is slow.
