Have you ever wanted to speak to your computer so that you do not have to type? If you run Windows 7 and have a microphone lying around somewhere you might be able to forgo the keyboard for a while. When configured the built-in speech recognition engine in Windows 7 will allow you to dictate text into your microphone that will be converted to text in a Word document, spreadsheet and any other application that allows you to enter text. The guide below is the first step in a series I will publish in the next couple of weeks that will help you get started with using speech recognition on your computer. If you have any comments or questions please use the comments form at the end of the article.
Software/Hardware Used: Windows 7 Ultimate and a Blue Microphones Yeti USB Microphone.
Before you can start dictating to your computer you will first need to tell your computer which microphone you will be using (you will also find out if your microphone works).
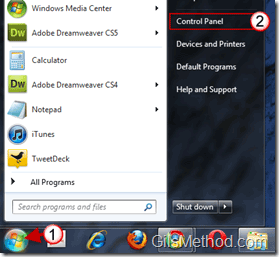
1. Click on the Orb to open the Start Menu.
2. Click on Control Panel on the right pane.
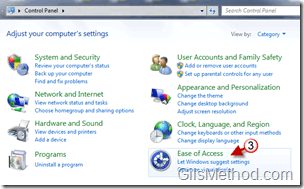
3. When the Control Panel window opens click on Ease of Access.
Note: If Ease of Access does not appear on the list, just use the Search Control Panel box to locate Set up a microphone.
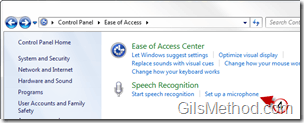
4. Click on Set up a microphone under Speech Recognition.
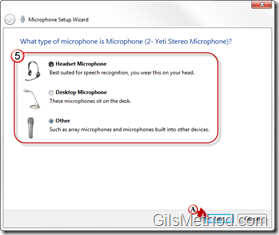
The Microphone Setup Wizard will open.
5. Click on one of the three microphone types that matches your microphone.
Headset Microphone – Best suited for speech recognition, you wear this on your head.
Desktop Microphone – These microphones sit on your desk.
Other – Such as array microphones and microphones built into other devices.
A. Click Next to proceed.
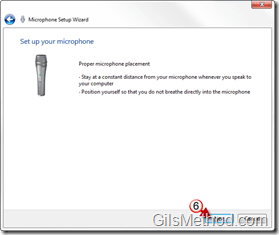
Follow the advice on proper microphone placement specific to the microphone type you selected.
6. Click Next to proceed.
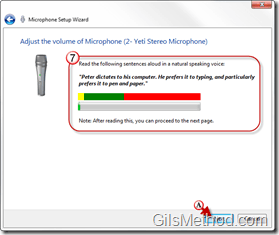
This is the part where you find out whether or not your microphone will work.
7. Read the indicated sentence out loud to see if your microphone works. Don’t worry about adjustments right now, you can change that later.
A. If everything is good, click Next to proceed.
Note: If the indicator did not react to your voice in other words it didn’t move, make sure that your microphone is plugged in correctly.
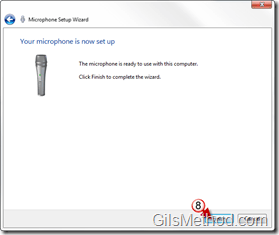
8. Click Finish to complete the microphone setup.
You have completed the first step in preparing your computer for speech recognition. If you are adventurous and want to start using speech recognition right away then click on the Start Speech Recognition link in the Control Panel (refer to Step 3 above). Otherwise hang on tight and subscribe to this site so that you can continue following the series when the next set of articles are published.

