If you’re like me and you like to keep a clean Desktop free of clutter, you may feel that the Recycle Bin will never leave the Desktop. You can remove it, but then how will you access it? By following the instructions below you will be able to place a shortcut to the Recycle Bin on your Taskbar so that you can remove it from the Desktop and keep your screen free of clutter.
Note: I used Windows 7 Ultimate for this tutorial.
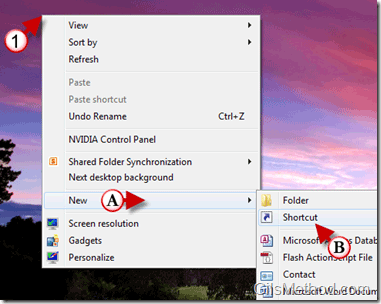
1. Right-click on the desktop to open the menu. A. Place your cursor over New and B. click on Shortcut from the list.
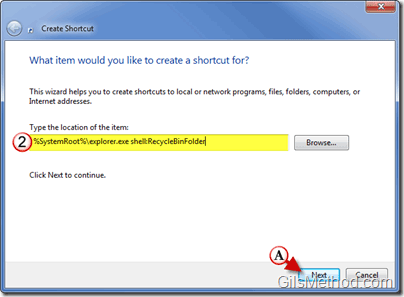
2. When the Create Shortcut window opens, enter the following text string in the location text box.
%SystemRoot%\explorer.exe shell:RecycleBinFolder
A. Click Next to proceed.
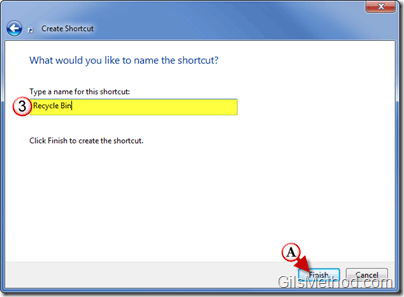
3. Name the shortcut the A. click Finish.
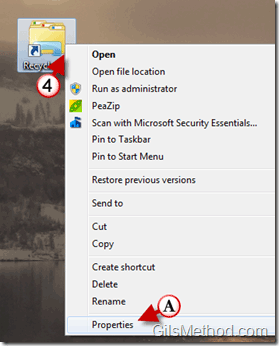
4. Right-click on the new shortcut and A. click on Properties.
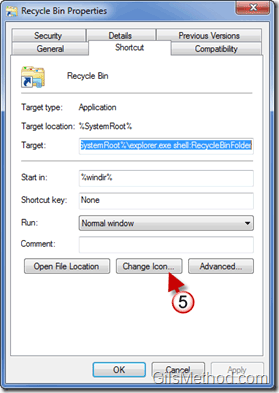
5. When the Properties window opens, click on the Change Icon button.
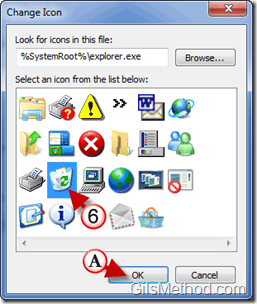
6. Choose the icon you wish to use for the Recycle Bin and A. click OK.
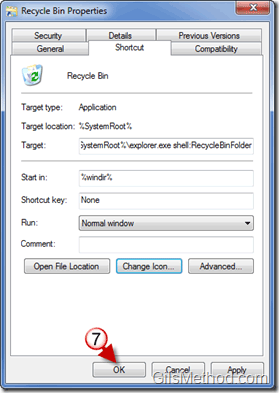
7. Click OK to close the Properties window.
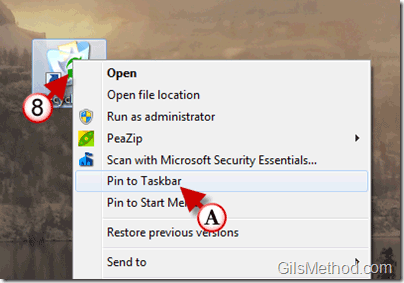
8. Right-click on the new shortcut and A. click on Pin to Taskbar.
The shortcut will appear on the Taskbar, feel free to remove the Recycle Bin from the Desktop.
Adapted from Tech-Recipes.com

