Why install a program on your computer to create collages when you can use Facebook and not install a single thing. The Photovisi app in Facebook allows you to create collages from photos stored in your computer and in your Facebook albums. The provides you with about 21 templates that can be used to style collages. You also have to option of customizing backgrounds, the ability to add shapes, and modify the images included in the collage.
If you are looking for a way to create free photo collages without having to install a single program, then check out the Photovisi Facebook App below.
Do you know of other useful Facebook Apps that should be featured here? Post your suggestions in the comments form below.
1. Visit the Photovisi Facebook App page.
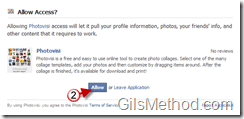
2. When the application page opens you will be asked if you would Allow Access to the application. To continue using the application, click on Allow.
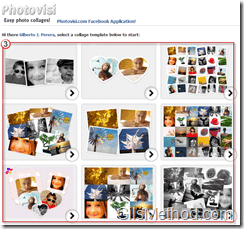
3. Select the collage template you would like to use for your photographs.
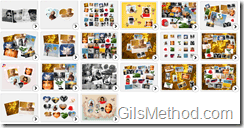
As of this writing there are 21 different collage styles to choose from.
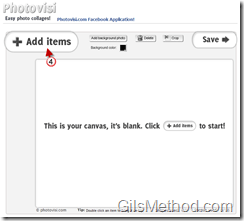
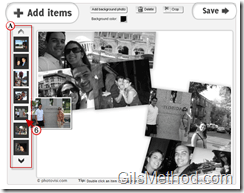
4. The Photovisi application window will open. To add pictures to the collage, you must first add them to the application. Click on the Add items button.
5. A menu will appear allowing you to add pictures from your computer or from albums in your Facebook profile. Choose the album you wish to use for the collage.
Note: You can only load one album at a time.
A. Once loaded the images will be available in a vertical carousel Use the arrows above and below the carousel to view all the images.
6. When you place your mouse cursor over an image a larger thumbnail will appear. When you are ready to add images to the collage, click on the image and it will automatically be added to the collage.
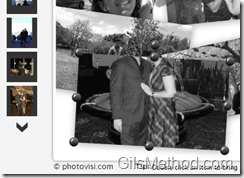
When adding photos to the collage, be careful that your head doesn’t get cut off. I tried playing around with the picture to correct this, but it doesn’t look like there’s an option to correct this. To delete an image, simply click on the Delete button.
Photovisi will automatically resize, crop, and align the picture when added to the collage. If you would like to adjust the image, click on the image and use the yellow handle (B) to rotate the image. You can use the handles on the corners (C) and on the sides to resize the image.
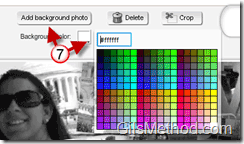
7. You can modify the background at any time. You have the option to use a solid color by clicking on Background color or you can use an image as your background by clicking on the Add background photo button.
8. Once you are done editing your collage, click on the Save button.
9. A pop-over will appear, choose the resolution you would like to use for the collage.
10. Click Upload now! to start the upload process.
Processing collage…
11. Click on the Click here to download you collage! button.
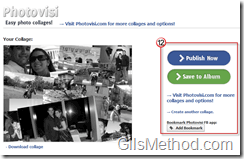
12. You will have several options to save the collage you just created.
- Publish Now – This option will place the collage on your Facebook wall so that you can share it with friends.
- Save to Album – You will be able to save the collage to a Facebook album in your profile (option I chose for this how-to).
- Download Collage (located directly below the collage) – Download the collage directly to your computer.
I went with the option to Save to Album.
13. Choose the Album you would like to save the collage to.
A. Enter a Caption for the image.
14. Click on the Save to Album button.
In a couple of minutes the collage will appear in the album you designated.

