If you have tons of family pictures or great photographs you are proud of and you use Windows 7, then you need to read this. Windows 7 allows users to customize the default themes that it shipped with as well as allowing users to download themes created by others. Part of the customization is modifying the images used as desktop backgrounds, that’s correct images. My favorite Windows 7 feature is the ability to use not one, but multiple images for your wallpapers. You choose a folder or individual images and specify a duration, when the time is up the next image is displayed, the same is repeated for every subsequent image.
This how-to will walk you through the steps to help you customize your Windows 7 wallpaper and save those customizations to a theme you can later share.
If you have any comments please post them below or if you have any questions visit our forums.
Note: I used Windows 7 Ultimate in this tutorial. Windows 7 Starter does not allow for the customization of the Wallpaper/background image.
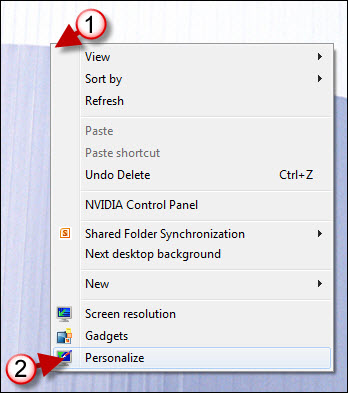
1. Right-click on your Desktop
2. Click on Personalize from the menu.
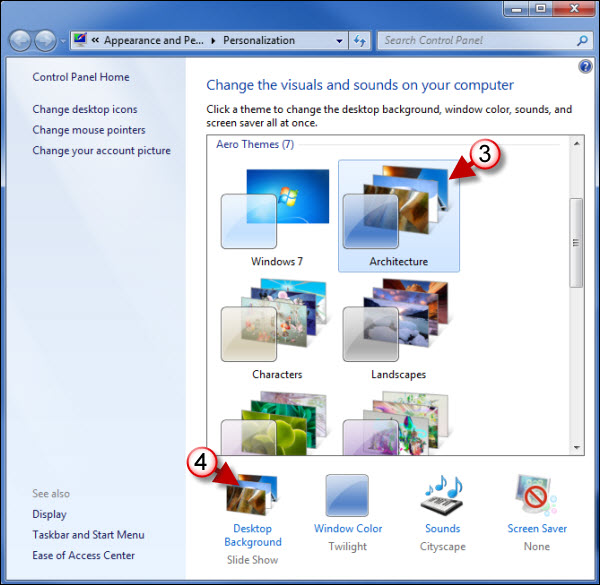
3. Click on a Theme to work on as your starting point. I chose the Architecture theme because I like the default Window colors and sounds.
4. To customize the desktop background, click on the Desktop Background icon located below the themes.
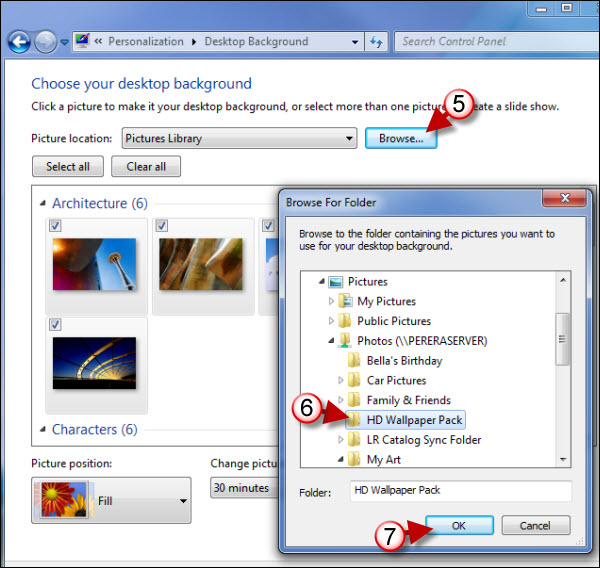
5. In this window you get to choose the images for your background. I will be using an album of pictures I have stored on my server for my background so I will not be using any of the locations listed on the Picture Locations drop-down.
Click on Browse to specify a folder other than those listed in the Picture location drop-down.
6. The Browse For Folder dialog box will appear. Locate and select the folder containing the images you wish to use.
7. Click OK to proceed.
The folder you selected should be displayed and selected in the Picture location drop-down.
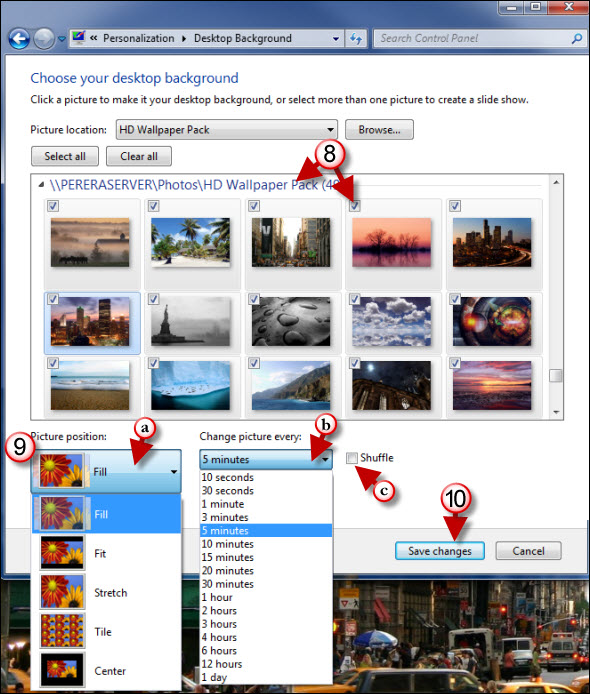
8. You have to options when selecting images, you can select the heading (see above where I clicked on \\PERERASERVER\Photos…) when you click on the heading all images in that folder are selected. The other option is to add a checkmark to the images you wish to select. Select the images you wish to choose.
9. Customizing how the images are displayed.
a. Choose a position (Picture position) from the drop-down menu for the pictures you selected. This will determine how the images behave when displayed as a background.
b. If you choose more than one picture, Windows will automatically change the images in the interval you specify. Choose the interval you wish to use in the Change picture every drop-down.
c. If you wish to display the images in a random order, add a checkmark to the Shuffle checkbox.
10. Once you are satisfied with the changes you made, click on Save changes to proceed.
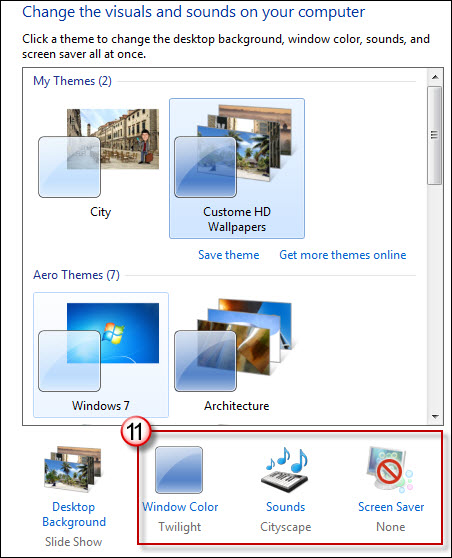
11. Customize the following options.
Window Color – The color assigned to windows and the Taskbar.
Sounds – Allows you to customize the system sounds.
Screen Saver – Allows you to customize the Screen Saver
Once you have completed customizing all the options proceed to the following step.
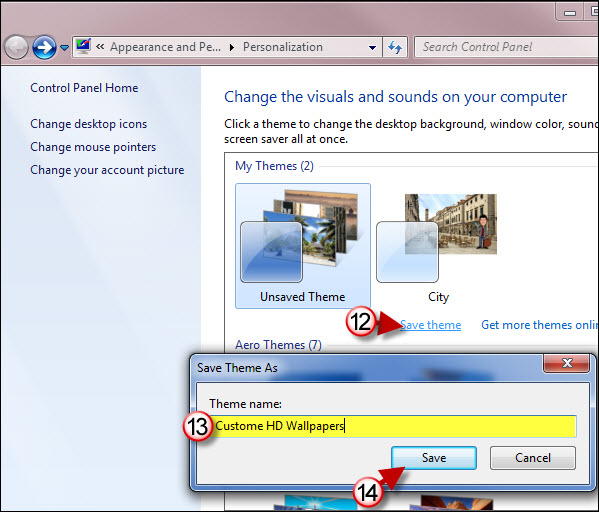
12. Click on Save theme
13. The Save Theme As dialog box will appear. Assign a name to your new customized theme.
14. Click Save to save your customized theme.
You can download Themes from Microsoft by following this link.
