As the user of several desktops and a laptop, Windows Home Server (WHS) makes the chore of backing up computers easy…as long as the computer is on the network and powered on. If you frequently use a laptop outside of your network and ‘forget’ to leave it plugged in and on it probably will not get backed up when scheduled. The Windows Home Server application running on your computer will let you know about your backup delinquency and it will do so on every computer on the network that has the WHS software installed. Luckily WHS provides users with the flexibility and convenience of manually backing up the computer in a couple of steps. The how-to below will walk you through the steps necessary to start a manual backup of your computer with Windows Home Server.
If you have any comments please post them below or if you need help visit our forums.
Note: I used Windows Vista Ultimate and Windows Home Server for this tutorial.

Since you have not backed up your computer in a while…the Windows Home Server Connector icon in the notification are will be red, indicating that you have not backed up your computer.
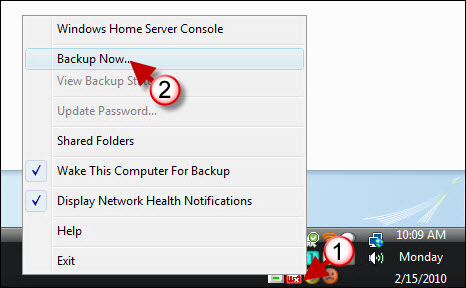
1. Right-click on the Windows Home Server icon located on the notification area.
2. Click on Backup Now from the menu that appears.
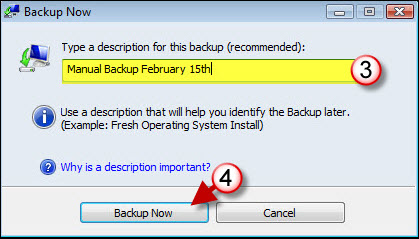
3. Name the manual backup so that you can identify it later should you need to use it.
4. Click on the Backup Now button when you are ready.
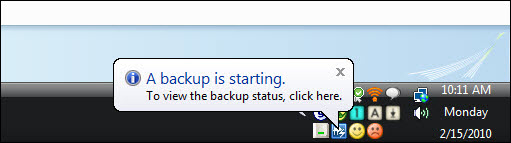
A small bubble will appear indicating that the backup has started. You will notice that the icon changes from Red to Blue, when you are done and don’t have any other issues affecting your network’s health then the icon should be Green.
