
If you’ve ever wanted to author your own DVD’s for family events, travel, and/or your favorite clips, you can now accomplish this using software that is included with Windows Vista. The tutorial below will show you how to create a DVD from movie files on your computer using Windows Movie Maker. If you have any comments/questions, feel free to post them below.
Note: In order to use Windows Movie Maker & Windows DVD Maker you must have Vista Home Premium or Vista Ultimate.
1. Go to your Start menu and click on Windows Movie Maker, this will open the Windows Movie Maker program which came with Windows Vista.
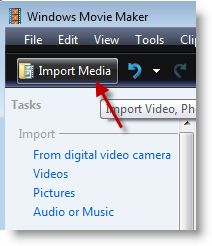
2. I’m assuming that you have some kind of video already stored in your computer, so click on the Import Media button located on the top left.
Note: You can also import video from your video camera if it’s plugged in to your computer (I will cover this in a future tutorial). You can also import pictures and audio files to be used in your DVD. If you would like to create a Photo Slideshow DVD read the instructions on the following tutorial; How to Create a Photo Slideshow DVD.
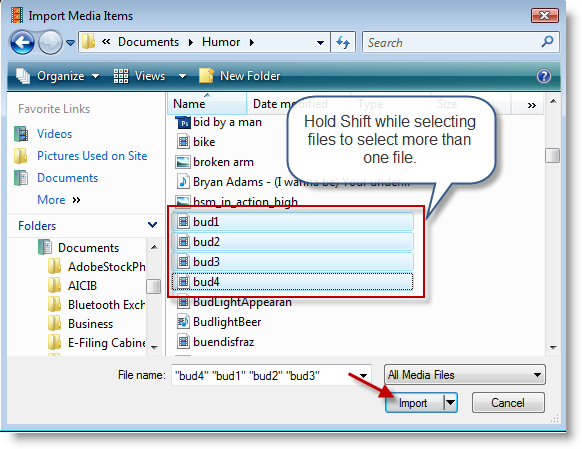
3. Browse to the directory where your video files are located. Select the files to use and click Import.
Note: To select multiple files, hold down Shift while selecting more than one file.
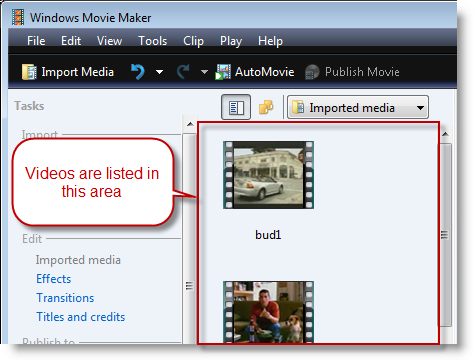
4. The videos are imported into Movie Maker and can now be viewed in the Videos pane.
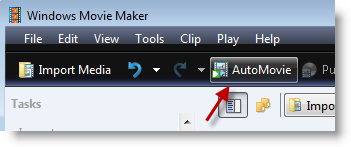
5. Once all of your videos are imported into Movie Maker, click on the AutoMovie button. The AutoMovie options will appear.
Note: You can create your DVD by adding the files to the timeline and adding transitions, the AutoMovie feature does this automatically for you. We will cover this feature (adding transitions and others in subsequent guides).
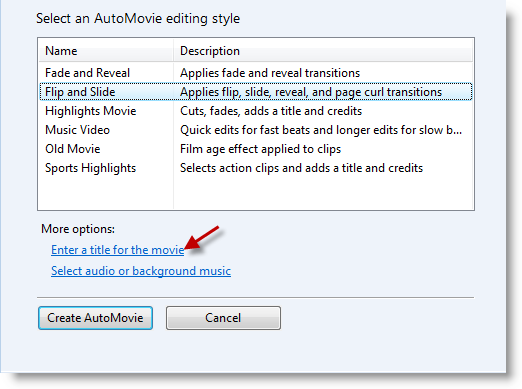
6. The AutoMovie features allows for the selection of multiple editing styles depending on the type of DVD being authored. I chose the Flip and Slide style for this tutorial. Click on the Enter a title for the movie link
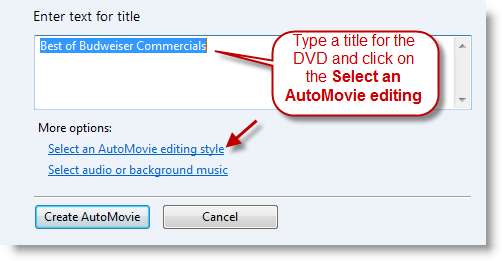
7. On this screen you can specify the Title for your DVD. Once completed, go back to the main menu by clicking on the Select an AutoMovie editing style link.
Note: You can also add background music to the video by clicking on the Select audio of background music link
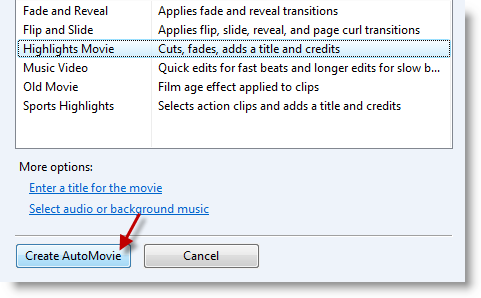
8. Make sure that you selected you AutoMovie styles and click the Create AutoMovie button.

9. Windows Movie Maker will analyze your videos, add them to your timeline, and add the appropriate transitions.
Note: This can take anywhere from 5 minutes to several hours depending on your computer configuration, the type of movie files, and the number/length of the movie files.

10. Once the operation is completed all of your movie files are now in the timeline with the appropriate transitions applied.
Note: You can change the transitions and the order in which the movie clips appear. This feature will not be covered in this tutorial, but will be covered in subsequent tutorials.
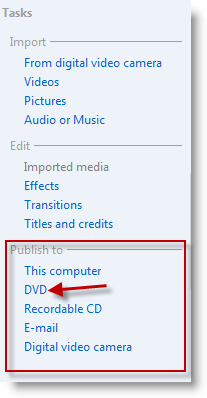
11. Now we are going to Publish your project to a DVD. So click on DVD located under the Publish to section on the left pane.
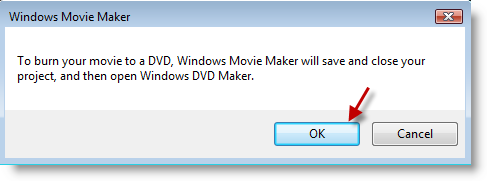
12. Since we have not saved your project you will be prompted by Movie Maker to save before proceeding. Click OK to save the project. The Save Project As window will open.

13. Locate the directory you wish to save your file, name the project, click Save.
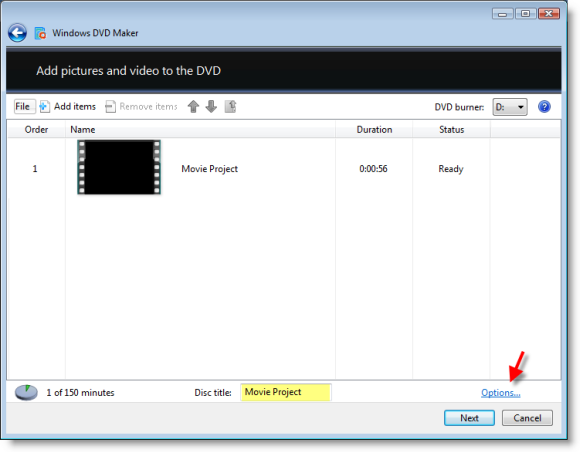
14. You are now working with Windows DVD Maker to burn your DVD movie (don’t worry Movie Maker is still open). Name the disc by entering it in the Disc title and click Options…
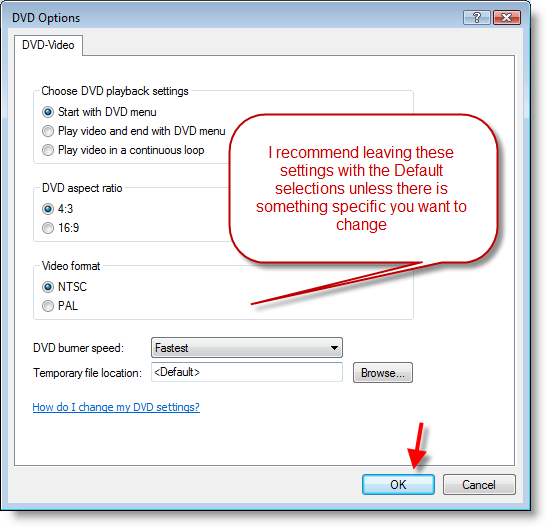
15. You can specify the how the DVD behaves when inserted into a player, you can also specify the aspect ratio and format. I recommend you leave these settings as default unless you have a reason to change these settings. Click OK to continue.
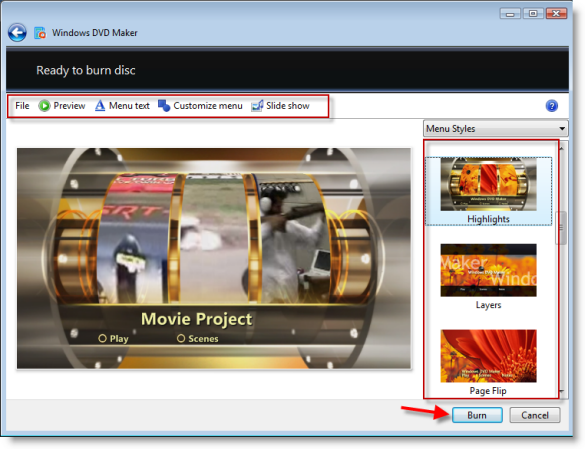
16. You can further customize the DVD by clicking the Customize menu and Menu text buttons (we will cover these options in subsequent tutorials). We will only cover the Menu Styles in this tutorial, select the menu Style you wish to use (you can preview the menu Style when you click on it). Once your Menus Style is selected click on Burn.
Note: If a blank DVD is inserted in the drive then the burning process will proceed, otherwise you will be prompted to insert a blank DVD.
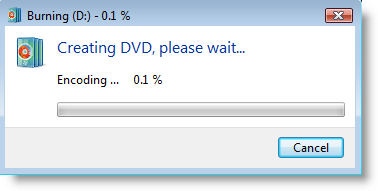
17. Burning will commence, this process may take anywhere from 30 minutes to several hours (depending on the number of pictures and your computer specifications).
Once burning is completed, insert your new DVD into a DVD player and enjoy the show!


