There were very few things I like about Lotus Notes except, for example, the ability to create an appointment (calendar entry) from an email (no, this is not creating an appointment/meeting from an appointment/meeting request email, these are two separate scenarios). When we switched to Outlook from Lotus Notes, I found myself looking for the ability to do this and was surprised when there was no menu or mention of a feature like this in online searches (all that came up were articles on creating appointments from appointment/meeting request emails).
Why is this feature important/neat? This feature automatically copies the message you are creating an appointment for in the comments section of that calendar entry, so all you have to do is enter Date/Time, etc, and add the appointment. Let’s say you get an offer in the email for a local store on a specific date and you want to include the offer details (the email) with your appointment. Instead of creating a new appointment and copying/pasting, adding the location information, etc; you would simply create a calendar entry from an email, which would then automatically add the email to the comments section of that entry, then all you do is add the date/time, etc, and save.
I was glad to find out that the process of creating a calendar entry from an email is merely a drag operation. Please read the two steps below for a simple demonstration of this process. If you have any questions/comments feel free to post them below.
Note: The screen shots below were generated using Outlook 2007and Windows Vista, options and menu locations should be very similar for Office 2003.
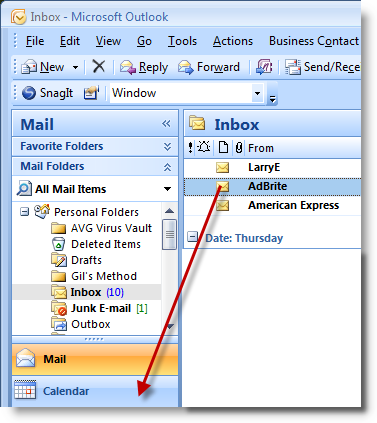
1. You’ve just received an email you want to reference in an appointment you want to create, so, you select the e-mail by clicking and holding while you drag the message to the Calendar icon on the left pane.
Note: If you use the To do pane on the right of the screen (Outlook 2007) you can drag the email to a specific date on the calendar view, when you do this it automatically sets the date for the calendar entry. I recommend this method because it saves the date entry step during the appointment creation process.
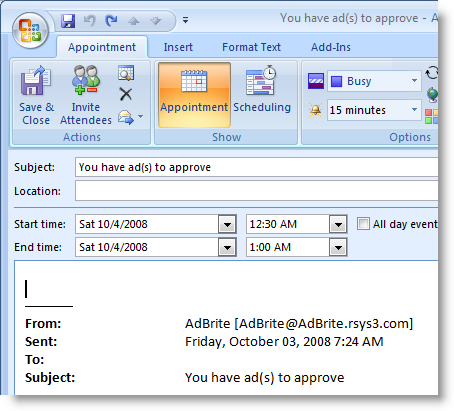
2. Now that you’ve dragged the email to the Calendar, the New Appointment window opens. Set the appointment details (date/time, etc.). When completed click on the Save & Close button.
You’ll note that the entire content of the email is now automatically included in the appointment you just created. You can close that appointment and all of the copied information (the email) will be available by simply opening that appointment/meeting.
