 I have a ton of pictures on my computer and normally use Picassa to manage them, however when I simply want to view them through explorer I find that the thumbnail size generated by windows is not large enough. I set on a mission to find out how to change this setting. It turns out the you can ater the registry and modify the size of the thumbnail, I also found out you can use Microsoft’s free utility Tweak UI to accomplish the same thing without getting your hands dirty. I created a little how-to in order to help those who don’t know how to use Tweak UI to change this setting. Before following the instructions on this tutorial download Tweak UI here. Change your thumbnail size by following these easy steps.
1. Install Tweak UI
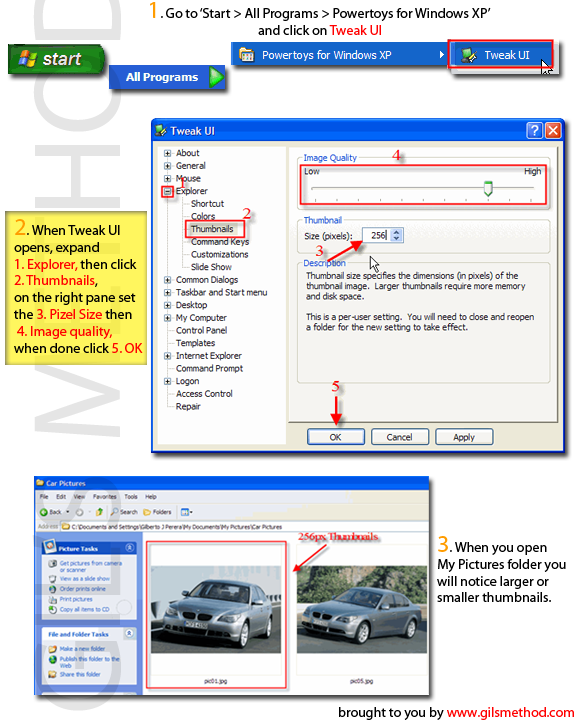
2. From your Start menu go to ‘All Programs > Powertoys for Windows XP > Tweak UI‘
3. Once the program has loaded, expand ‘Explorer’ then click on ‘Thumbnails’
4. On the pane to the right adjust the size of your thumbnail under ‘Size (pixels)’ default is 96 pixels, for this example I set it to 256 pixels
5. Set the ‘Image Quality’ the higher the setting the more resources will be used, but the nicer the picture, click ‘OK’
6. Now Open your ‘My Pictures‘ folder and confirm that the change took place, you are done!
