
The Snipping tool is a great alternative to paid screen capturing software out there. It allows users to select different modes of capture (full screen vs. rectangle), it provides some primitive editing tools (a pen with multiple colors, an eraser, and a highlighter). I can see this as a great tool for tablet users. It doesn’t have all the bells and whistles of paid screen capture tools, but it certainly gets the job done. The guide below will show you how to use the program to make a screen capture and save it. If you have any questions or comments, feel free to post them below.
Note: I used Windows 7 RC1 for this tutorial
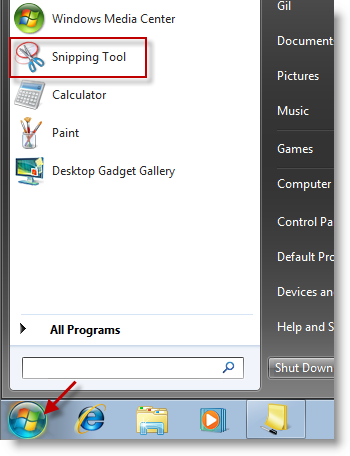
1. Click the Start Menu button (the Orb) and locate the Snipping Tool program, click to open.
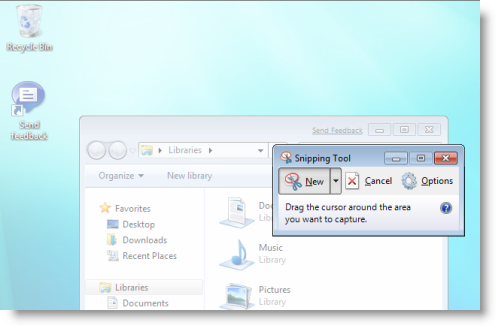
2. The Snipping Tool window will open. To capture a screen shot, click on the New button and select Rectangular Snip from the menu.
You may chose additional Snip types, the options are as follows;
- Free-form Snip: A free-form snip, the name says it all.
- Rectangular Snip: A snip enclosed in a rectangle designated by you
- Window Snip: A snip of a selected window
- Full-screen Snip: A snip of the entire screen
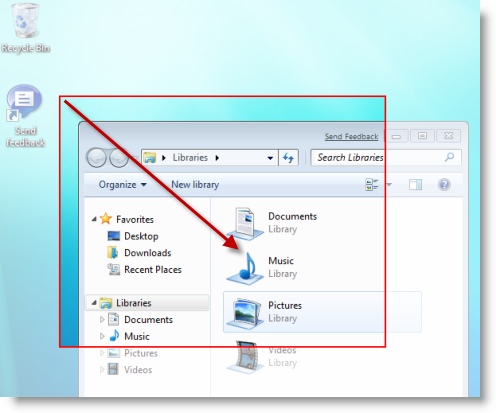
3. Click and drag (while holding down the left mouse key) a rectangle around the area you wish to capture. The red lines indicate the boundaries of the current capture. When you’re happy with your selection release the left mouse key to finalize your selection.
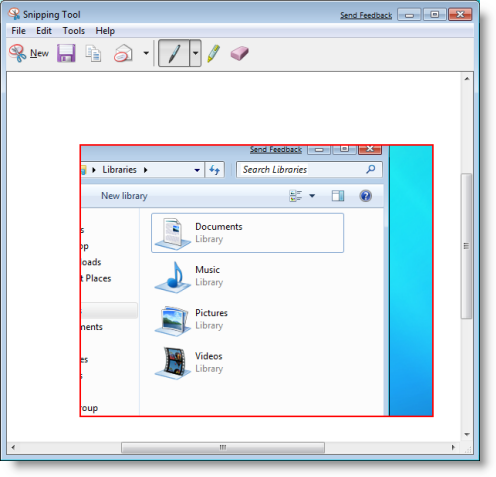
4. Your selection should now appear in the Snipping Tool window. Here you can edit the image by adding notes, highlighting, and erasing.
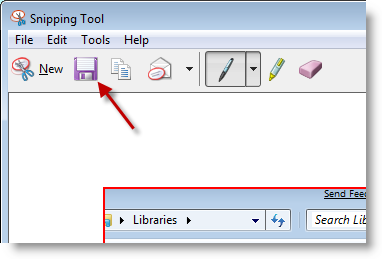
5. To save your screen capture, click on the Floppy button located on the menu bar.

6. Locate the directory you wish to save the screen capture to and click Open to access the folder.
Note: I had created a Screen Captures directory that I use for this purpose
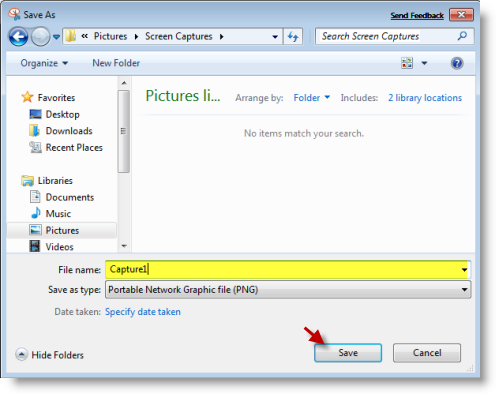
7. Name your screen capture and click Save to save the image to your desired location.


