If you added an email account to your Android phone when you initially bought it or someone at the store did it for you, chances are that you don’t know how to an email account yourself.
Don’t worry, in this guide I will show you how to add an email account to your Android phone, step-by-step. I used a Google account for this guide, but the instructions will apply to most email providers.
Software/Hardware used: Android 2.3.4 running on a Nexus One, keep in mind that these instructions will apply to all Android-powered phones like the Droid, Evo 4G, Droid Incredible, and others.
How to Add an Email Account to Your Android Phone
1. Press the Menu button on the phone.

2. Tap Settings from the menu.
3. Tap Accounts & Sync on the Settings page.

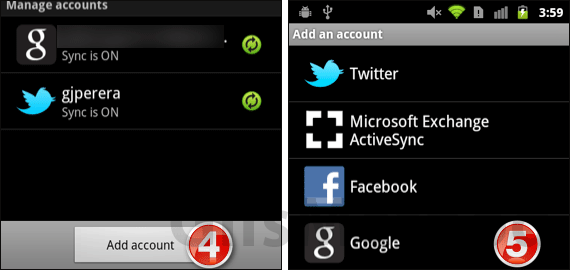
4. Tap the Add account button.
5. Tap Google from the list.
Note: The list of available accounts varies depending on the applications installed on your Android phone. In my case I use Facebook and Twitter on my Android phone, so the account options are available.
6. Make sure to get your Google Account credentials for Step 9 below.

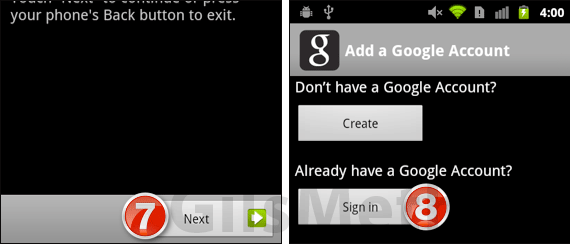
7. You can add more than one Google account to your Android phone. Tap Next to continue.
8. If you need a Google account, tap Create and follow the instructions. If you already have an account, tap Sign In.

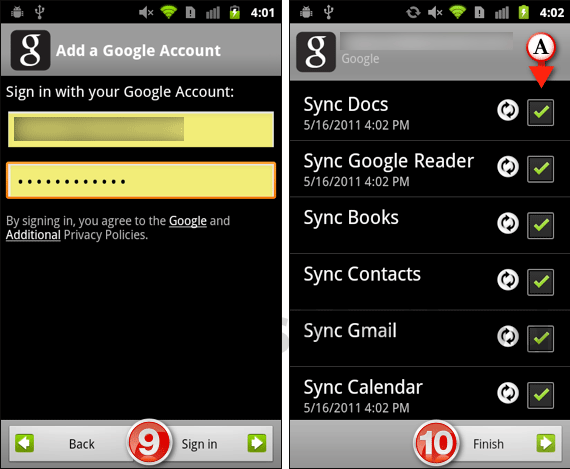
9. Enter your credentials and tap Sign in.
10. Once verified you will be able to select which Google services to sync with your Android phone. Like the account types in Step 5, you will have the option to select which services to sync based on the Apps installed on your Android phone.
Check the services you wish to sync and tap Finish.
The phone will sync with the services you selected. This may take a couple of minutes depending on the number of emails, contacts, and services selected. You will now be able to send and receive messages with the account you just added.
If you have any comments or questions please use the comments form below.


