Wouldn’t you like to be able to access all of your Word Documents, Presentations, Spreadsheets, and even your Notes on the Go? Well, if you use Office 2010 and your Windows Live SkyDrive you’ll have your files securely stored online so that you can access them from anywhere. Gone are the days of additional plug-ins to allow Office to save to Office Live. Now you can use the Save menu in PowerPoint, Excel, Word, and Notebook to save your files from SkyDrive.
For those of you who are not familiar with SkyDrive, let me give you brief explanation. SkyDrive is essentially storage space (currently 25GB) where Microsoft allows you to store and retrieve your personal documents and folders. Since the storage space is located in the cloud, it can be accessed from any computer with an Internet connection and the appropriate credentials. If you wish to learn more about SkyDrive or sign up, follow this link – it’s free.
Back to the how-to, for those of you who have a SkyDrive account and are using the following Office 2010 products; Excel, OneNote, PowerPoint, and Word – follow the guide below to save your files to SkyDrive from within the aforementioned applications.
If you have any comments or questions, feel free to join the community and ask questions.
Note: As of this writing, OneNote support for SkyDrive is still not functioning.
(Click on Images to enlarge)
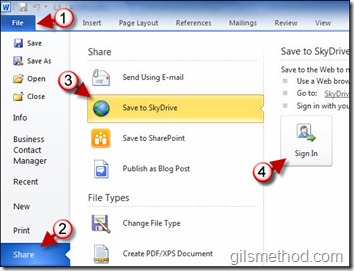
1. Click on File (this will be the same for all Office 2010 applications specified above).
2. Click on Share – This will open the Share Menu.
3. Click on Save to SkyDrive.
4. The Save to SkyDrive section will open. Click on the Sign In button.
Note: If you are already signed in, skip to Step 7
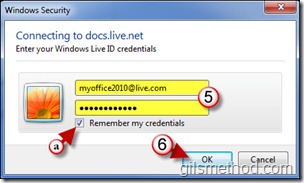
5. Enter your Live/Hotmail credentials.
a. You have the option of saving your credentials by clicking on the Remember my credentials check box.
6. Click OK to connect.
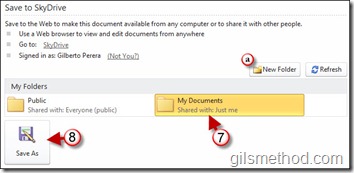
7. Once you have connected to your SkyDrive, you will be presented with the folders that are available. Click on the folder you wish to save your file to.
a. You also have the option of creating a new folder should you need to.
8. Click on the Save As button.
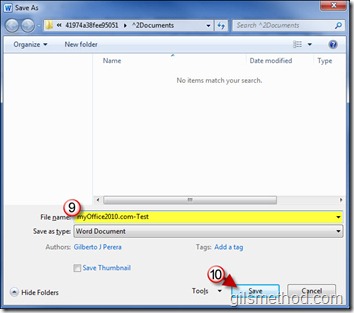
9. The Save As window will appear. Enter the name you wish to assign to the file you are saving.
10. Click on Save to the Save the file in the selected location.
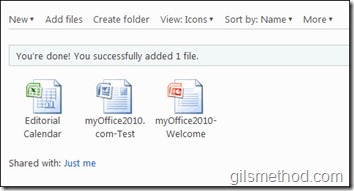
Once saved you should be able to access the saved file using SkyDrive in your browser.
Error Messages
When using this feature you may encounter an error or two…this is expected considering this tutorial was made with the Beta version of Office 2010. Below you will find some of the error messages you may encounter.
Status bar error indicating that the file did not upload and is in queue.
Upload Failed warning – notification bar, click on the Save a Copy button to try again or to save the file locally.
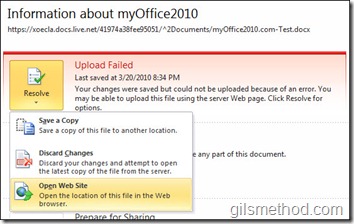
When an upload fails and you click on the File menu you will see the screen above. The File menu will default to Info, which will provide you with several options to resolve the issue.

