Are you running a small business that relies on driving routes to efficiently deliver products and services to your customers? If you’re looking for an inexpensive method to optimize routes you may want to take a look at the RouteSavvy App for Bing Maps. This free app allows you to add addresses to a route using an Excel spreadsheet containing the addresses, manual input and by clicking on the map.
Once you have added the addresses to the map you then click the Optimize button and you will be presented with a fully optimized route based on your criteria. This guide will focus on adding addresses using the map.
Access the RouteSavvy App in Bing
Before you can begin using this awesome app you will need to find it in Bing Maps.
1. Go to http://maps.bing.com on your browser.
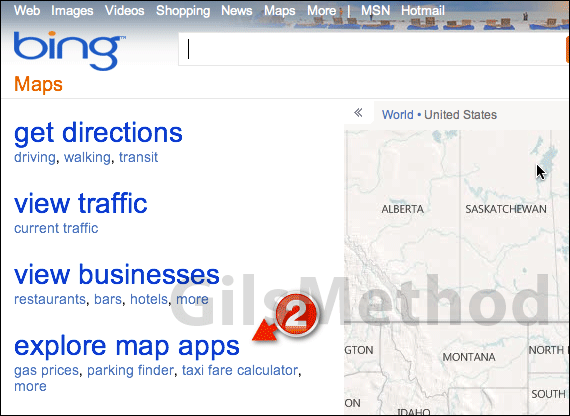
2. Click the explore map apps link on the left side of the screen.

3. Search for RouteSavvy by entering the name in the search box. When the app appears, click the App’s icon to load it. RouteSavvy runs on the browser so you will not need to install additional software to use it.
Note: You may want to bookmark the location of the app for future reference.
How to Add Stops and Optimize Your Route
In this section of the guide I will show you how to add stops to a route using the map. Once we’ve added the stops we will optimize the route based on the selected criteria.
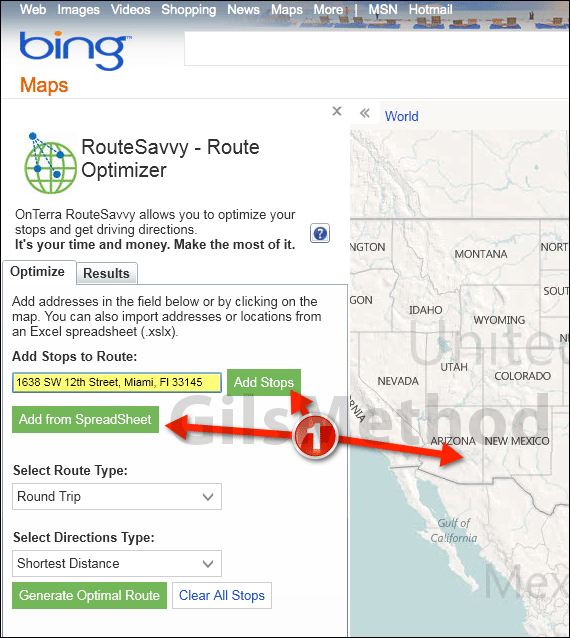
1. You have three methods of adding stops to a route.
- You can enter the address in the text box provided and click Add Stops.
- You can import an Excel file containing the addresses.
- You can click on the map to add a stop.
Add the stops using one of the methods listed above.
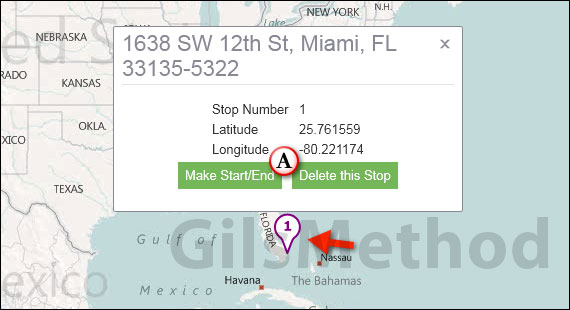
A. When you add a stop it will appear on the map as a location with a number. This number determines the stop’s order in the route. If you wish to delete the stop, click on the pin icon on the map and click Delete this Stop. If you wish to make the stop the start or end of a route, click the Make Start/End button.
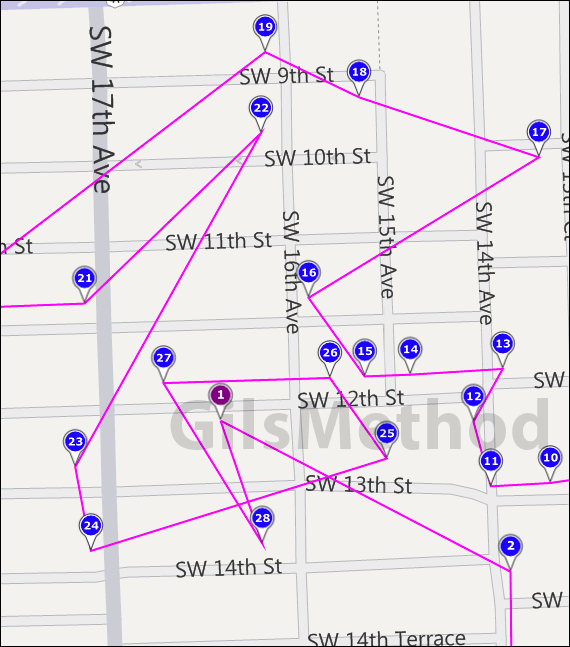
Once you have added all of your stops, your map may look like this…
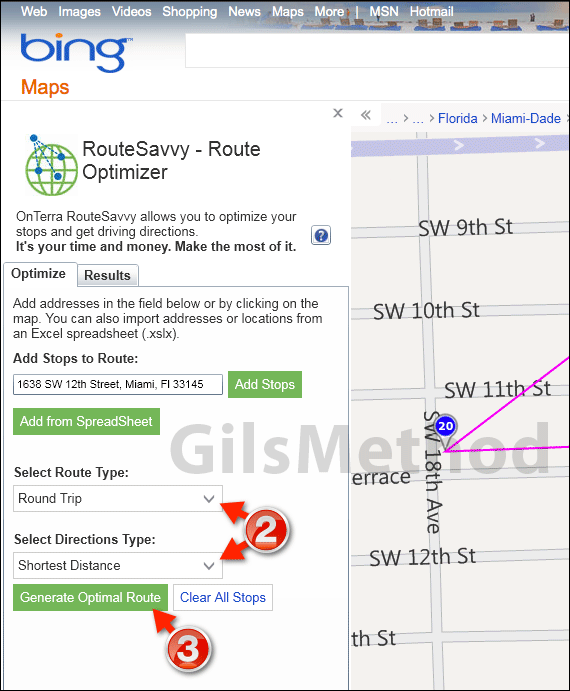
2. When you are ready to optimize the route you will need to set the criteria. Select the Route Type and how directions should be generated.
3. Once you have set the route’s criteria, click the Generate Optimal Route button.
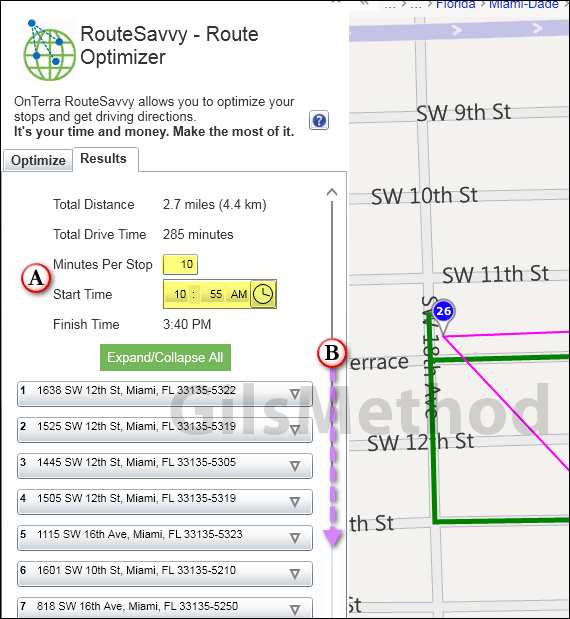
RouteSavvy will generate a map containing the optimized route along with a list containing each of the stops and directions to each.
A. You can customize the route further by setting the amount of time per stop and including when the route begins. This information will provide you with a more accurate picture of how long the route will take to complete and when to expect the route to be completed.
B. To view and print a detailed list with the route’s directions scroll to the bottom of the stops section.
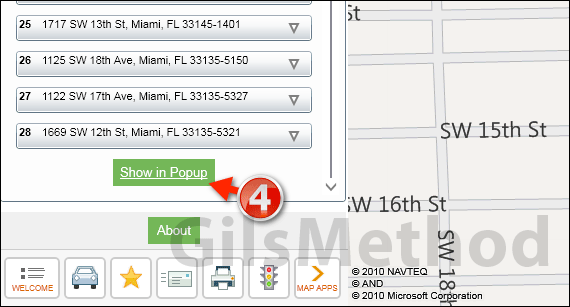
4. Click the Show in Popup button to bring up a separate window containing the information for the route. Now you can print or share the route with your team.
What do you think about RouteSavvy? Is this something you would rely on for your business? Please share your thoughts in the comments section below.


