I came across a program not too long ago that helped me with these two issues and I wanted to share it with everyone. Gizmo Drive allows users to mount ISO, BIN, CUE, NRG, and VHD files using a Virtual CD-ROM drive. This essentially means that the program emulates a physical DVD/CD drive that you can load images onto. In my case I wanted to mount a .VHD (virtual hard disk) file so that I can access the files on that drive. Thus far the software has met that need and done so in an easy to use and stable experience.
Below I will walk you through the easy process of mounting .vhd files (same for ISO, BIN, CUE, and other Image file formats) so that you too may access the files without opening Virtual PC. If you know of an easier way to load VHD files or have any questions please post them below.
Note: I used Windows Vista and Gizmo 2.7
Before proceeding with this guide, download and install Gizmo
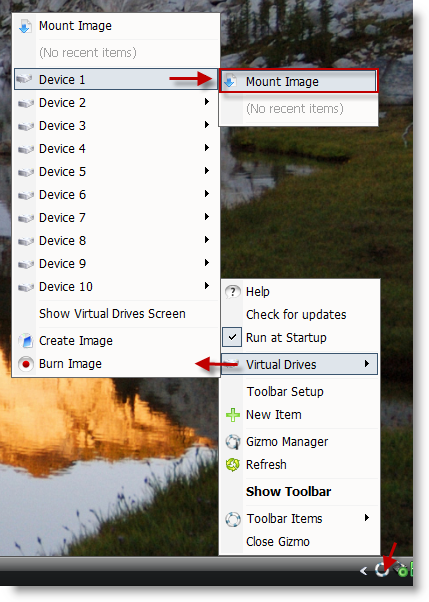
1. Right-click on the Gizmo icon located in the Notification Area on the bottom right corner of the screen. Go to Virtual Drives > Device 1 > Mount Image.
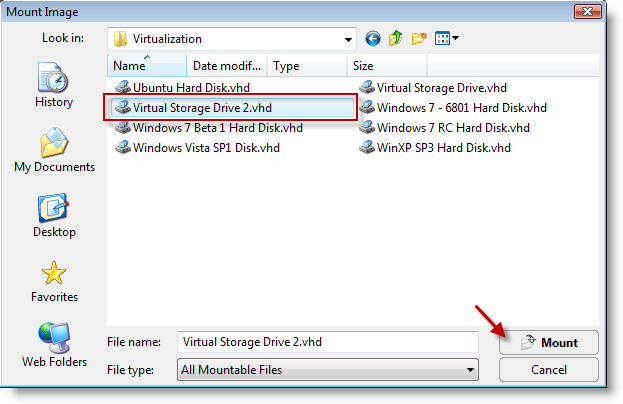
2. Locate the drive (.VHD) file that you wish to mount, select the file and click Mount.

3. Assign an available Drive Letter from the drop-down menu, click OK.
Note: On this screen you are provided with several options;
- Remount image when Windows starts up: Simply mounts the image whenever the computer boots up, I recommended it if you will be accessing this VHD frequently.
- Mount image as read only: When enabled, it will not allow you to write onto this drive. I would recommend enabling this option as a safeguard to prevent anything from being added or deleted to the virtual disk.
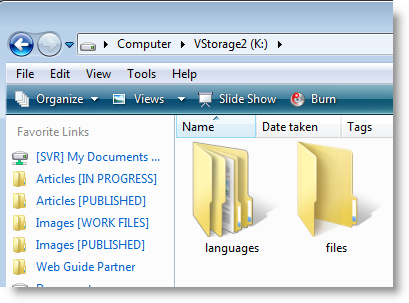
4. Open Start > Computer and locate the drive letter you assigned to your virtual drive and browse freely without a virtual pc.
