
I was asked by a relative to make a DVD of video recordings stored in a JVC Everio camcorder. Unfortunately they had lost the CD that came along with the camera which contained the software that would allow me to edit those files. I thought that it wasn’t an issue I have Adobe Premiere and I should be able to bring those files in and edit them…boy was I wrong. It turns out that the .MOD files that JVC uses are not recognized by Premiere or pretty much any other video editing application out there. It also turns out that this is a widespread issue. While reading through forums that had solutions to this problem I found that the majority of them instructed users to convert the files to a recognizable format (AVI, MPEG, & others) and run an de-interlacing operation to get rid of the interlace in the video. When I realized the amount of files that I had to work on and the number of operations it would take, I thought to myself that there had to be an easier way. I continued searching and found that there is software that can queue the operations and streamline the process, but I still had to burn time in order to actually bring the files over to Premiere. I kept searching.
Finally I came across a comment from one of the visitors to this site. The user noted that the .MOD file was essentially an .MPEG file and that all a user needed to do was change the extension on the file from .MOD to .MPEG. The only problem I encountered was that I had hundreds of files to rename. Another user on the site suggested the use of the Rename command in Windows Command Prompt and voilà! I was able to rename all of the files in one operation and bring them over to Premiere where I was able to edit them and subsequently burn the DVD for my relative.
This seems to be the simplest solution to this problem, a lot of advice out there suggests that the file be converted and deinterlaced which can be time consuming and costly if you have to buy software. If you know of any other way that this can be accomplished please let it be known in the comments.
Note: I included some screen shots that highlight the issue that I came across. I used a JVC Everio HDD Digital Camcorder, Windows Vista, and Adobe Premiere CS 4 for this tutorial.
If you are unable to view the file extensions for files stored on your computer, follow the guides listed below which will walk you through the process of enabling the files extensions.
How to Display File Extensions in Vista
How to Disable/Enable File Extensions in Windows XP
CAUTION: Please make sure you backup your video files before proceeding with this tutorial.
Example of Initial Import using .MOD Files to Demonstrate Error
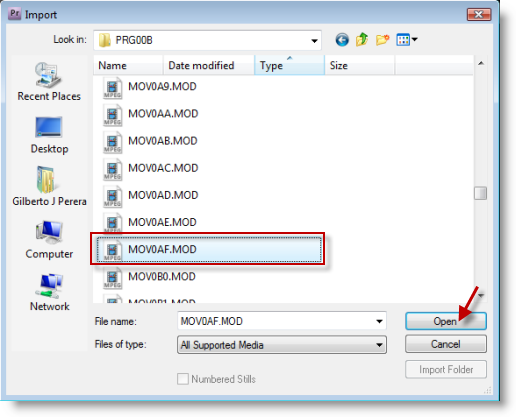
When I copied the files over to my computer, I went to Premiere and imported the .MOD files only to find the message below.
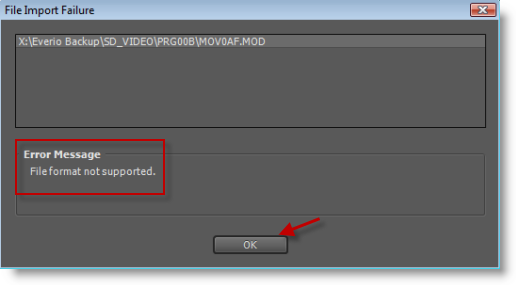
The message stated that the files were not supported and I could not import them.
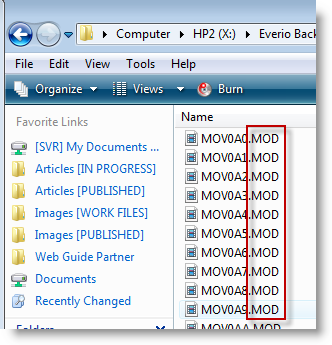
Screen shot highlighting the .MOD file extension
How to Convert .MOD Files Guide
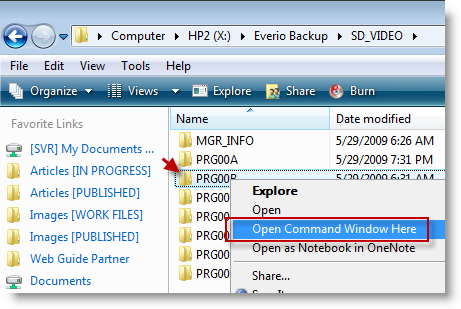
1.Open the directory where the folders containing video files are located. While holding the [SHIFT] key on your keyboard, right-click on one of the folders containing the actual .MOD files and click on Open Command Window Here from the menu.

2. The Command Prompt window will open. In order to change the file extension for all the files contained in the folder selected, type ren *.MOD *.MPEG and hit Enter
Note: The command you are using is ren (rename) and you’re telling the computer to change ALL and ONLY the files with the .MOD extension to the .MPEG extension

3. When the command is completed you should see the next line appear without an error. If you receive an error make sure that you typed the command as written in the previous step. Type exit to close the Command Prompt.
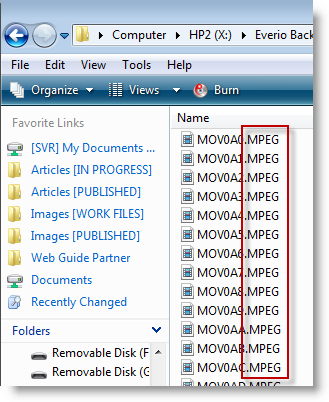
4. You will notice that all of the files now have the .MPEG extension instead of the the .MOD extension.
Note: You will also notice that Media Player will be able to play these files now.
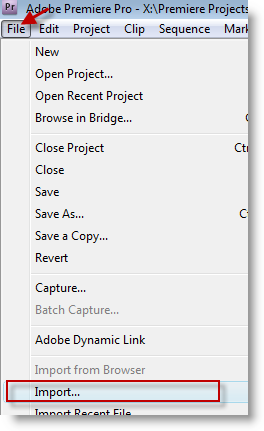
5. Return to the video editing software of your choice (I used Premiere) and import the files. In Premiere click on File > Import…
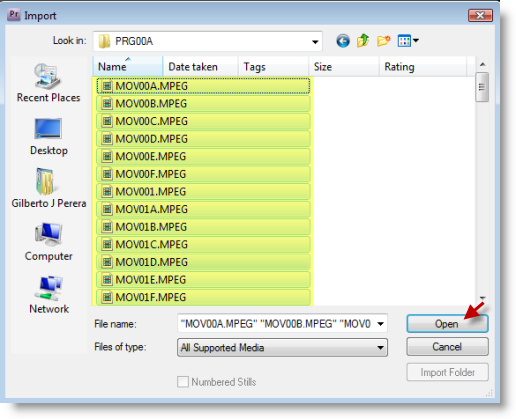
6. Choose the files you wish to import and hit the Open button.
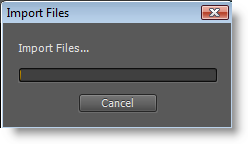
Message while files import…
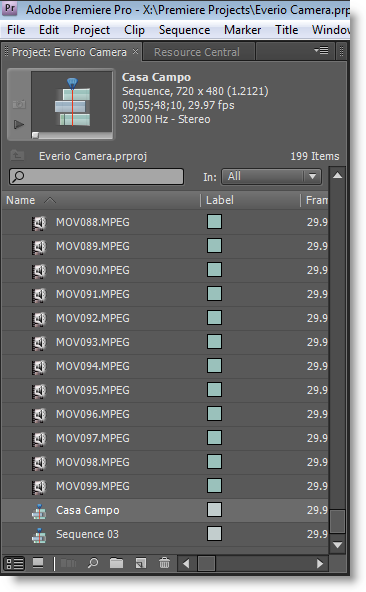
7. A screen shot showing the imported files in the Premiere Assets window.
If you have any questions or comments, feel free to post them below.


