If you’re using WordPress as your blog’s publishing platform and you have yet to enable Turbo, you’re missing out."The speed increase is most noticeable when Internet is slow or on high latency and makes everybody’s blogging experience more enjoyable." When enabled, Turbo essentially uses a local copy of the admin area of your WordPress installation in order to reduce the need for access of these files from your web server. This is great feature for slow/flaky connections or when server bandwidth is limited. The guide below will walk you through the process of enabling it on your browser. If you have any comments or questions please post them below.
Note: I used WordPress 2.71 and Firefox 3.0.10 for this guide.
Before proceeding with this tutorial make sure that you have Google Gears installed, follow this link to install. Once install proceed with the guide below.

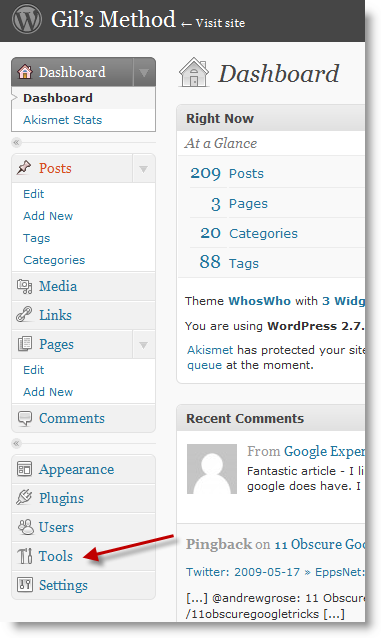
1. Open your website’s WordPress Dashboard (http://www.yoursite.comwp-admin) and click on the Tools link located on the left pane.

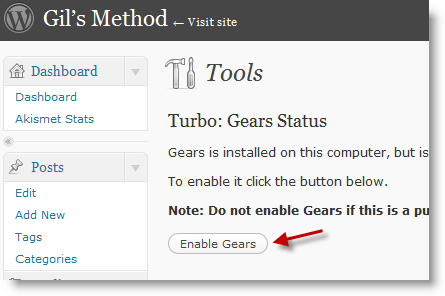
2. When you click on Tools the first thing that will appear is Turbo: Gears Status, click on the Enable Gears button to enable Turbo.
NOTE: Do not enable Gears if this is a public computer. When Gears is enabled it copies files from your server locally for faster access.

3. A Gears Security Warning will open. In order for Gears to operate you must add a check to the I trust this site… check box. Make sure that your WordPress web site is the one listed. Click Allow to proceed.

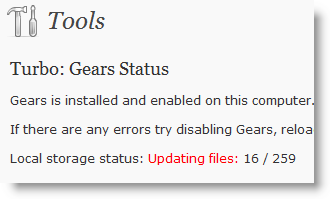
4. WordPress Turbo will use Gears to copy files from your server locally. Allow it to proceed uninterrupted.

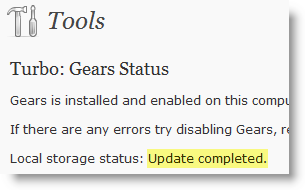
5. Once completed the Local storage status: should read Update completed. You’re done.
More information can be found on the WordPress Support Web site


