Now that you have VirtualBox installed and you created your first virtual machine it’s time to use of some great tools that make the management of virtual machines painless and easy. VirtualBox includes a set tools named Guest Additions. These tools provide additional functionality to the interaction between the host machine and the guest/virtual machine. To help you understand what these tools do and how they can make your life simpler I will describe each one of them and then walk you through the steps necessary to install the Guest Additions to your virtual machine.
VirtualBox includes Guest Additions for Windows, Linux, and Solaris OS environments. Guest Additions provide the following features;
- Mouse pointer integration – When using a virtual machine you will quickly develop an annoyance for the Alt + Ctrl key combination required to "recapture" your mouse pointer once it’s captured by the virtual environment. This tool will seamlessly integrate your host computer’s mouse pointer with that of the guest machine so you can switch from one another seamlessly.
- Better video support – You will be able to use advanced graphics (Direct3D) and you wont have to worry about setting the resolution for the guest computer when you resize the window. This tool will automatically do it for you.
- Time synchronization – This addition will ensure that the time on the guest machine matches that of the host.
- Shared folders – You will be able to exchange files between the host and the guest pc. This is great for folks who are testing software and need access to files located in a specific directory on the host machine but want to prevent the back and forth transferring that occurs when files cannot be shared.
- Seamless windows – This feature allows the mapping of windows on the guest machine to the host making it seem like the windows were running on the host rather than the guest machine.
- Shared clipboard – This is one of my favorite features that VirtualBox supports. The ability to share clipboards between host and guest operating systems makes working with virtual machines that much easier.
- Automated Windows logons – Passing credentials from the host to guest PC, this feature is only compatible with Windows guests.
The process is fairly simple, but I thought I’d cover it here for those of you who may not know how to install the Guest Additions. If you have any comments or questions, please post them below.
Note: I used VirtualBox and a Windows 7 virtual machine for this how-to.
Install Guest Additions
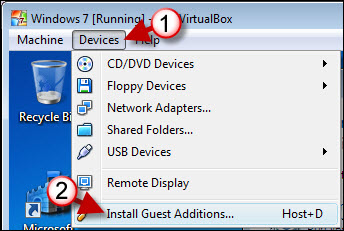
1. With your Virtual Machine running, open the Devices menu
2. Click on Install Guest Additions from the drop-down menu..
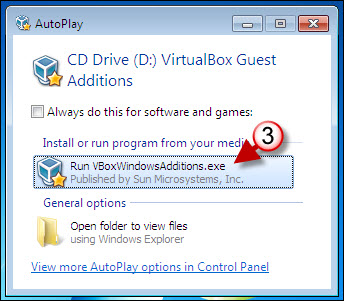
3. If AutoPlay is enabled you will see the prompt above, click on the Run VBox…..exe (depends on operating system running on the guest machine.
Note: If AutoPlay is disabled or the guest operating system does not support it then you need to browse to My Computer (guest/virtual machine) and double-click on the CD/DVD drive. VirtualBox inserts an image on the virtual drive that allows you to install the additions.
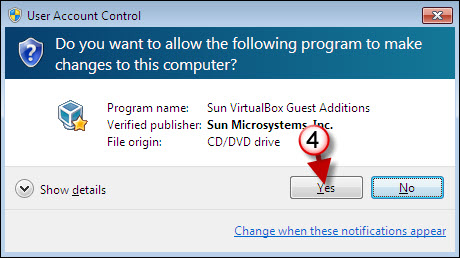
4. If you’re using Vista or Windows 7 you may be prompted by User Account Control about proceeding. Just click Yes to proceed.
Note: User Account Control (UAC) in Windows Vista and 7 prevents software and other things from inadvertently installing themselves on your computer. In this case we know what we are installing so please proceed.

5. The Guest Additions Setup Wizard will open, click Next to proceed.
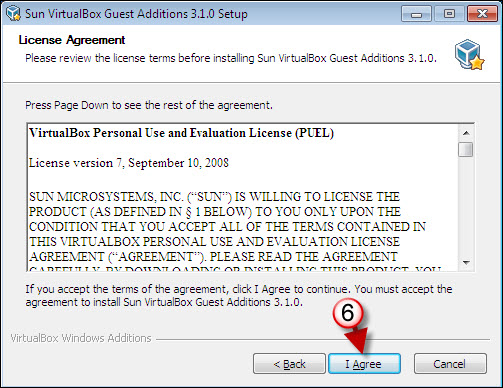
6. Click I Agree to proceed.
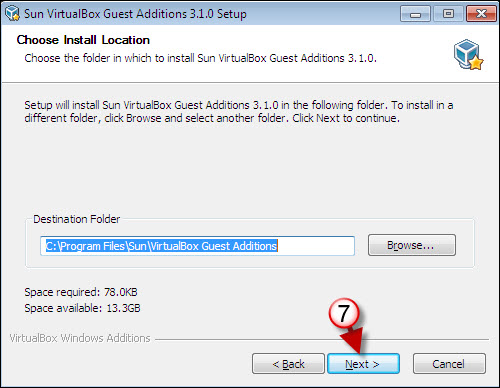
7. If you wish to specify an install location other than the default, click Browse, otherwise click Next to proceed.
Note: Stick to the default installation location.
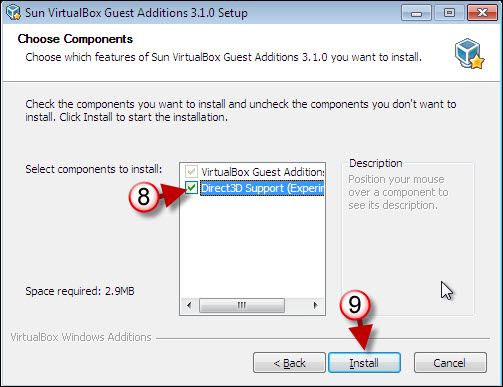
8. Direct3D support enable the use of advanced graphics in your virtual machine, notice that it is still experimental so it’s up to you to select it.
9. Click Install to begin the installation process.
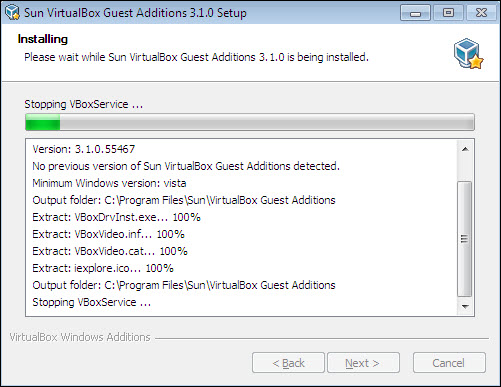
Install progress...
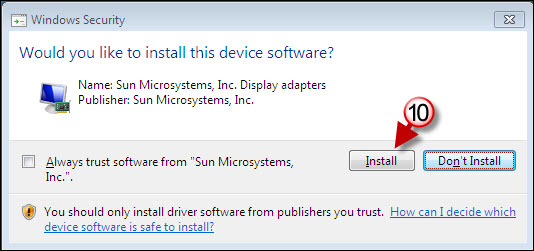
10. If you chose to include the Direct3D component you will get this dialog box, click Install to proceed, otherwise skip to the next step.
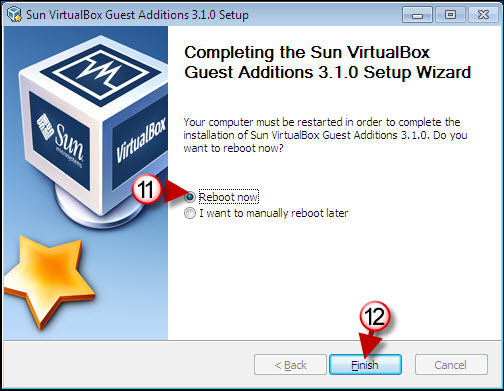
11. You will be presented to restart your virtual machine. If you wish to take advantage of the Virtual Machine Additions right away choose Reboot now.
12. Click Finish to complete the installation and reboot your virtual machine.
