If you are creating a PowerPoint presentation that includes screenshots from your desktop, the easiest method to acquire those screenshots is to use PowerPoint’s built-in screenshot function. In this guide I will show you how to insert a screenshot from your computer as an image you can later edit in a PowerPoint slideshow.
Software/Hardware used: PowerPoint 2010 running on Windows 7.

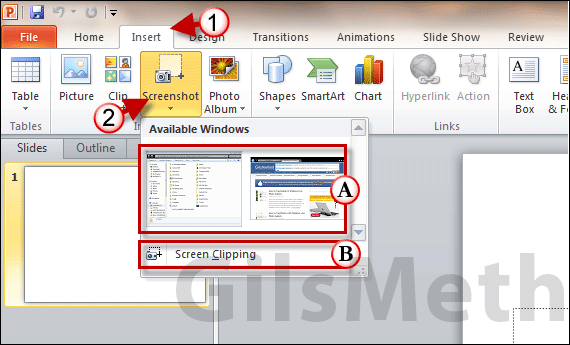
1. Open PowerPoint and click the Insert tab on the Ribbon.
2. Click the Screenshot button on the Images group and a menu will appear.
A. You will notice that a screenshot of all open windows will appear. You can click on one of the screenshots to insert it into the slide or…
B. You can create your own screenshot by clicking Screen Clipping which will allow you select an area on the screen as the screenshot that will be inserted in the slide.

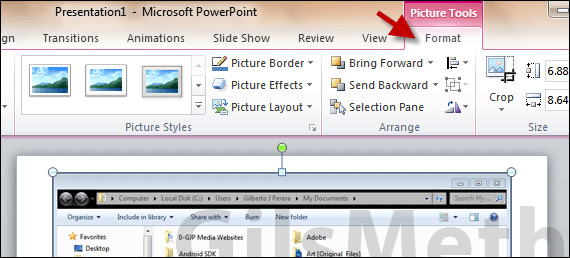
Once the screenshot is inserted it will appear as an image on the slide and you will be able to edit it using the Picture Tools available.
Repeat to insert other screenshots in the slideshow. If you have any comments or questions please use the comments form below.


