Do you need to create great looking business cards for your business, but don’t have the cash? If you’re running the latest version of Word for your Mac, you’ll be happy to know that Word 2011 ships with a series of business card templates that take the guess work out of designing your own business cards. The guide below will show you how to open the template and print your own business cards in Word 2011.
The following guide assumes that you are using regular paper, not perforated paper (Avery, etc.) to print your business cards. If you have any comments or questions please use the comments form below.
Software/Hardware used: Word 2011 running on Mac OS X.

1. Open Word 2011 and select Business Cards from the Templates list.
Note: If the Word Document Gallery doesn’t appear when you open Word, click on the Word Document Gallery on the Word toolbar.
2. Select one of the pre-designed business card templates provided.
3. Customize the selected template using a color scheme from the Color drop-down and the font set from the Font drop-down.
4. When you are ready click Choose to begin customizing the business card.

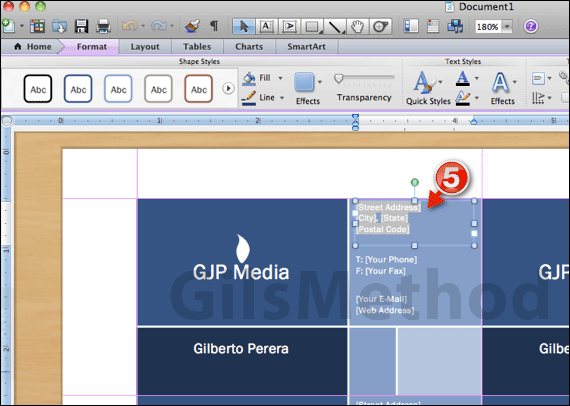
5. Click on the text boxes to modify the information for each. You can also resize the boxes, change the fonts, and colors.

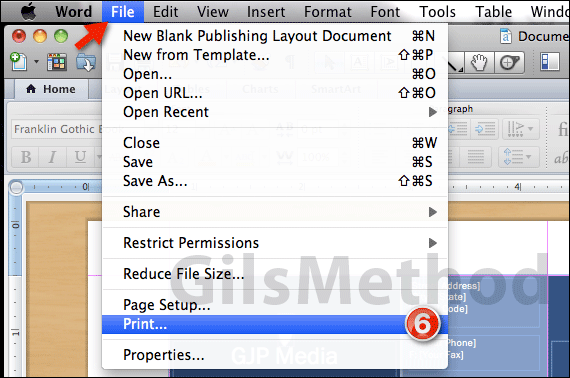
6. When you are ready to print the business cards, click File then Print.

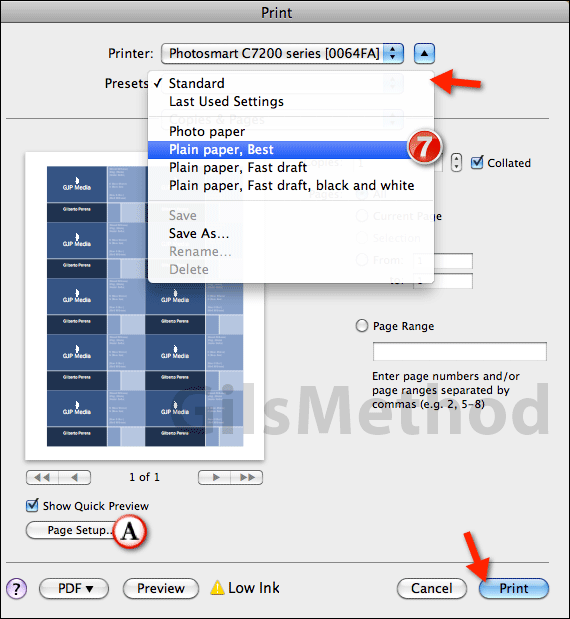
7. When the Print window opens select Plain paper, Best from the Presets list to set higher print quality for your business cards. Click Print when you are ready to begin printing.
A. If you are having trouble with margins or would like to change them, click the Page Setup button and customize the settings.
If you would like to use Avery’s business card templates to print your business cards, check out Avery Design Pro for Mac.


