Sure, you can spend a couple hundred bucks to purchase professional screen capturing software like Camtasia or ScreenFlow, but if you’re looking to create a quick screencast without the bell and whistles, then QuickTime Player may just be your solution.
This guide will show you how to use QuickTime’s built-in recording capabilities to record the screen as a video that can be saved to your computer for later use. If you have any comments or questions please use the comments section at the end of the guide.
Software/Hardware used: QuickTime Player 10 running on Mac OS 10.6.
1. Launch QuickTime Plater from the Applications folder.

2. With QuickTime active, click File and then New Screen Recording.
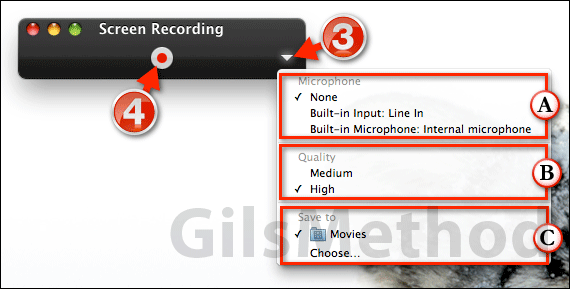
3. When the Screen Recording window appears, click on the small arrow to the right of the window. This will present you with various options before you begin the screen recording.
A. The first section allows you to choose which Microphone will be recorded during the screencast. You can use the Line In on your Mac or the built-in microphone.
B. The second option allows you to select the Quality of the output video. The choices are Medium and High.
C. The last option you have is where the new movie will be stored. The default save location is the Movies folder, but you can set another location by clicking Choose… The save location can be chosen at a later step in the process.
4. Once you’ve configured the recording you can start the recording by clicking the Record button (red button).
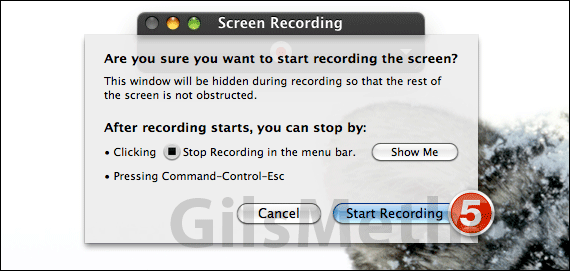
5. You will see a confirmation screen, click Start Recording to begin.

6.Once you are done recording, click the Stop Recording button that appears in the menu bar or press Command-Control-Esc on your keyboard.
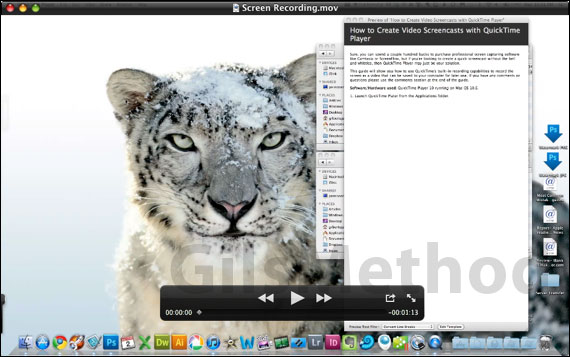
You will be greeted with a QuickTime player window containing the video you just recorded, I recommend taking the video to iMovie to special effects and more, but before you can do that you must first save the video.
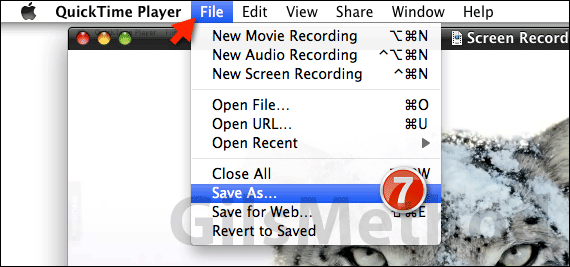
7. Click File then Save As.
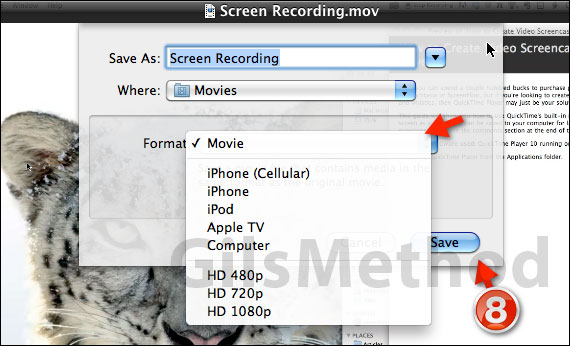
8. Click the Format drop-down to select the format you wish to save the video to. You have several options ranging from iPhone size to HD1080p. Notice that they don’t have an iPad option. Click Save when you are done.
So did you know that QuickTime could also be used to record your screen? I just found out recently, neat feature to keep in the back of your pocket.


