When you insert an animated map in iMovie you will find that you can only use two locations for the animated map clip. What if you want to show a map clip with more than two locations?
In this guide I will show you how to insert multiple locations while editing your the map clips in iMovie so that you can show more than two locations in your videos.
This is great if you want to show the route of your entire trip, the route of the cruise you took for your vacation, and it’s a great way to highlight multiple locations for a video project.
Software/Hardware used: iMovie ’11 running on Mac OS 10.6.
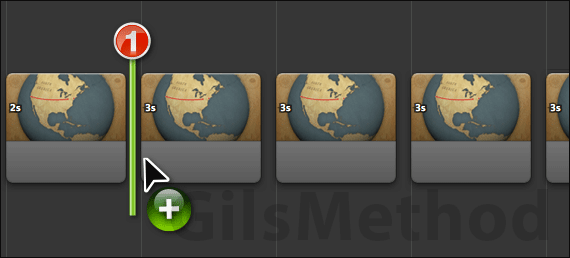
The trick to adding more than two animated map locations in iMovie is to insert multiple map clips in the iMovie timeline.

1. Drag an animated map clip to the timeline after the first clip in the movie. If you don’t know how to add an animated map, check out How to Add Animated Maps to iMovie.
Example of Route: If your route is Rome, Nice, Barcelona, Malaga, Amsterdam. You would create the following movie clips:
- Clip 1 – Rome to Nice
- Clip 2 – Nice to Barcelona
- Clip 3 – Barcelona to Malaga
- Clip 4 – Malaga to Amsterdam
This ensures that you have a nice flowing clip of all the locations on the route.

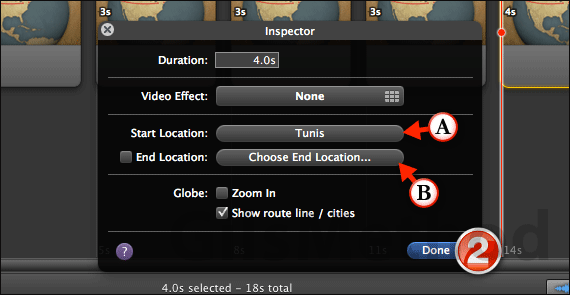
A. When the map Inspector opens you will notice that the Start Location will automatically populate with the End Location of the previous animated map clip.
B. All you have to do is enter the End Location by clicking the Choose End Location… button.
Note: If your animated map is for a cruise itinerary or a list of locations that are close to each other. I recommend you check Zoom In so that the video offers more detail of the locations selected.
2. Click Done to save the changes.
Repeat for each of the stops you wish to add to the movie clip and pretty soon you will have a fully animated globe with stops to each of the locations you designate.
If you have any comments or questions please use the comments form below.


