Do you have a ton of recorded TV shows you can’t seem to find the time to watch? How about TV shows you record for the kids? Wouldn’t it be nice if you could put those recordings on a DVD you can take with you on your next flight or road trip with the kids? With Windows Live Movie Maker and recordings from Windows Media Center you will be able to do just that. This method differs from the built-in Windows Media Center option in that you can remove the commercials, add title screens, and more. So if you’re looking to enjoy uninterrupted TV shows on DVD, check out the instructions below.
Software/Hardware used: Windows 7 Ultimate and Windows Live Movie Maker.

1. Open Windows Live Movie Maker and click Add videos and photos from the Ribbon.
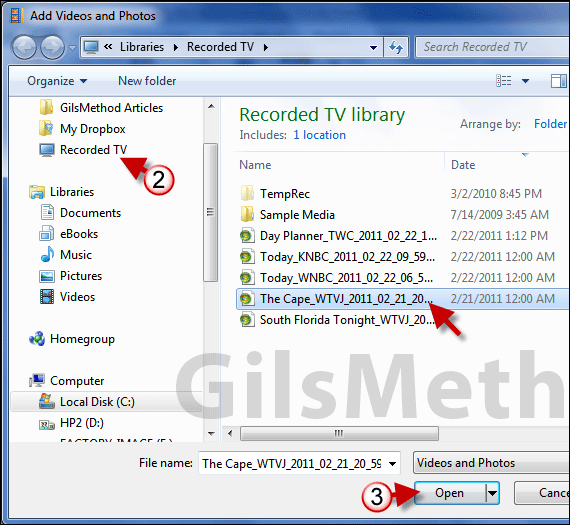
2. Click the Recorded TV Library on your computer.
Note: The Recorded TV Library is automatically created when you record TV content using your Windows 7 computer.
3. Select the recording you wish to copy to a dvd and click Open.
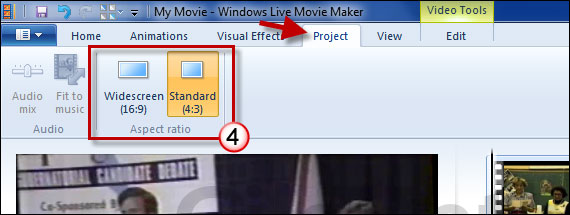
4. Click the Project tab and select the Aspect ratio you wish to use for the video you are recording. The two aspect ratios are Widescreen and Standard.
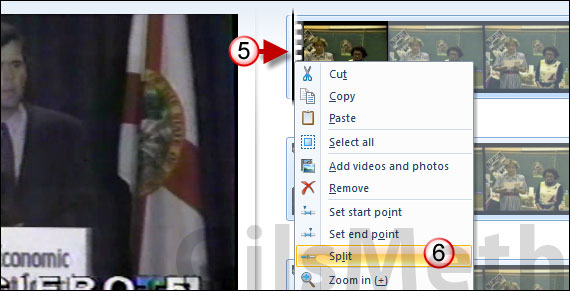
5. Once you’ve selected the projects aspect ratio, the next thing you can do is use the Split tool to edit the TV show to remove unwanted footage (commercials…). Place the playhead (black line) where the footage you wish to edit begins.
6. Right-click the playhead and click Split. This will split the video in the location you selected. Repeat the same for the end of the footage you wish to remove. Once you are done you should have three clips. Video (footage you want to remove) and the rest of the video.
Click the footage you wish to remove and press the Delete key on your keyboard. You can use transitions to blend the split clips if you wish.
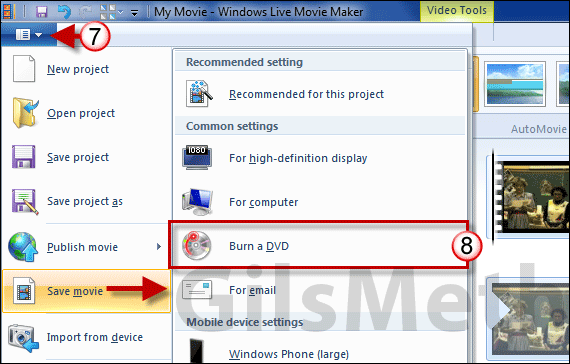
7. When you are ready to burn the DVD, click the Movie Maker button then Save movie.
8. Click Burn a DVD from the menu.
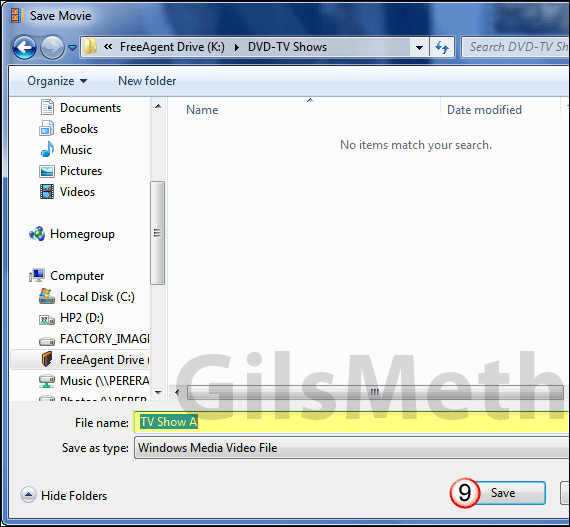
9. When prompted, name the video file, choose a save location and click Save.
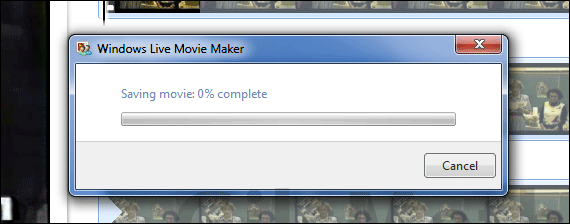
In order to burn the DVD, Movie Maker first creates a video file that is compatible with DVD Maker and will be used in the next step. This portion of the process may take anywhere from a couple of minutes to a couple of hours depending on your computer and the length of the video.
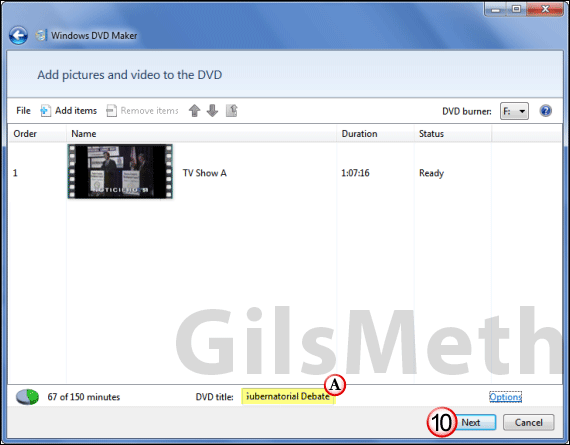
A. Enter the DVD’s title. This will appear on the menu when the DVD is inserted into a DVD player. Click Next to proceed.
Note: You can add more videos and images to the DVD by clicking Add items.
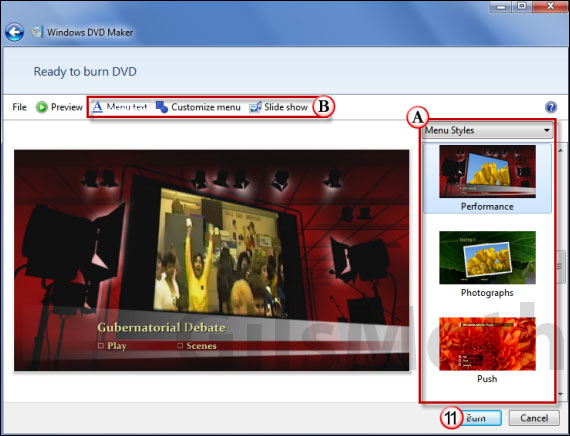
A. Choose a Menu Style from the list. This will customize how the DVD appears when it is loaded.
B. If you wish to have more control over the look the feel of the menu, use the tools (Menu text, Customize menu, and Slide show) to change the how the menu looks and preview the changes.
11. Click Burn when you are ready to burn the movie to a DVD.
If you don’t have a blank DVD in your computer you will be prompted to insert a blank DVD.
The DVD creation and burning process may take some time, it all depends on your computer’s speed and the length of the videos. If you have any comments or questions please use the comments form below.
When the DVD is ready


