While not in use, the iPad will automatically lock itself in two minutes, the default Auto-Lock setting. If you find that two minutes is too short of an interval and you find that Auto-Lock interrupts what you are doing on the iPad you can always change it.
Auto-Lock Options
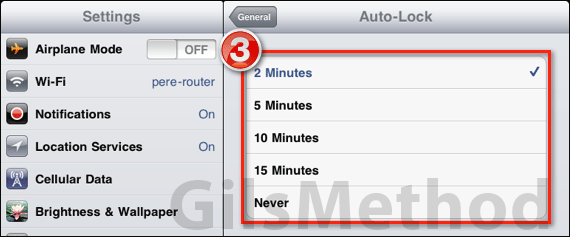
In this guide I will show you how to change the Auto-Lock’s delay on the iPad. iOS offers the following options for this feature:
- 2 Minutes (default value)
- 5 Minutes
- 10 Minutes
- 15 Minutes
- Never
As far as I can tell from the documentation, these options are hardcoded, meaning that you can set Auto-Lock to three minutes or something other than the options provided.
How to Change the Auto-Lock Delay on the iPad
Software/Hardware used: iPad 2 running iOS 4.3.
1. Tap Settings on the iPad’s Home screen.

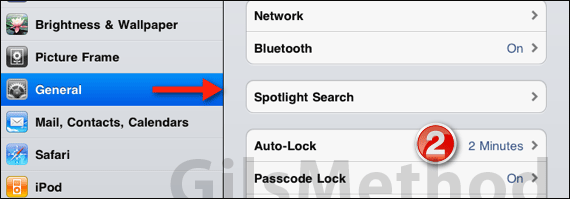
2. When Settings opens, tap General and then tap Auto-Lock.

3. A list with the available time delays for Auto-Lock will appear. Use the one the best suits your iPad usage and press the Home button to exit Settings.
Never Set Never
It is always good to have a short auto-lock delay because it will ensure that if you leave the iPad unattended without manually locking it, that someone will not be able to access your information.
If you are concerned about the auto-lock feature interrupting your movies or games, there’s no need to worry as this feature is disabled when those kind of apps are active on the iPad.
If you have any comments or questions please use the comments form below.


