I’m away from my Windows 7 desktop this weekend and I promised myself I would write several Windows 7 how-to’s, unfortunately I’ve been dreading the upgrade process on my laptop so I’m going to end up using VirtualBox to run Windows 7 so I can write these articles. I’ve already prepared the how-to on setting up a virtual machine in VirtualBox that will be published tomorrow, the how-to below will walk you through the process of adding a CD/DVD image to a Virtual CD/DVD drive so that, in my case, I could install Windows 7 and access said drive from the virtual machine I created.
The process is fairly simple, but I thought I’d cover it here for those of you who may not know how to get to the right place in VirtualBox right away. If you have any comments or questions, please post them below.
Note: I used VirtualBox and a Windows 7 image for this how-to
Add a CD/DVD Image to a VirtualBox Machine
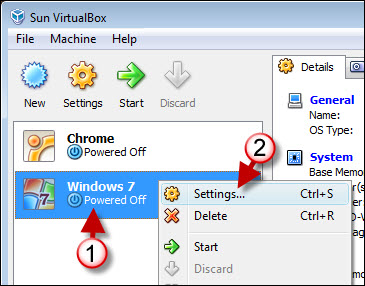
1. Right-click on the machine you wish to add the image to.
2. Click on Settings
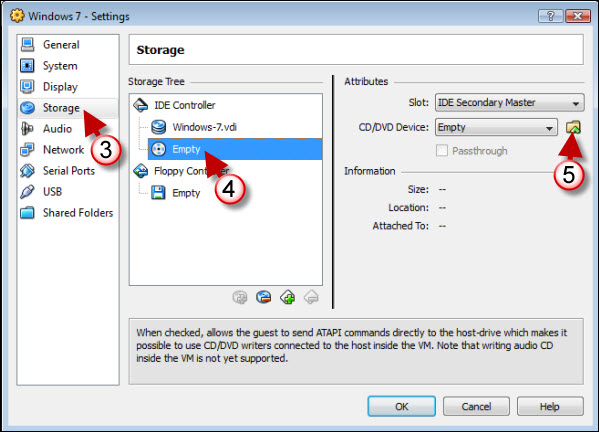
3. Click on Storage located on the left pane
4. Under IDE Controller click on Empty (the Disc Icon)
5. Click on the small folder icon located to the right of the CD/DVD Device drop-down.
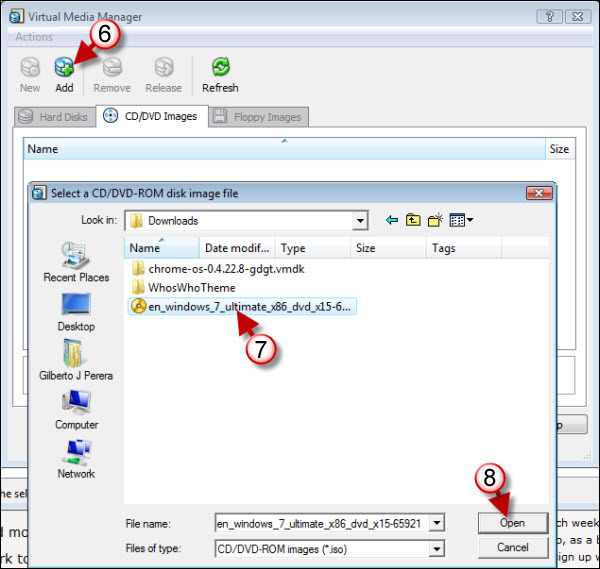
6. When the Virtual Media Manager dialog box opens, click on Add – a separate dialog box will open
7. Another dialog box will open so that you can locate the image file you wish to add. Click on the image file.
8. Click on the Open button.
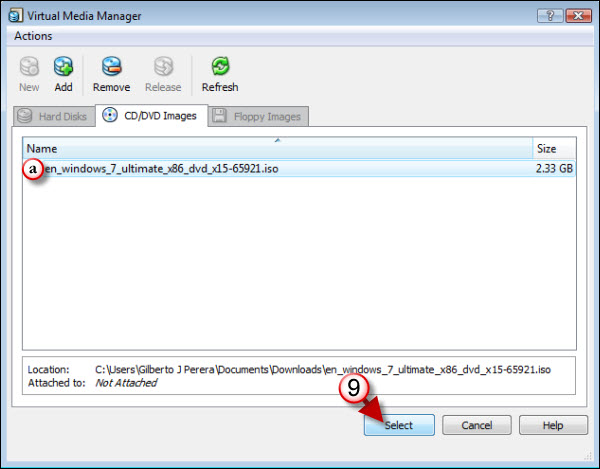
9. When you return to the Virtual Media Manager dialog box, ensure that the correct (a.) image is selected and click Select.
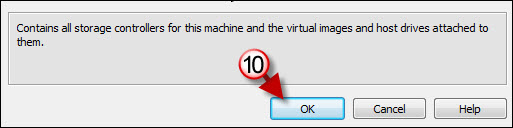
10. Click OK to close the machine Settings dialog box and you are done! The CD/DVD image you selected will now be accessible to your virtual machine.
