Last week I showed you how you can use Word 2007 and the soon to be released Word 2010 to create blog posts for your favorite blogging platforms. This week I will show you how to create a shortcut to the blog post template, so that you are ready to blog without having to hit the Publish as Blog Post button.
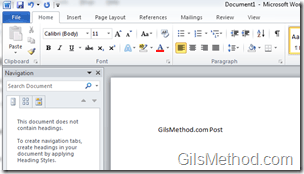
Normally when you open Word you will see the default layout that can be used to edit regular documents or blog posts (see below).
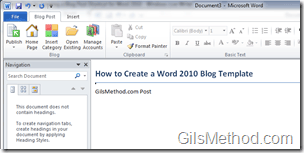
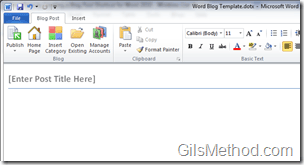
When you press the Publish as Blog Post button, the Office Ribbon changes to provide you with the blog posting tools that Word offers (see below). This change only occurs after pressing the Publish as Blog Post button otherwise the default set of tools will be displayed.
To save time and get you blogging right away we can create a Word template in Word that will always Word to prepare your document to be published the Office Ribbon changes so that the blogging options are available (see below).
In this post I will show you how to save a blank Word document that can be used as a blog post template so that the Office Ribbon only displays the Blog Post tools.
Note: Before saving the blog post template make sure that you hit the Publish as Blog Post button. Follow the instructions in How to Blog Offline with Word 2010.
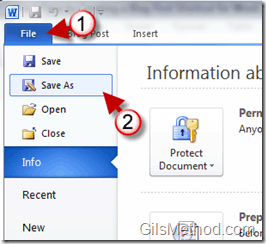
1. Click on File.
2. Click on Save As.
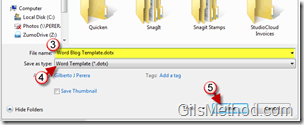
3. Name the file you are about to save.
4. Choose Word Template (*.dotx) from the Save as type list.
5. Click Save.
Next time you open the template file it will default to the Blog Post tools and layout.

