Do you have a large library of movies, music, and pictures that you would love to access securely while away from home? How about creating your own personal Netflix service? If so, you will want to follow the guide below which will show you how to configure Windows 7 and Windows Media Player so that you can stream content from your computer at home to your laptop while away.
The method described in this guide uses Windows Media Player’s streaming functionality in conjunction with your Windows Live/Hotmail ID to stream content outside of your home network. The use of a Windows Live/Hotmail ID ensures that access to your content be limited to individuals you have authorized. To ensure that everything is done correctly, I recommend that you read the guide in its entirety before performing the steps described.
Software/Hardware used: Two Windows 7 Ultimate PC’s.
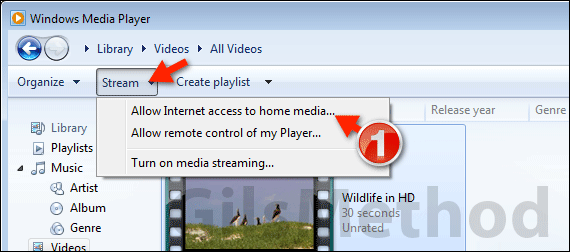
1. Open Windows Media Player and click Stream then Allow Internet access to home media.
Note: When you enable this feature, your computer will no longer go to Sleep automatically. This ensures that you can access your content remotely without having to worry about the computer going to sleep.
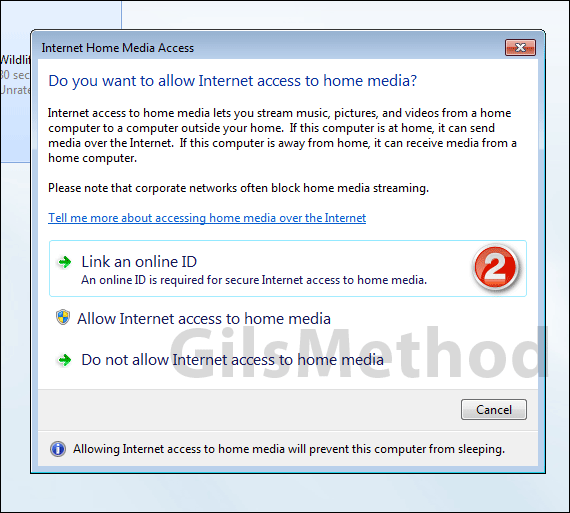
2. A dialog box will appear asking you to associate an online ID so that your content can be accessed securely. This ensures that only those who are permitted to access your content (you) can do so securely.
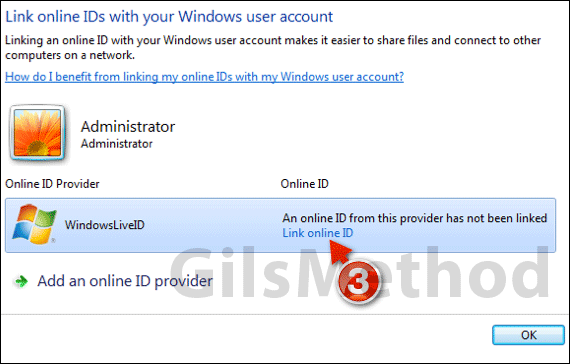
3. Choose an Online ID provider. I recommend that you use Windows Live ID as your Online ID provider for two reasons, it’s secure and backed by Microsoft. If the Windows Live ID option does not appear, please download and install Windows Live ID Sign-in Assistant 7 from Microsoft.
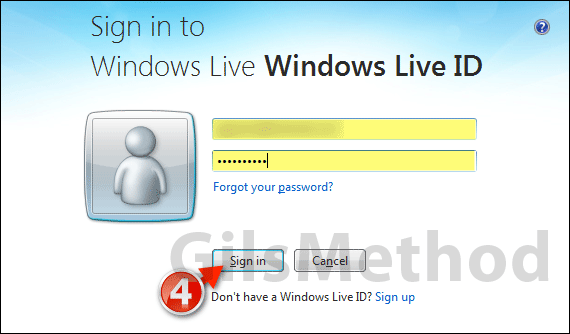
4. When you select Windows Live ID as your Online ID provider you will be asked to enter your Live/Hotmail credentials and Sign in.
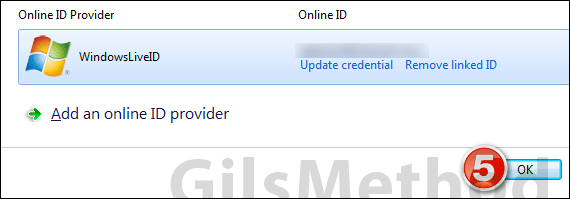
5. Once you have confirmed that you are signed in (Update credential and Remove linked ID links will appear when confirmed), click OK.
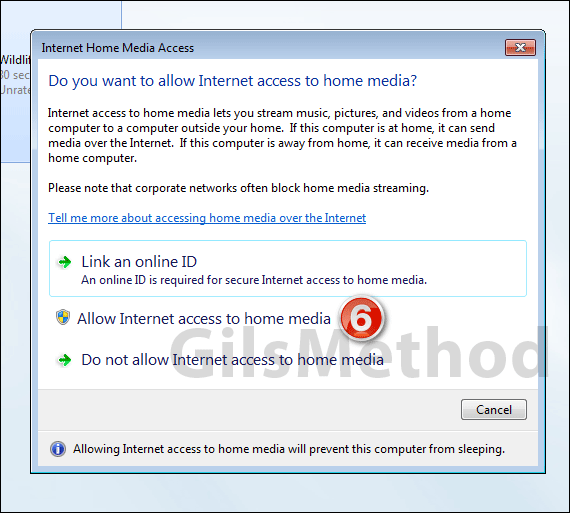
6. You will be taken back to the Internet Home Media Access dialog box where you will click Allow Internet access to home media.
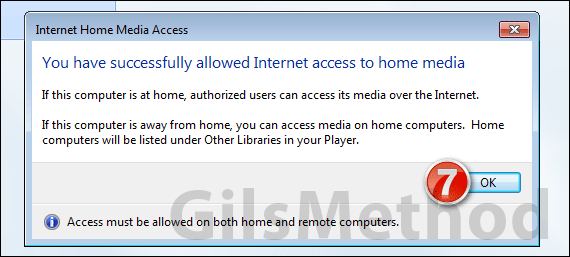
7. Click OK to finish setup.
Important: You will need to repeat the steps above on the computer you wish to access the media from, so keep in mind for this to work correctly both the streaming computer and the computer viewing the content remotely will need to Allow Internet access to home media.
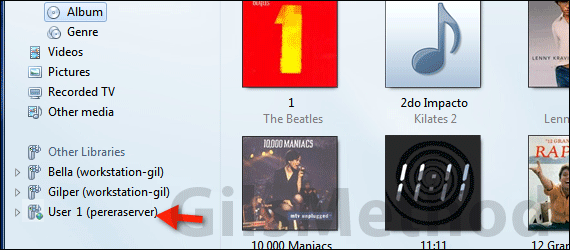
Once you’ve configured both computers you will be able to access all of your content from any location, so long as you have an internet connection. The shared libraries will be listed under Other Libraries on the left pane in Windows Media Player. Click to expand the library so that you can access all of your content remotely.
If you have any comments or questions please use the comments form below.


