This is the third part of a larger series that I will be publishing in the coming weeks covering my switch from Outlook to Google’s online services. The intent of this series is to help others who have found themselves wanting more out of their email and calendar applications. This guide specifically covers how to use Google’s new Tasks feature. I will briefly describe some of the features of the new task feature. If you have any tips to share, please post them below.
Note: If you’ve enabled the Tasks lab in Gmail or iGoogle, you’ll have access to the same lists in Calendar. Instructions to enable in Gmail are at the end of the guide..
To view the how-to describing the process for transferring appointments from Outlook to Google Calendar, follow this link.
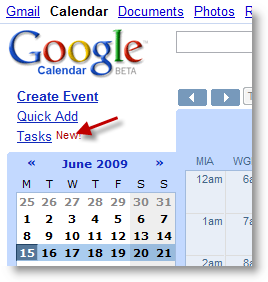
1. To access your Tasks, click on the Tasks link located directly below the Google Calendar logo.

2. The Tasks list will open next to your calendar.
Getting Around Tasks
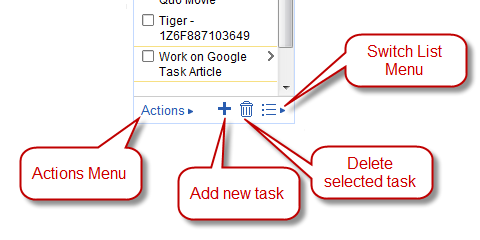
The Actions Menu allows you to perform certain actions (see below). You can Add a new task by clicking on the + sign, you can also delete a task by clicking on the trash can icon. To manage your task lists (if you have more than one), click on the Switch Listt icon to open the menu.
The Actions Menu
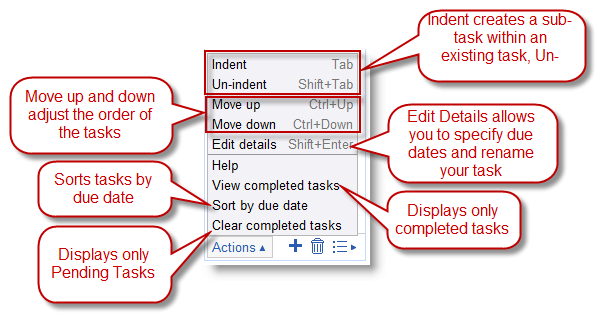
The actions menu offers you a series of activities. You can set the priority of tasks by changing their location using the Move up or Move down action. You can also make create sub tasks which are very helpful when working with a project that requires more than one action item. You have two options when viewing your list, you can view completed tasks by clicking on View completed tasks from the menu or to view pending tasks click on Clear completed tasks (don’t worry the completed tasks will not be deleted). You can also sort the list by due date if assigned and Edit the task details (due date, notes, etc).
Editing Task Details
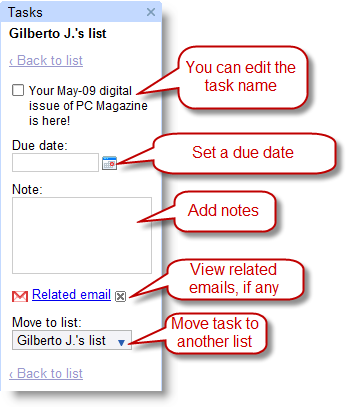
Managing Your Tasks List
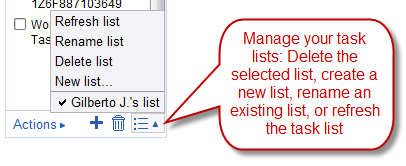
If are involved in multiple endeavors then it would probably be prudent to keep your tasks separate. You can accomplish this by creating different tasks list for each endeavor. You would use the Switch list menu to manage these lists. From here you can switch, edit, delete, and rename all of your task lists.
Enable Your Tasks List in Gmail

1. Log on to Gmail and click on the Settings link located on the top right corner.
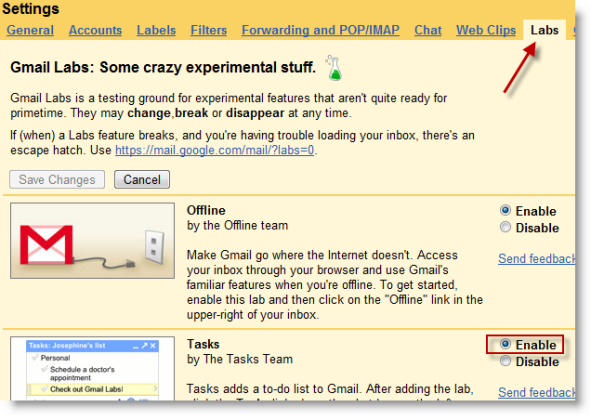
2. When the Settings window opens, click on the Labs tab. Locate Tasks and click on Enable. Save the changes.
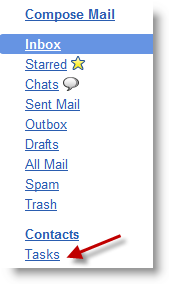
3. The Tasks link should appear on the left pane of the Gmail interface.
