If you have more than one Mac at home, chances are you would like to be able to access the files located on other Macs from your computer. However before you can do that you need to make sure that file sharing is enabled otherwise you can only access the Public folder on the Mac.
In the guide below I will show you how to enable file sharing on a Mac so that you can access your files from other computers on the network.
Software/Hardware used: Mac OS 10.6.

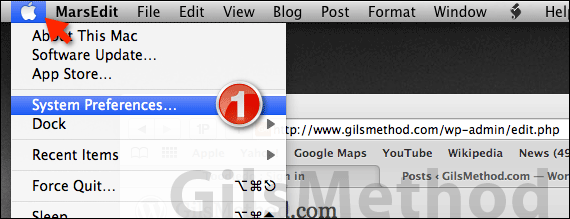
1. Click to open System Preferences from the Menu bar.

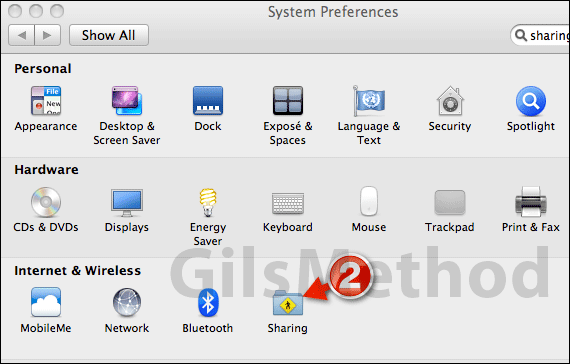
2. Click Sharing under Internet & Wireless.

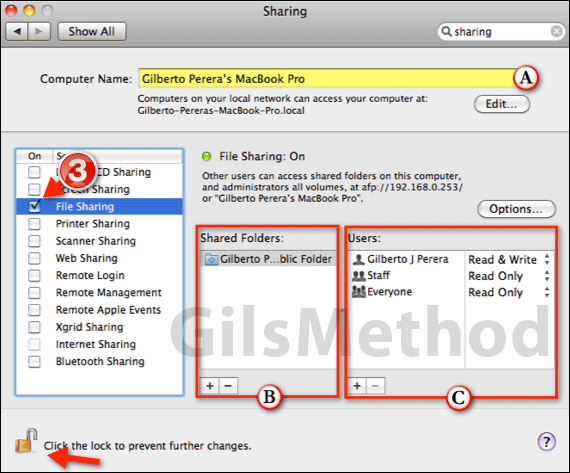
3. Check File Sharing to enable file sharing on your Mac.
A. You can customize the name used by the computer when it is displayed on the network list.
B. Use the Add/Remove buttons to include folders to share with others on the network.
C. You can also Add/Remove and customize the users and their permissions when accessing the shared folders.
Note: You may have to click on the small lock on the bottom left of the window to make changes.

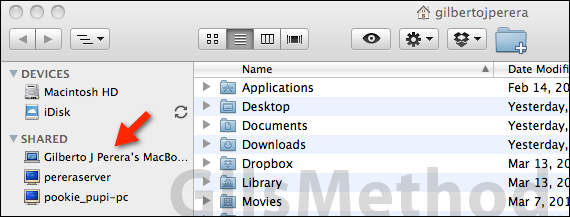
When you are done making the changes, close the window and try to connect to the computer on the network. If you have any comments or questions please use the comments form below.


