
In an effort to prevent misuse and accidental modifications to critical files and settings in Windows, Microsoft developed User Account Control in Vista. Although a noble and thoughtful solution to this issue, User Account Control or UAC for short, is one of the most annoying and frustrating "enhancements" that Microsoft has developed. UAC prompts the user each time he/she installs a program, modifies certain files, and changes specific settings. This is a great idea however folks like me who are constantly installing software, modifying files, registry entries, and other tasks, UAC can become a hindrance.
Luckily Microsoft was kind enough to allow us to disable this wonderful feature for those of us who find it annoying, the guide below will walk you through the process of disabling and enabling UAC on your computer. If you have any comments or questions, please post them below.
Note: The screenshots below are from Windows Vista Ultimate 64-bit –Unless you’re very familiar with computers and software, I would recommend you keep UAC enabled, it can be annoying, but it can save you from a couple of headaches.
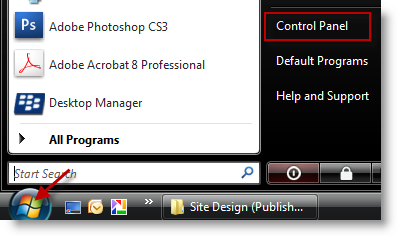
1. Click on the Orb (Start button) and click on Control Panel
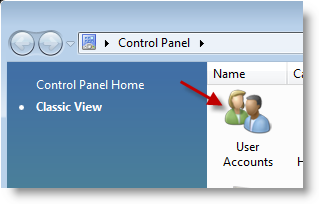
2. Double-click to open User Accounts
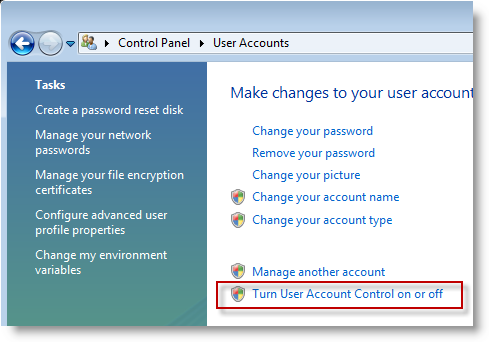
3. Click on the Turn User Account Control on or off link
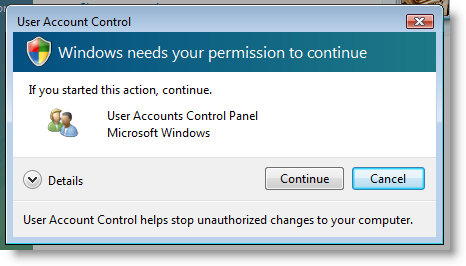
4. The User Account Control warning window will appear, grant permission to this operation by clicking on Continue.

5. Uncheck the Use User Account… to disable UAC and click OK, to enable UAC make sure that you add a checkmark to the checkbox.
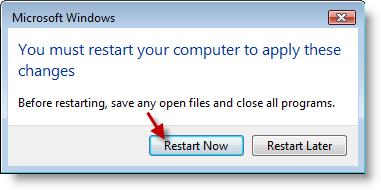
6. In order for the changes to take effect your computer must be restarted, click Restart Now to restart your computer.
Note: If you wish to continue using your computer, click Restart Later. A warning will appear in your notification area when you disable UAC


