If you are new to the iPad, chances are you are also new to all of its applications. In this guide I will help you become familiar with the calendar application on the iPad, specifically how to create, modify, and delete calendar entries.
Software/Hardware used: iPad 2 running iOS 4.3.
Add a New Calendar Entry on the iPad

1. Tap Calendar on your iPad’s Home screen.

2. Tap the Add New Appointment icon [+].

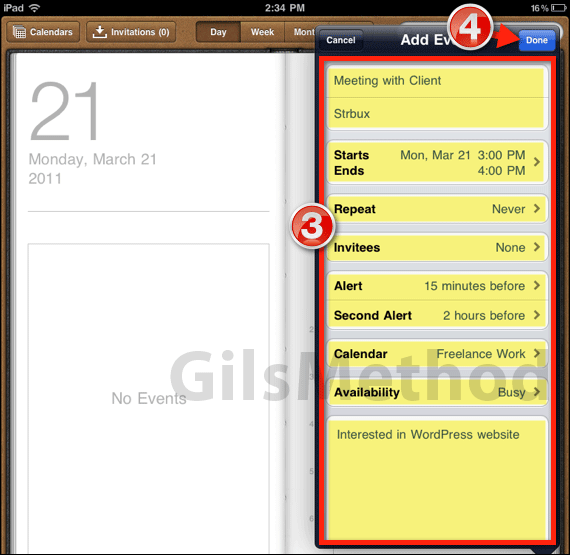
3. Enter the details of your appointment in the fields provided.
4. Tap Done to save the appointment to your calendar.

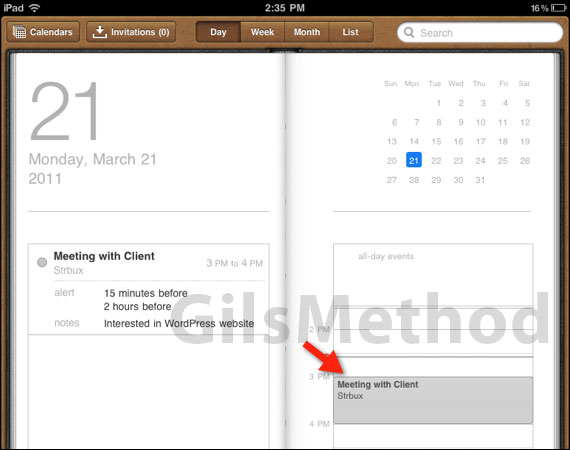
The appointment will appear on your calendar.
How to Edit an Existing Calendar Entry on the iPad

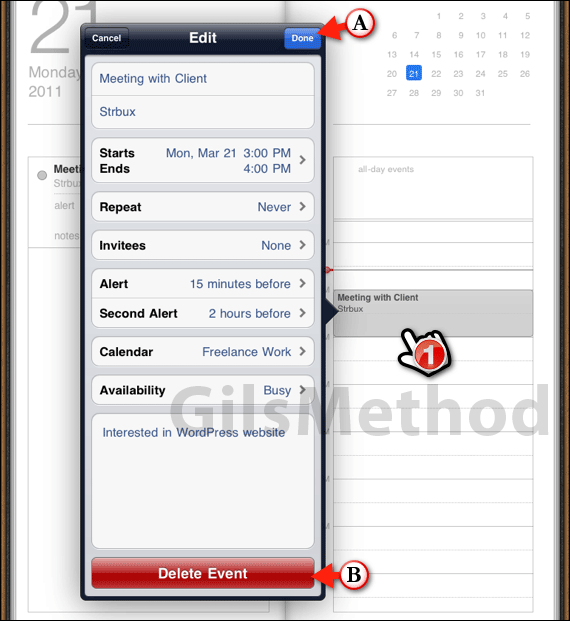
1. To edit an existing calendar entry, tap the appointment you wish to edit on the calendar and modify the event’s details.
A. When you are done tap Done to save the changes.
B. If you wish to delete the event, tap Delete Event.
If you have any comments or questions please use the comments form below.


