If you are looking to build a blog or web application that requires a MySQL database, you will first need to create the database in order to use it.
In this guide I will show you how to setup a MySQL database using the GoDaddy Hosting Control Center. This is the control panel associated with most GoDaddy hosting accounts included with a Linux hosting package.
Software used: Chrome Browser.
Setup a MySQL Database in GoDaddy
Access the Control Panel

1. Log in to your GoDaddy account and click My Account and then My Products.

2. When the My Products page loads, click on the Web Hosting tab and click the Launch button for hosting package you will create the database for.
Create the Database

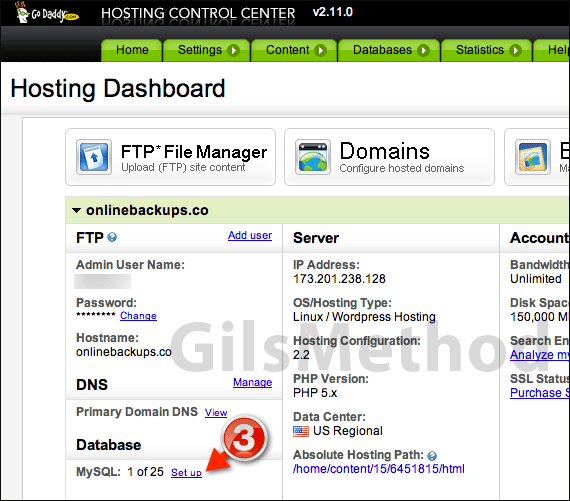
3. In the Hosting Dashboard locate the Database section and click the Set up link to create a new MySQL database.

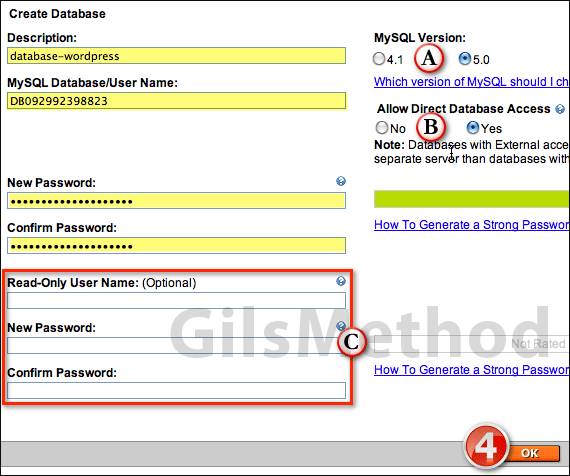
Enter a Description, Database/User Name and Password for the database. Use the password strength indicator to ensure that you are using a strong password.
Also note that the User Name for the database and the database name are one and the same.
A. Select the MySQL version you wish to use. I recommend you choose 5.0 unless you need 4.1 for another reason.
B. Determine whether you need Direct Access to the database or not.
C. Optional – Setup a Read-only account that will only have read access to the database with the supplied user name and password.
4. Click OK to setup the MySQL database.

You will be taken to the MySQL page in the Hosting Control Center where you will find the database you just set up along with others.
You can also use this space to create additional databases by clicking the Create Database button.
Your database will take a couple of minutes before it is ready. In the mean time head over to our Webmaster section to check out more website related how-to guides.
If you have any comments or questions please use the comments form below.


