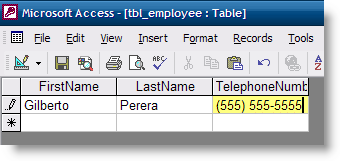
This post is a continuation of an Access How-to Series that I’m working on, the last article that I posted walked you through the creation of a table in Access. This how-to will address the application of masks to fields in your table, specifically the telephone mask. The Telephone Mask can be very useful if you would like to store telephone numbers in a table in your database, not only does it format the field as a telephone number would be displayed, but it also helps with the entry of the information. If you have any comments or questions, please post them below.
Note: I used Access 2000 for this tutorial
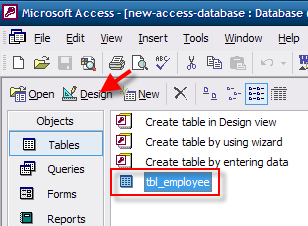
1. Open your Access database, click on the the table you wish to modify and click the Design button
Note: I will be using the same table I created in the first Access tutorial, tbl_employee
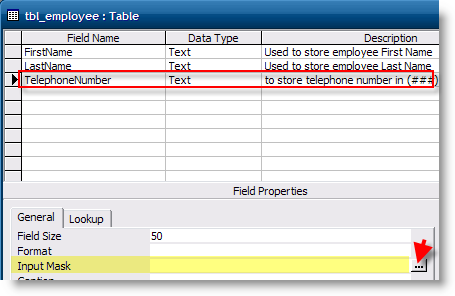
2. Enter a name for the telephone field in the Field Name column, leave Text as the Data Type, and add a Description that can be used for future reference. In the Field Properties section make sure the General tab is selected, click on the button with the 3 dots next to the Input Mask

3. Before you continue you will be prompted to save the changes you have made to your table, click Yes to save those changes.
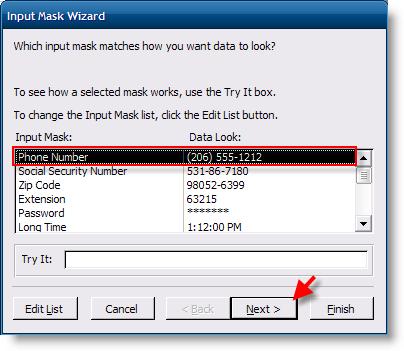
4. Select the Phone Number mask from the Input Mask list, click Next
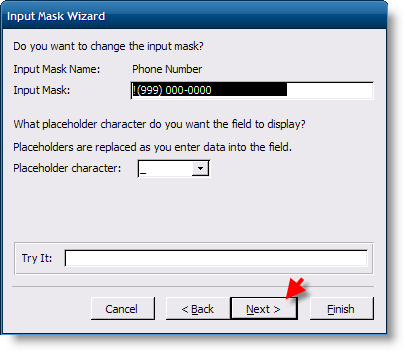
5. Unless you want to specify a different format, leave the default settings and click Next
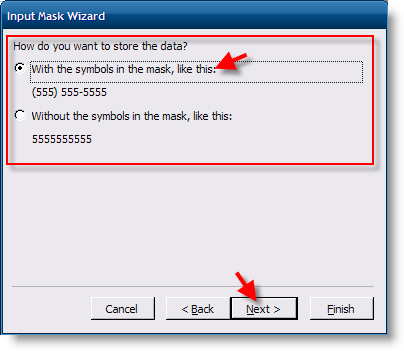
6. You have the option of choosing how the data will be stored with the mask, with or without symbols (I chose the "With the symbols…" option), make your selection and click Next
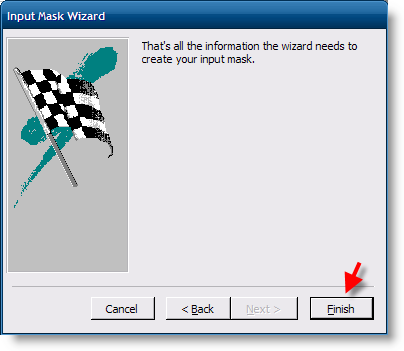
7. Click Finish when you’re done

8. Click on the Save icon to save your changes. Open the table and enter a telephone number in the Telephone Number field you just created. The telephone number you enter should be displayed with the following format (123) 555-5555
Access Icon via benjigarner


