Do you frequently send files to a specific directory? If so you may benefit from the tip below. When you right-click on files or folders in Windows 7 you will notice that there is a Send To menu which allows you to send files and folders to the directories that are listed. If there’s a directory that you frequently use, but is not listed, this guide will show you how to add the directory to the list for quick and easy access. If you have any comments or questions please use the comments form below.
Note: I used Windows 7 for this guide.
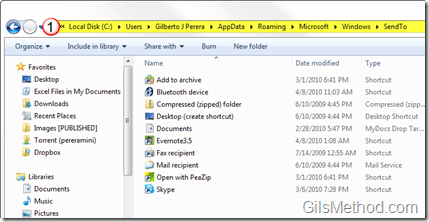
1. Open Windows Explorer and enter the following in the Address Bar:
C:\Users\[User Name]\AppData\Roaming\Microsoft\Windows\SendTo
or
shell:sendto
Which will automatically take you to the SendTo folder referenced above.
The location we opened contains the shortcuts that you will find in the Send To folder when you right-click a file or folder. You can add shortcuts to this directory by creating shortcuts or by dragging folders and other locations to create links in the Send To menu. The instructions below will show you how I created a shortcut from a network location by dragging the directory to the SendTo folder.
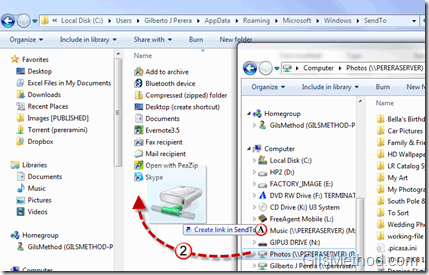
2. Click and while holding down the left-click button on your mouse, drag the directory you wish to add to the SendTo folder.
A. You will notice that a small box will appear indicating that you will Create a link in SendTo.
Using the New Link
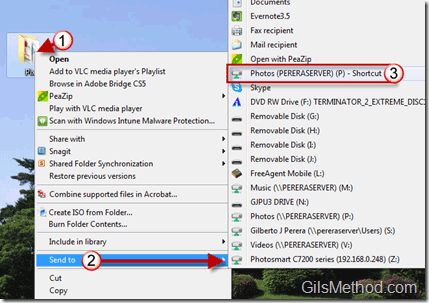
Once the link has been added you will be able to use it from the Send To menu.
1. Right-click on the folder you wish to move.
2. Click on Send To from the menu.
3. Click on the new link you created to send the selected files to that location.


