Have you ever been asked to sign a Word document digitally but didn’t know how? The guide below will show you how to insert digital signatures into Word documents using the Microsoft Office Signature Line. The guide below will specifically cover adding the signature line, how to add a custom signature, and provide a link to a list of online digital ID providers required to insert a validated and secure digital signature. If you have any comments or questions please use the comments form at the end of the guide.
Software/Hardware used: Word 2010 running on Windows 7.
How to Insert a Signature Line in Word

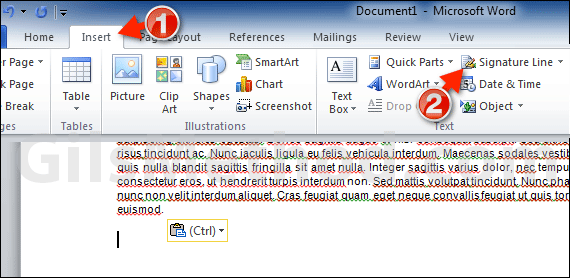
1. Click the Insert tab on the Office Ribbon.
2. Click Signature Line in the Text group.

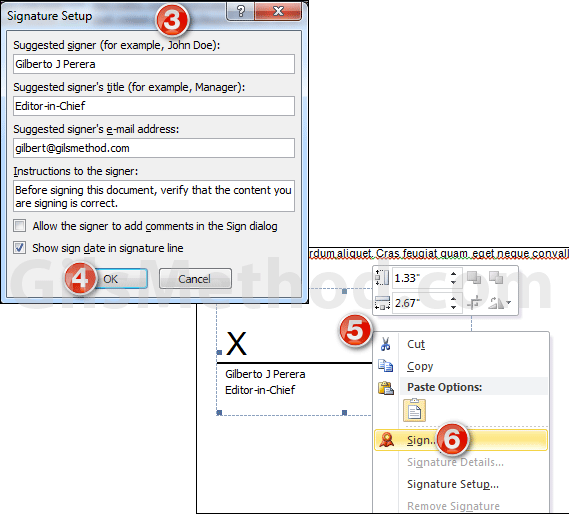
3. You will be asked to setup your signature. Enter your information as you would like it to appear on the signature line.
4. Click OK to insert the signature line.
5. To insert the actual signature, right-click on the signature line you just inserted.
6. Click Sign…

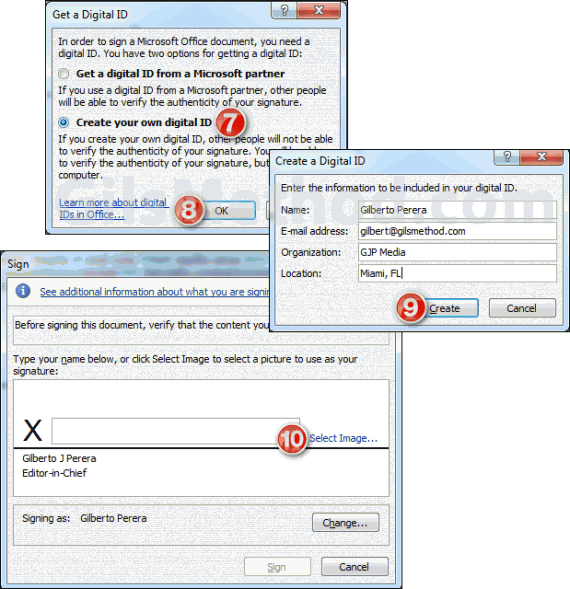
7. To sign the document you must have a Digital ID. Since this is the first time you are doing this you will need to Get a Digital ID. You will have the option of creating your own digital ID (which is not verifiable) or use a digital ID from one of these providers.
8. Click OK after you’ve made your choice.
The following steps pertain to users creating their own digital ID’s.
9. Enter the information for the Digital ID you are creating and click Create.
To continue with the creation of the digital ID you will need to actually sign the digital document. You can do this by entering your signature into an application like Paint using your mouse or a digitizer. Save the image to an accessible location so that you can access it in the following step.
10. When prompted click Select Image.

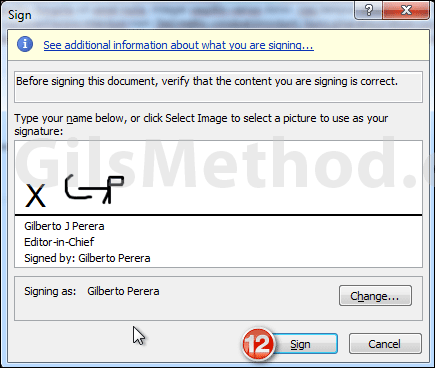
11. Locate the signature file you created and click Select.

12. Once you’ve added the digital signature, click Sign to digitally sign the document.
The document you are working on was just signed. Repeat the steps above to sign other documents.


